
Finding the perfect reference for your next art project can be a fun challenge. If you are looking for inspiration, this collection of 25 black hairstyles drawing references will spark your creativity. Capturing the unique texture, volume, and beauty of Black hair requires understanding its distinct structure. From tight coils and beautiful braids to flowing curls and elegant updos, there is so much variety to explore. Artists often struggle with rendering these textures realistically, but studying specific looks makes a huge difference. Whether you are a beginner sketching simple shapes or an advanced illustrator adding intricate details, having the right visual guide is essential. Let us dive into these stunning hairstyle illustrations to elevate your portrait art.
1. Afro Puff Drawing

Have you ever tried capturing the sheer volume of a beautiful afro puff? This classic and powerful look is a fantastic subject for any artist. When sketching an afro puff, focus on the overall silhouette first before adding any interior details. The shape should be round and full, radiating energy from the crown of the head. Use light, swirling lines to map out the expansive volume. Then, go back and add the tight, coily texture using short, curved strokes that follow the outward growth pattern. The band that gathers the hair should be drawn taut to create a contrast against the soft, expansive puff. This contrast makes the artwork pop and gives the drawing a realistic, three-dimensional feel that celebrates natural beauty.
2. Box Braids Sketch
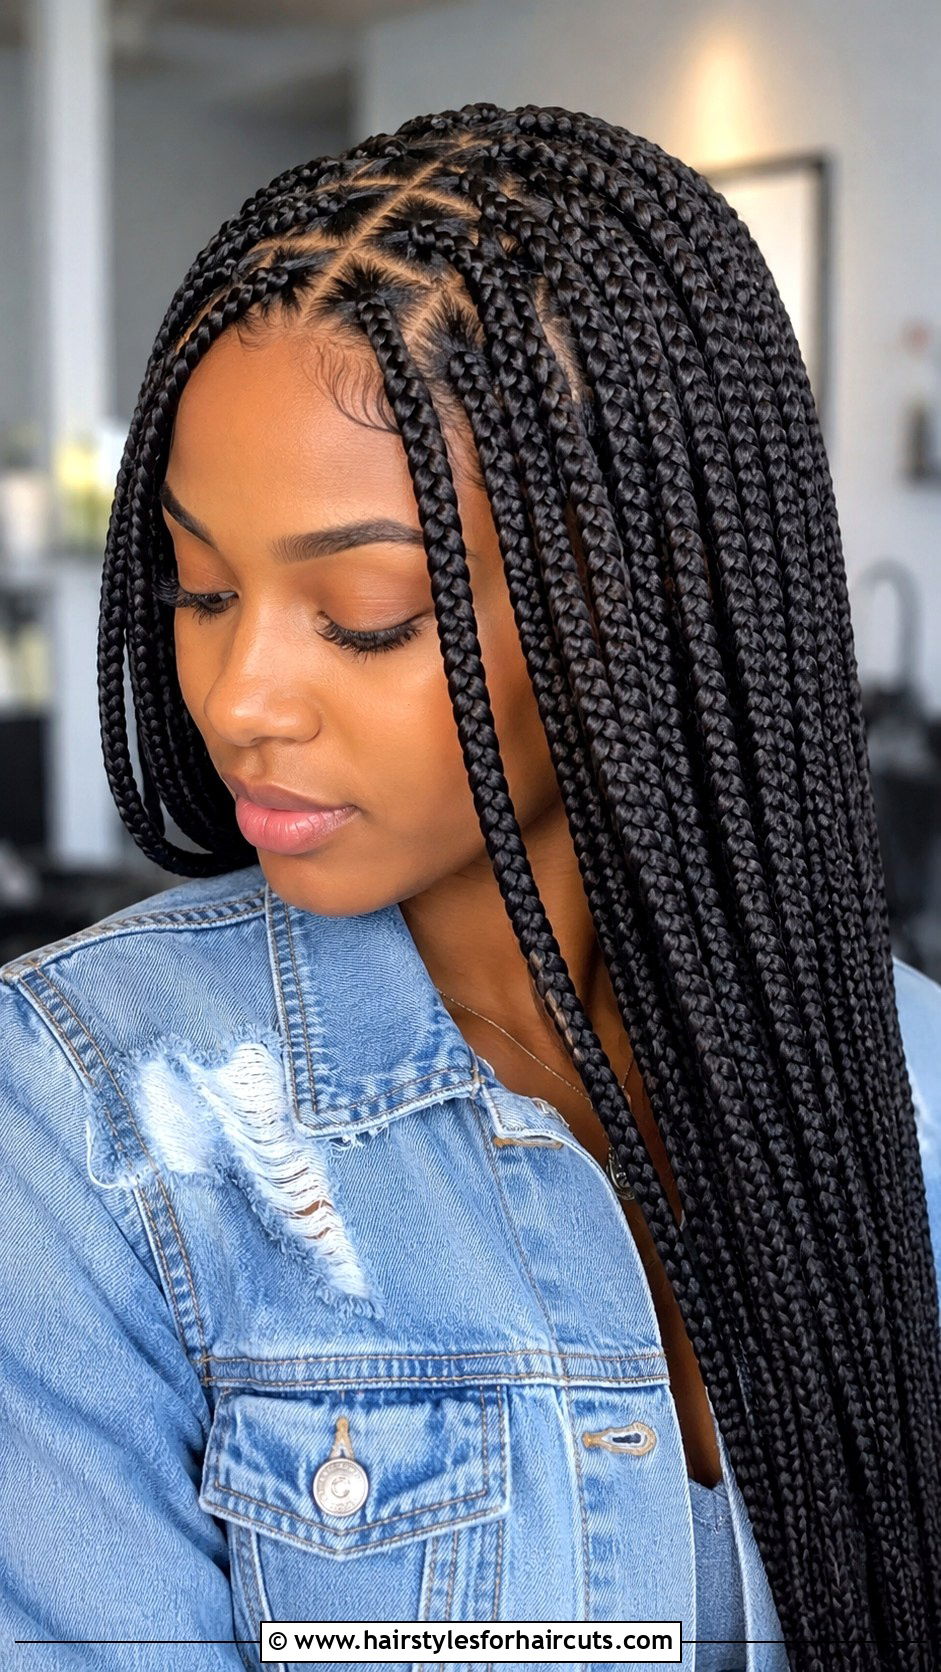
What makes box braids such a captivating subject for a sketch? It is the beautiful rhythm and flow of the individual plaits. Start by mapping out the parts on the scalp, which form distinct square or triangular sections. These parts are crucial for realism. As the braids fall, they overlap and create interesting shadows. Draw each braid as a thick, segmented tube, paying close attention to how the strands weave together. Use varying line weights to show where one braid crosses over another, adding instant depth. Do not forget the curly ends, which provide a soft finish to the structured plaits. Capturing the weight and thickness of this protective style will give your artwork a striking and culturally rich appearance.
3. Cornrows Illustration

Tracing the continuous lines of cornrows can be incredibly satisfying for any illustrator. This style is all about direction and the way the hair hugs the scalp. Begin by drawing the curved paths the braids will follow from the hairline to the nape. Because cornrows sit close to the head, the scalp is often visible between the rows. Add a subtle shadow along the edges of each braid to create that raised, 3D effect against the scalp. The key is to make the lines flow naturally, mimicking the curve of the skull. Whether you draw them straight back or in intricate swirling patterns, focus on the consistency of the braid width to maintain a clean, polished look in your final artwork.
4. Bantu Knots Art

Bantu knots offer a striking geometric shape that stands out on the canvas. These small, coiled buns are scattered across the head, creating a beautiful play of light and shadow. When drawing Bantu knots, treat each knot as a twisted spiral. Start with the base, wrapping the hair around itself smoothly. The trick is to show the tight twist of the hair while keeping the overall shape round and compact. Add strong shadows underneath each knot to lift them off the scalp, giving them a sculptural feel. The sections of hair leading up to the knots can be rendered with smooth, sweeping lines. This style is visually bold, making it a fantastic choice for dynamic and expressive character designs.
5. Curly Bob Drawing

There is something effortlessly chic about a curly bob. Sketching this look requires balancing the sharp cut of the bob with the bouncy unpredictability of curls. Outline the general shape first, making sure it frames the face nicely and ends around the chin. Instead of drawing every single curl, focus on grouping them into larger clumps. Use a zigzag line technique to outline these clumps, which instantly reads as curly hair. Inside these shapes, add loose, springy spirals to indicate the curl pattern without overworking the area. The bottom edge of the bob should not be a straight line; let the curls poke out naturally. This approach keeps the drawing looking fresh, voluminous, and full of lively movement.
6. Locs Drawing
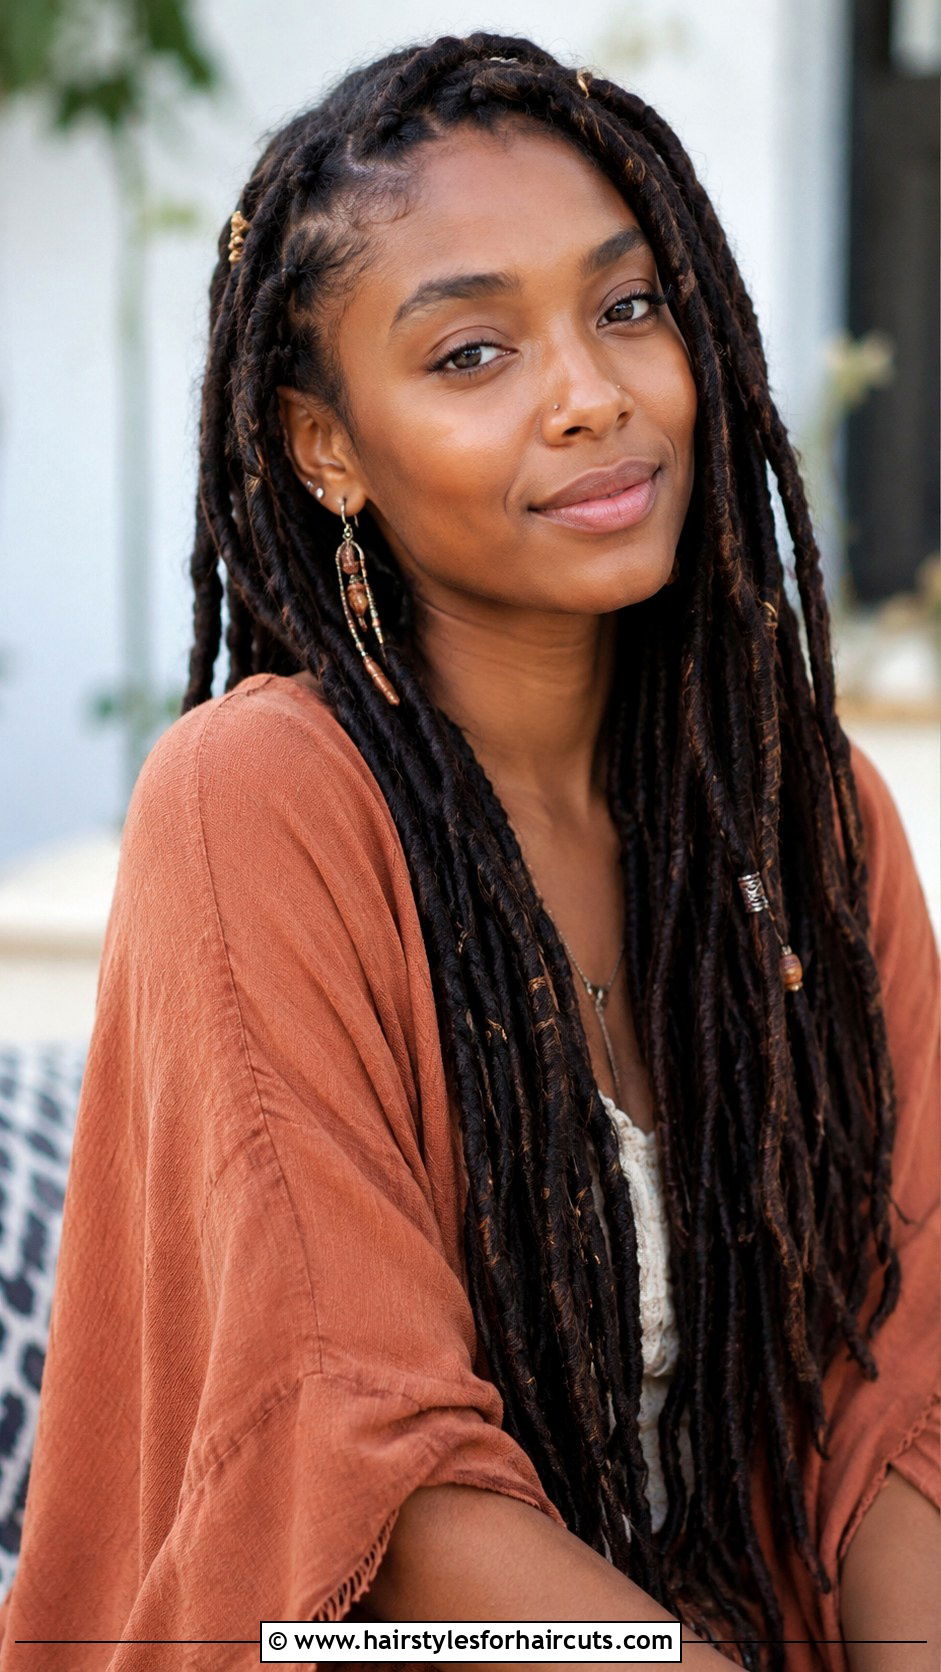
Drawing locs is an exercise in capturing texture and weight. Unlike loose curls, locs are distinct ropes of hair that carry a lot of visual density. Start by sketching the overall outline of the hairstyle. Then, draw the individual locs as thick, slightly irregular cylinders. Some locs might be smooth and neat, while others could be more freeform with a frizzy texture. Notice how they drape over the shoulders and overlap. You can add thin, broken lines along each loc to suggest the tightly coiled texture inside. Whether you are sketching short, spiky locs or long, flowing ones, emphasize their heavy, downward pull. This attention to gravity will make your drawing feel authentic and grounded in reality.
7. Twist Out Illustration

A twist out delivers incredible volume and fluffy texture that is a joy to illustrate. This style features deeply defined spirals that blend together into a cloud of hair. When drawing a twist out, avoid harsh outlines. Instead, use soft, sweeping strokes to build the volume outward from the head. Focus on drawing the distinct, springy curl clumps that result from the twisting process. These curls usually have a very uniform, crimped look. You can suggest this by drawing repeated, parallel curved lines within the larger mass of hair. Highlight the roots, which often appear slightly stretched, and let the ends fade into soft, open curls. This technique perfectly captures the light, airy feel of a beautiful twist out.
8. Halo Braid Sketch

How do you capture the angelic elegance of a halo braid? This style wraps a thick, single braid around the crown of the head like a crown. Begin by drawing a thick, continuous path that circles the head. This path will hold your braid. Next, construct the plait along this path, ensuring the weave stays consistent as it curves around. Pay close attention to the way the braid sits on the head; it should look anchored and secure. Add delicate shading between the woven sections to give the braid thickness and dimension. Leave a few soft baby hairs around the forehead to add a realistic, tender touch. This beautiful updo drawing exudes grace and timeless sophistication for any portrait.
9. Space Buns Drawing

Space buns bring a playful, energetic vibe to any illustration. This youthful style features two symmetrical buns positioned on top of the head. When sketching space buns, first establish the parting down the middle. Then, draw two high ponytails that twist into rounded buns. To make them look like natural hair rather than smooth fabric, add some texture to the surface of the buns. Use short, wispy strokes to indicate flyaways and coily strands escaping the twist. The buns should sit proudly on the crown, giving the character a fun and dynamic silhouette. This look pairs wonderfully with bright, expressive facial features, making it a go-to style for conveying personality and joy in your artwork.
10. Flat Twist Updo Art
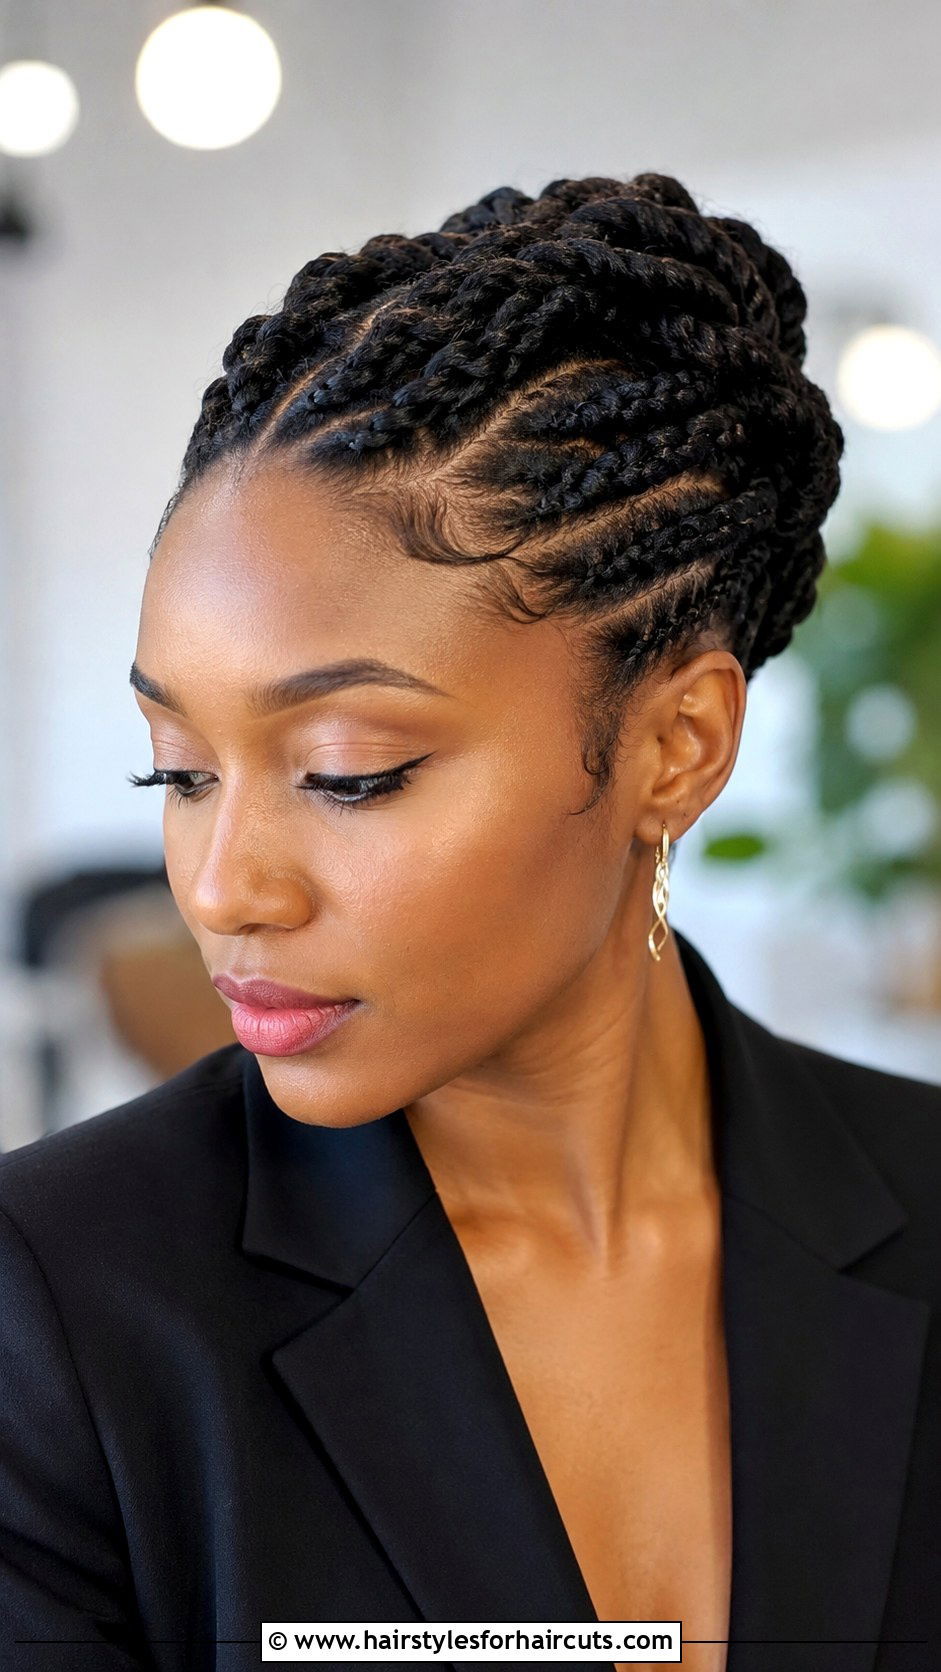
Flat twists create a beautiful sculptural effect against the scalp, similar to cornrows but with a softer, rolled appearance. In a flat twist updo, the twists are usually directed toward the back or the top of the head, culminating in a bun or a pinned style. When drawing this, outline the direction of the twists first. Each flat twist consists of two sections of hair rolled over each other. Draw the edges of these rolls with clean lines, adding subtle shading where one roll tucks under the other. The gathered hair at the crown provides an opportunity to draw looser, textured curls. This contrast between the sleek, pinned twists and the voluminous top makes for a highly dynamic drawing.
11. Finger Coils Drawing

Finger coils are all about definition and intricate, tiny spirals. This style is incredibly textured and offers a unique challenge for artists. Instead of drawing large clumps of hair, you are mapping out hundreds of tiny, individual coils. Start by outlining the overall shape of the hair, which is usually rounded and close to the head. Then, using a very fine tip, begin drawing small, tight corkscrews all over the surface. The coils should all point outward from the scalp. Layering these tiny spirals will naturally build up the volume and create a highly detailed, tactile look. It takes patience, but the resulting texture is incredibly rewarding and visually striking in any close-up portrait sketch.
12. Goddess Braids Sketch
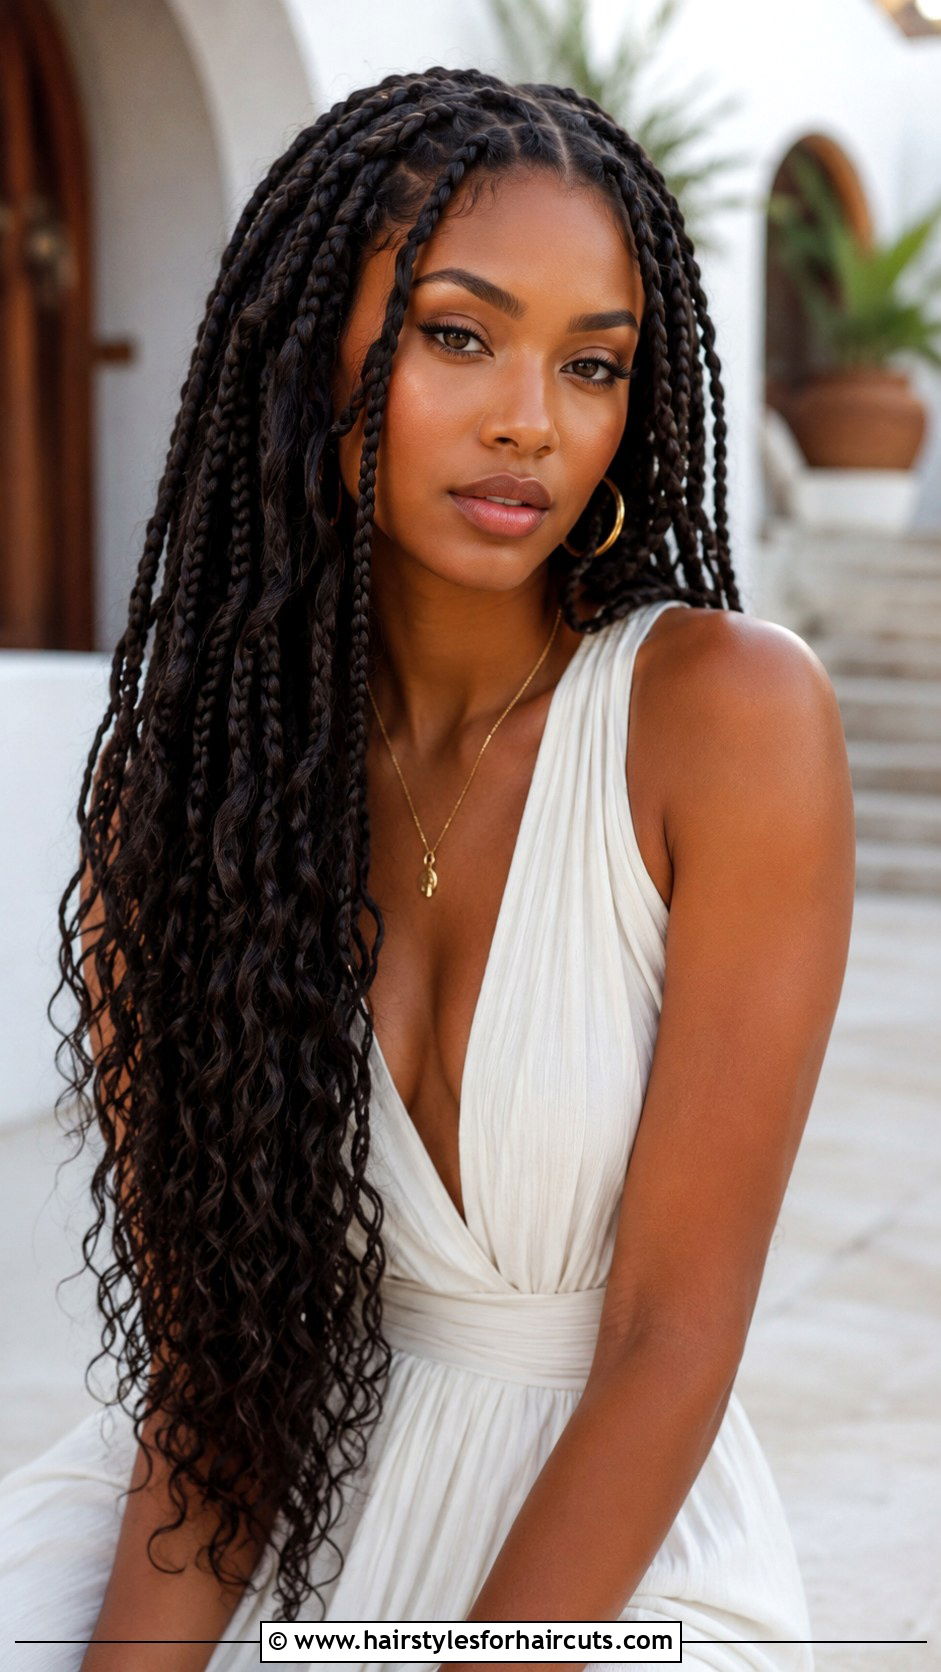
Goddess braids stand out because they are much thicker and more pronounced than standard braids. They often feature a curly or wavy texture leaving the ends of the plait unraveled. When drawing goddess braids, emphasize the thickness of each plait. The individual woven sections should be bold and chunky. Because these braids are so large, the scalp parts between them will be more visible. As the braids reach the ends, transition the tight, structured weave into loose, flowing curls. This mix of structured plaiting and free-flowing texture is the signature of the style. Add some soft shading to the curly ends to differentiate them from the smoother braided sections, creating a beautiful bohemian aesthetic.
13. Faux Hawk Drawing
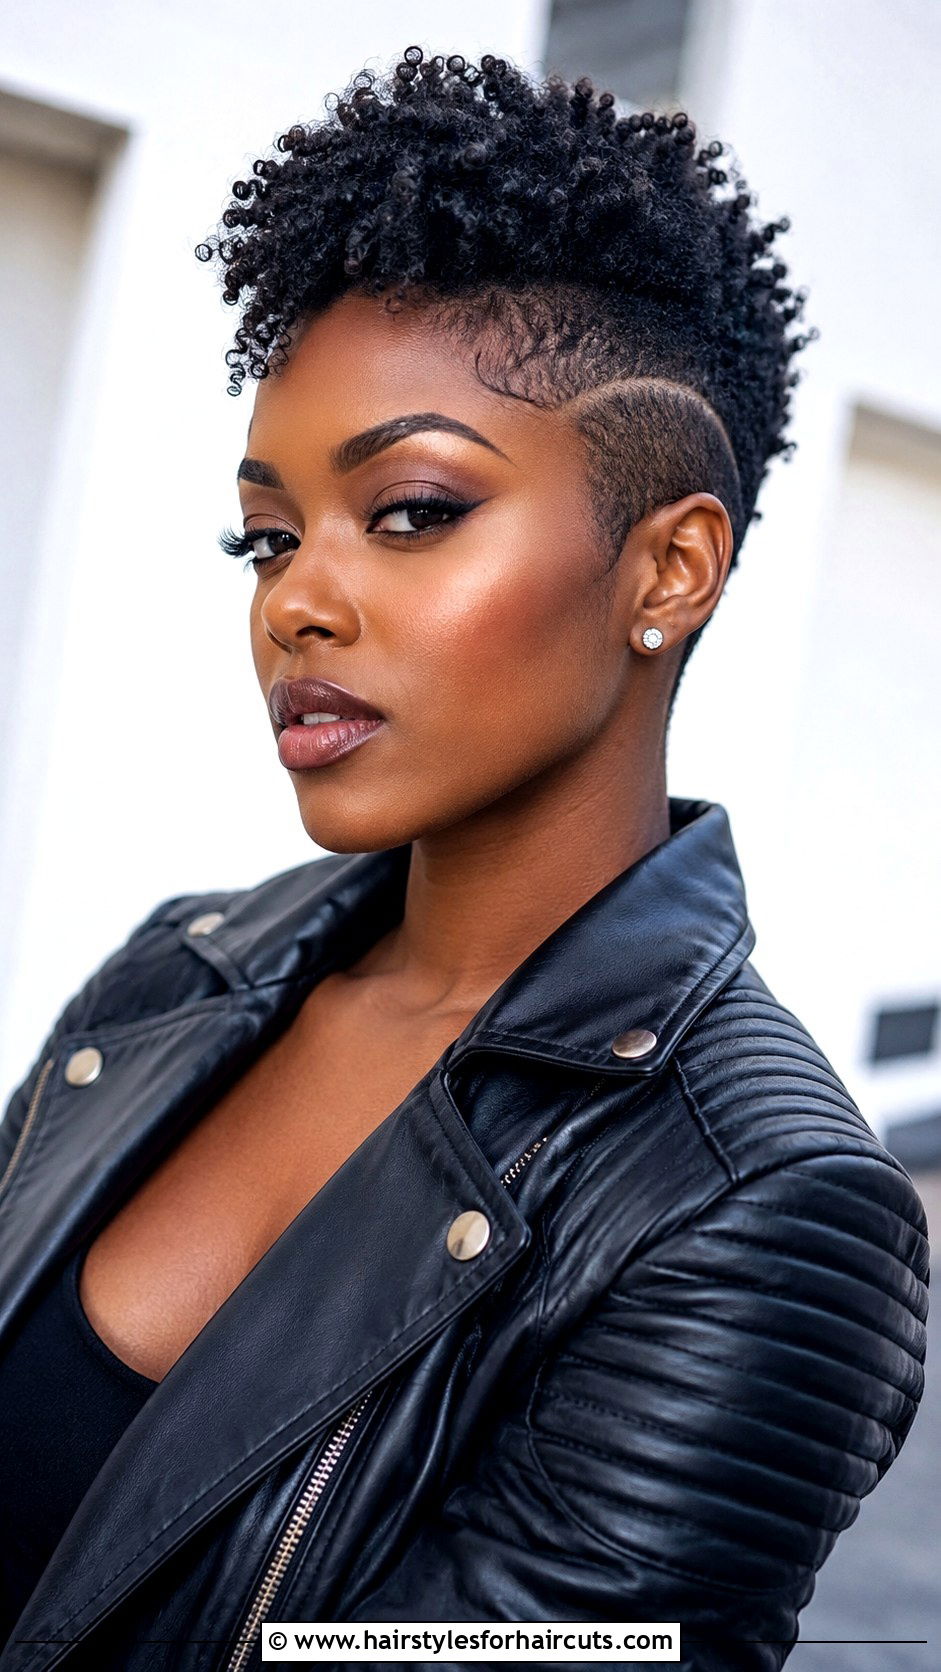
A faux hawk delivers edge and attitude without the commitment of shaving the sides. To draw this bold look, focus on the dramatic contrast in volume. The sides should be slicked down flat against the head, which you can achieve using smooth, flat shading with very little texture. The true star is the strip of hair running down the center. Draw this section with explosive volume, using sharp, jagged lines to indicate textured spikes or defined curls reaching upward. The height of the central hair creates a strong, vertical element in your drawing. This striking silhouette makes the faux hawk perfect for drawing edgy, confident characters with a punk-rock sensibility and powerful presence.
14. Half Up Half Down Curls Illustration

Why choose between an updo and wearing your hair down when you can draw both? The half up half down curls style gives you the best of both worlds. Start by sectioning the hair at the temples. The top half should be pulled back and secured, often showing a smooth crown that transitions into a small puff or curly ponytail. The bottom half flows freely. Use loose, bouncy spirals to illustrate the down portion, allowing the curls to drape over the shoulders. The transition point where the hair is gathered is key; draw a slight indent to show the tension. This style is incredibly versatile and brings a soft, romantic feel to any portrait illustration.
15. Passion Twists Drawing

Passion twists have taken the hair world by storm, and they are just as fun to sketch. These beautiful, bohemian-style twists look like waterfalls of soft curls. Unlike traditional twists, passion twists have a much fluffier and more textured appearance. When drawing them, avoid rigid or perfectly straight lines. Instead, sketch the twists with a slightly wavy, irregular edge. The ends should be left loose, bursting with curly texture. As they fall, the twists overlap in a fluid, organic way. You can suggest the twist pattern by drawing a subtle rope-like texture, but keep it soft. This technique will perfectly capture the carefree, romantic essence that makes passion twists so incredibly popular.
16. Senegalese Twists Sketch

Senegalese twists are known for their sleek, smooth, and polished appearance. Drawing them requires a different approach than fluffy passion twists. Start at the root, mapping out the neat sections. As you draw each twist down, use long, smooth, and consistent lines to show the tight winding of the hair. The texture should look silky and uniform. Because they are so sleek, they catch the light beautifully. Add a highlight running down the center of a few twists to emphasize that smooth, glossy finish. The ends are typically sealed, so they should taper off neatly rather than fluffing out. This style exudes elegance and precision, giving your artwork a very refined and clean aesthetic.
17. Lemonade Braids Drawing

Lemonade braids are iconic, known for their long, sweeping side part. Popularized by pop culture, this style features thick cornrows braided to one side of the head. When drawing lemonade braids, the direction of the hair is everything. The braids should sweep across the forehead and cascade down one shoulder. Pay attention to the scalp, drawing clean, sweeping curves that all flow in the same direction. Because the braids are thick, make sure your plaits are chunky and well-defined as they cross over each other. The way they all fall to one side creates a beautiful, asymmetrical frame for the face. This instantly adds a fierce and stylish narrative to your drawing.
18. Micro Braids Illustration
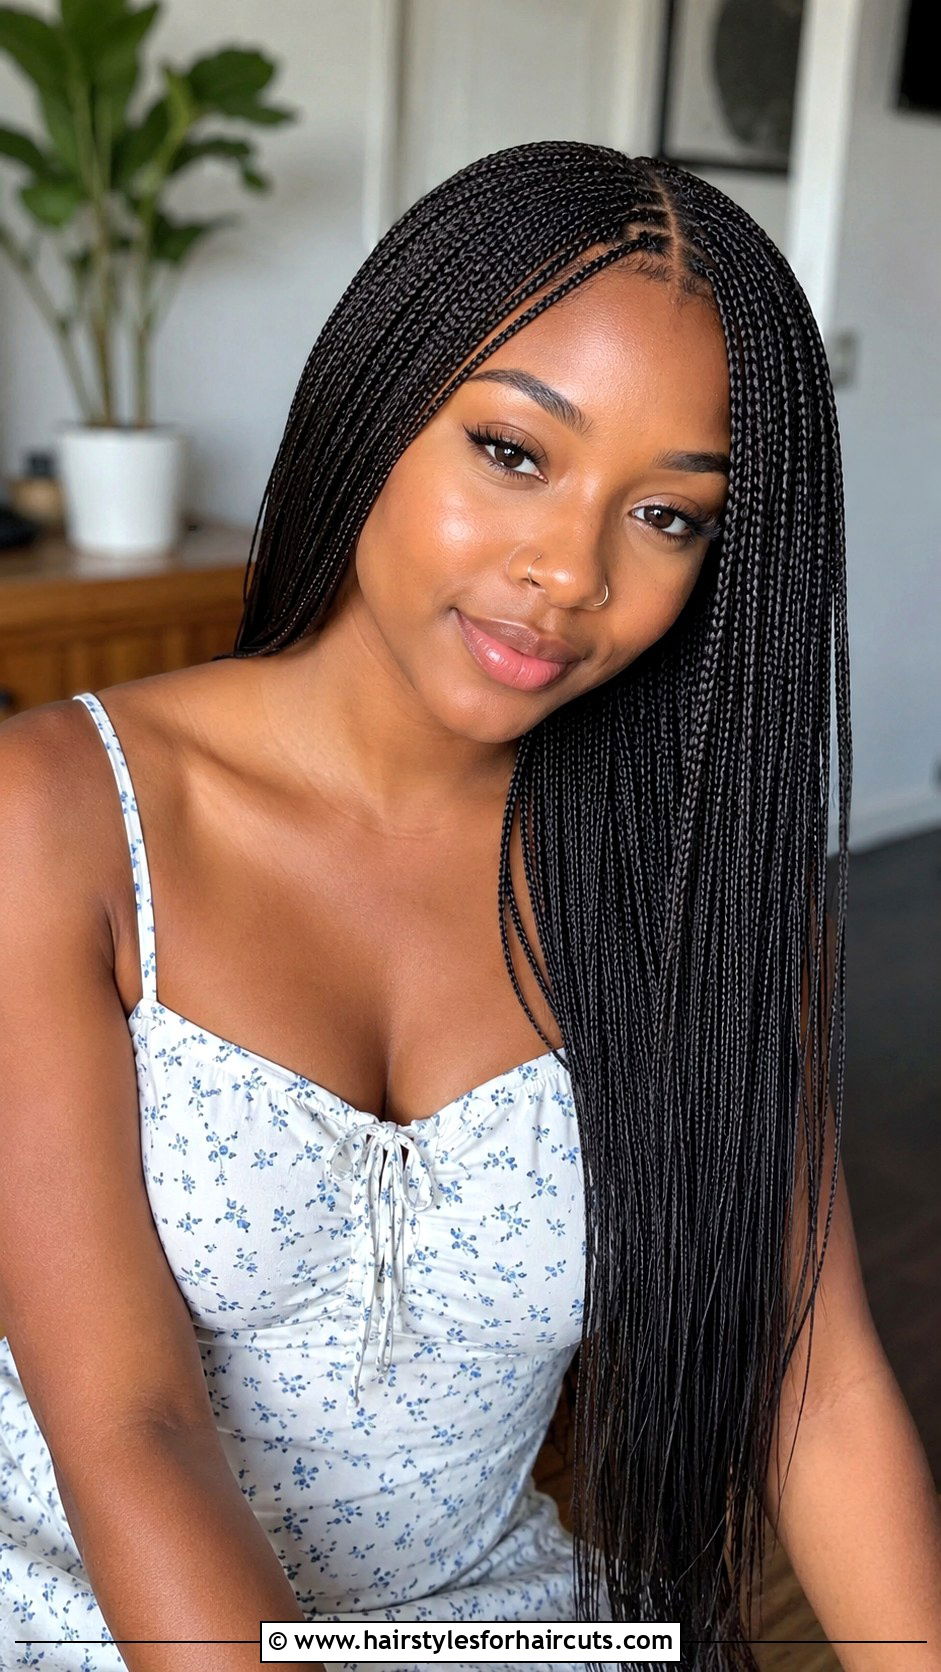
Micro braids are incredibly delicate and require a patient hand to illustrate. Unlike chunky braids, micro braids are tiny, creating a massive amount of individual texture. You do not need to draw every single braid to achieve the effect. Instead, outline the overall shape of the hair. Then, use a fine liner to draw thin, parallel lines running down the length of the hair to suggest the braided texture. Add a few more defined micro braids around the front and edges to show what the style actually is. The rest can be a beautiful, textured mass of fine lines. This approach saves time while perfectly capturing the dense, intricate beauty of this detailed style.
19. Pompadour Drawing

A pompadour is all about height and volume at the front of the hair. This retro-inspired look can be adapted for natural hair, creating a striking wave that rolls back from the forehead. When drawing a pompadour, focus on the smooth, sweeping curve at the front. The hair should roll upward and then back, creating a large, shadowed cavity underneath the front wave. Use smooth shading to show the sleekness of the styled front, while the back can be drawn in a bun or loose curls. The contrast between the sculpted, voluminous front and the rest of the hair makes this a truly dramatic and eye-catching piece for any portrait artist.
20. Shaved Sides With Curls Sketch
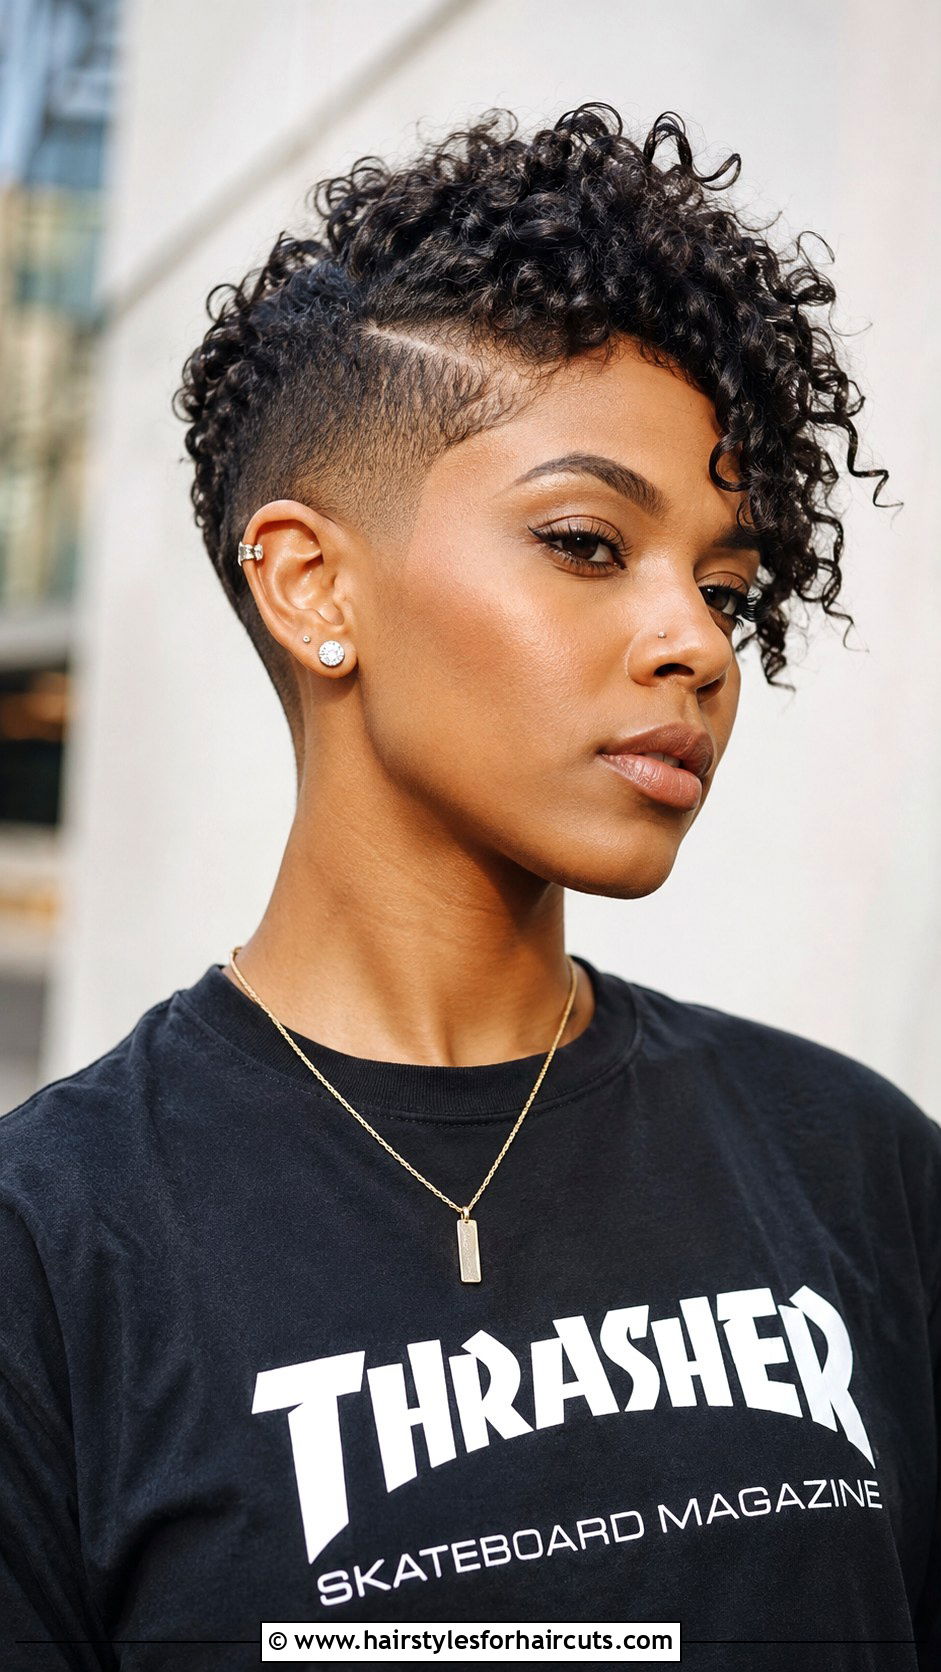
The contrast of a clean shave against bouncy curls makes this style an artist’s dream. Also known as an undercut, this look features hair shaved close on the sides and back, with a riot of curls on top. When drawing shaved sides, use a very short, subtle stippling technique or a smooth grey gradient to suggest the faint presence of hair follicles. This makes the shaved area look realistic and not just bald. The curls on top should explode with volume, using thick, springy lines to show the texture. The sharp line where the curls meet the shaved section is crucial. This strong contrast gives the drawing a modern, edgy, and highly stylized vibe.
21. Pineapple Updo Drawing

The pineapple updo is the ultimate curl-preserving style, and it looks absolutely adorable in illustrations. This look gathers all the hair to the very top of the head, resembling the spiky leaves of a tropical fruit. When sketching a pineapple updo, draw a high, loose ponytail or puff at the crown. The hair should fall forward and to the sides, often framing the face like a sunburst. The key is to keep the curls looking loose and bouncy, not pulled tight. Leave a few tendrils and baby hairs loose around the edges to soften the look. This hairstyle gives your character a fun, relaxed, and joyful appearance that is perfect for casual and lively scenes.
22. Yarn Braids Art
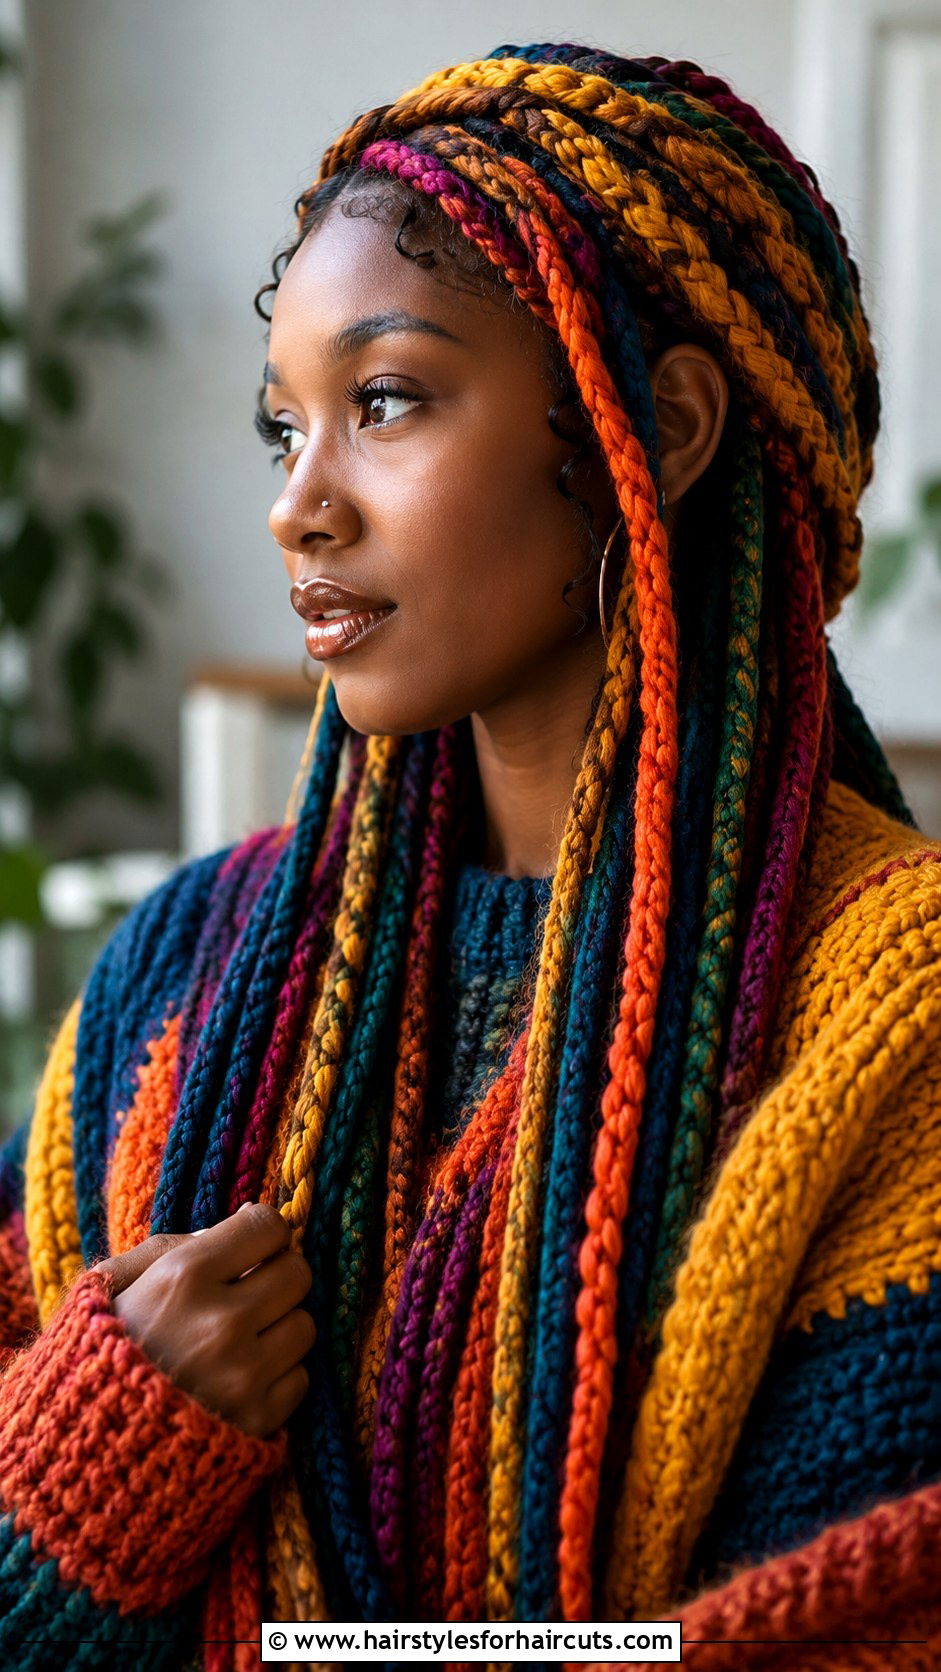
Yarn braids offer a unique textural challenge because they use actual yarn instead of hair. This creates a matte, thick, and slightly stiff appearance compared to natural hair braids. When drawing yarn braids, emphasize their bluntness and thickness. The texture should not look silky or glossy. Instead, use a softer shading technique that absorbs light. The ends of the braids are often left unsealed and slightly frayed, which you can show with tiny, scattered lines. Because yarn comes in many colors, this is a great opportunity to play with vibrant hues in your drawing. Focus on the heavy, draped way the yarn falls, giving the style a distinct and artistic presence on the canvas.
23. Knotless Braids Sketch

Knotless braids are the modern, pain-free alternative to traditional box braids. The main difference in drawing them lies at the root. Instead of a bulky knot at the start of the braid, knotless braids begin with the natural hair, gradually feeding in braiding hair. When sketching this style, make sure the roots look flat and smooth against the scalp, gradually getting thicker as the braid descends. This creates a very natural and seamless transition. The rest of the braid can be drawn similarly to standard box braids, with overlapping sections and curly ends. Capturing this seamless root is the secret to making your knotless braid illustration look authentic, modern, and incredibly true to life.
24. Natural Tapered Cut Drawing
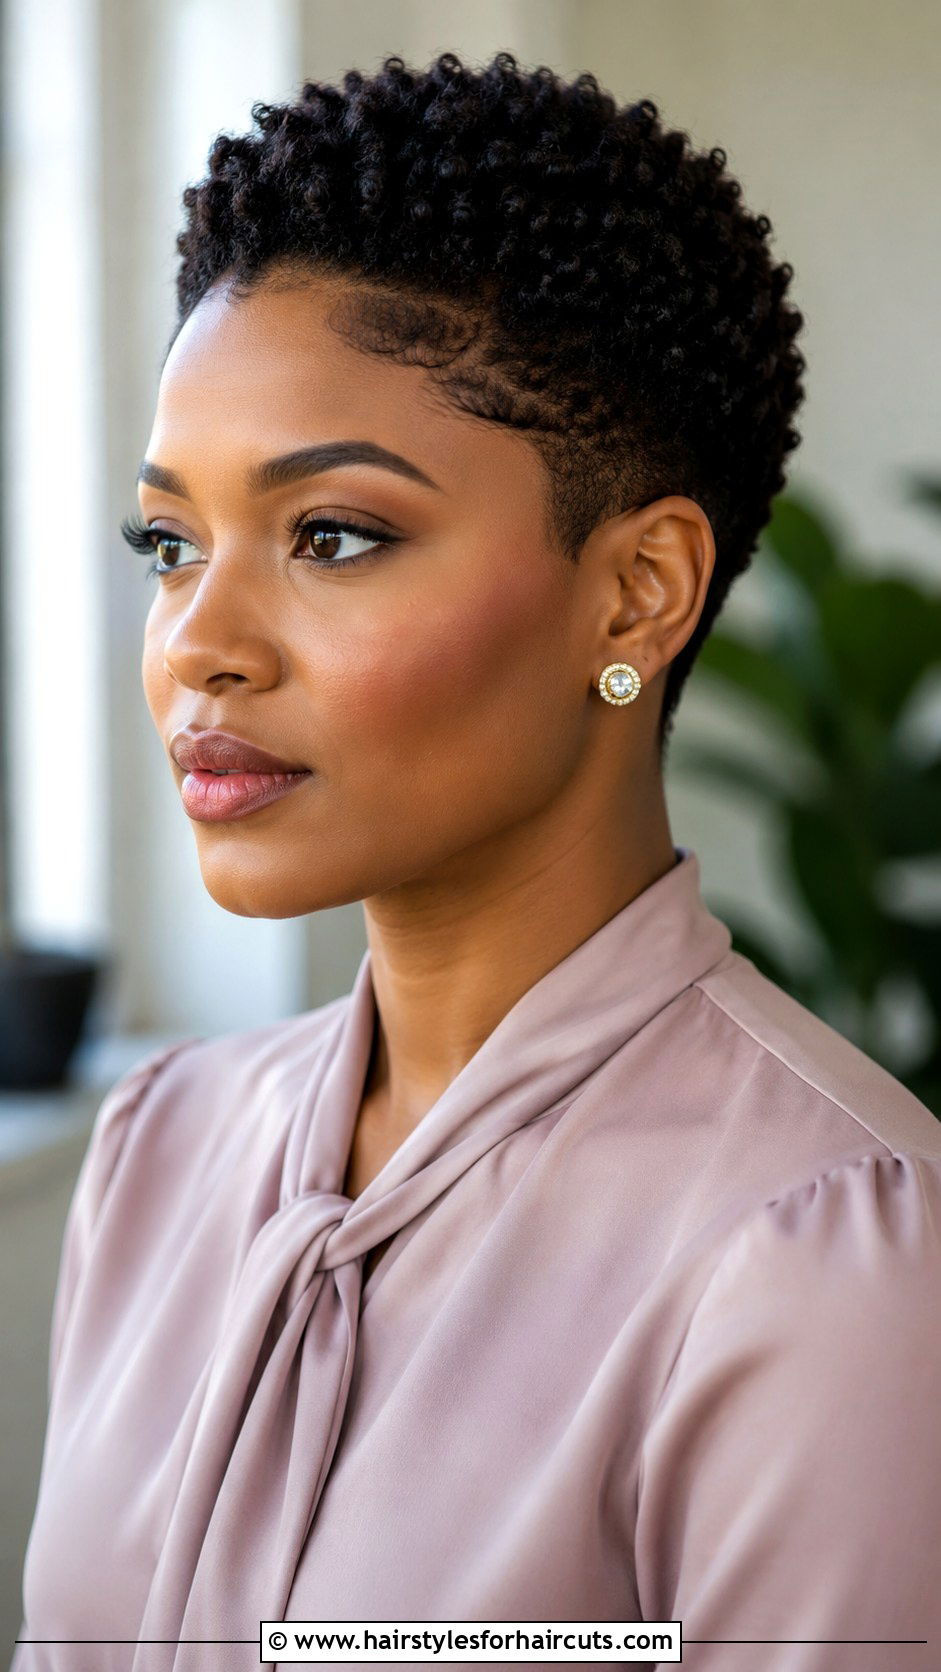
A natural tapered cut is incredibly chic and beautifully frames the face. This haircut features longer, voluminous curls on top that gradually fade to much shorter hair at the nape and sides. When drawing a tapered cut, you must focus on the gradient of length. Use tight, short strokes for the hair near the ears and neck, slowly increasing the length and bounce of your curl strokes as you move up the head. The top should be full of life and movement. This gradual transition creates a beautiful, sculpted shape that highlights the cheekbones and jawline. It is a fantastic style for drawing elegant, modern characters with a refined yet natural aesthetic.
25. Sisterlocks Illustration
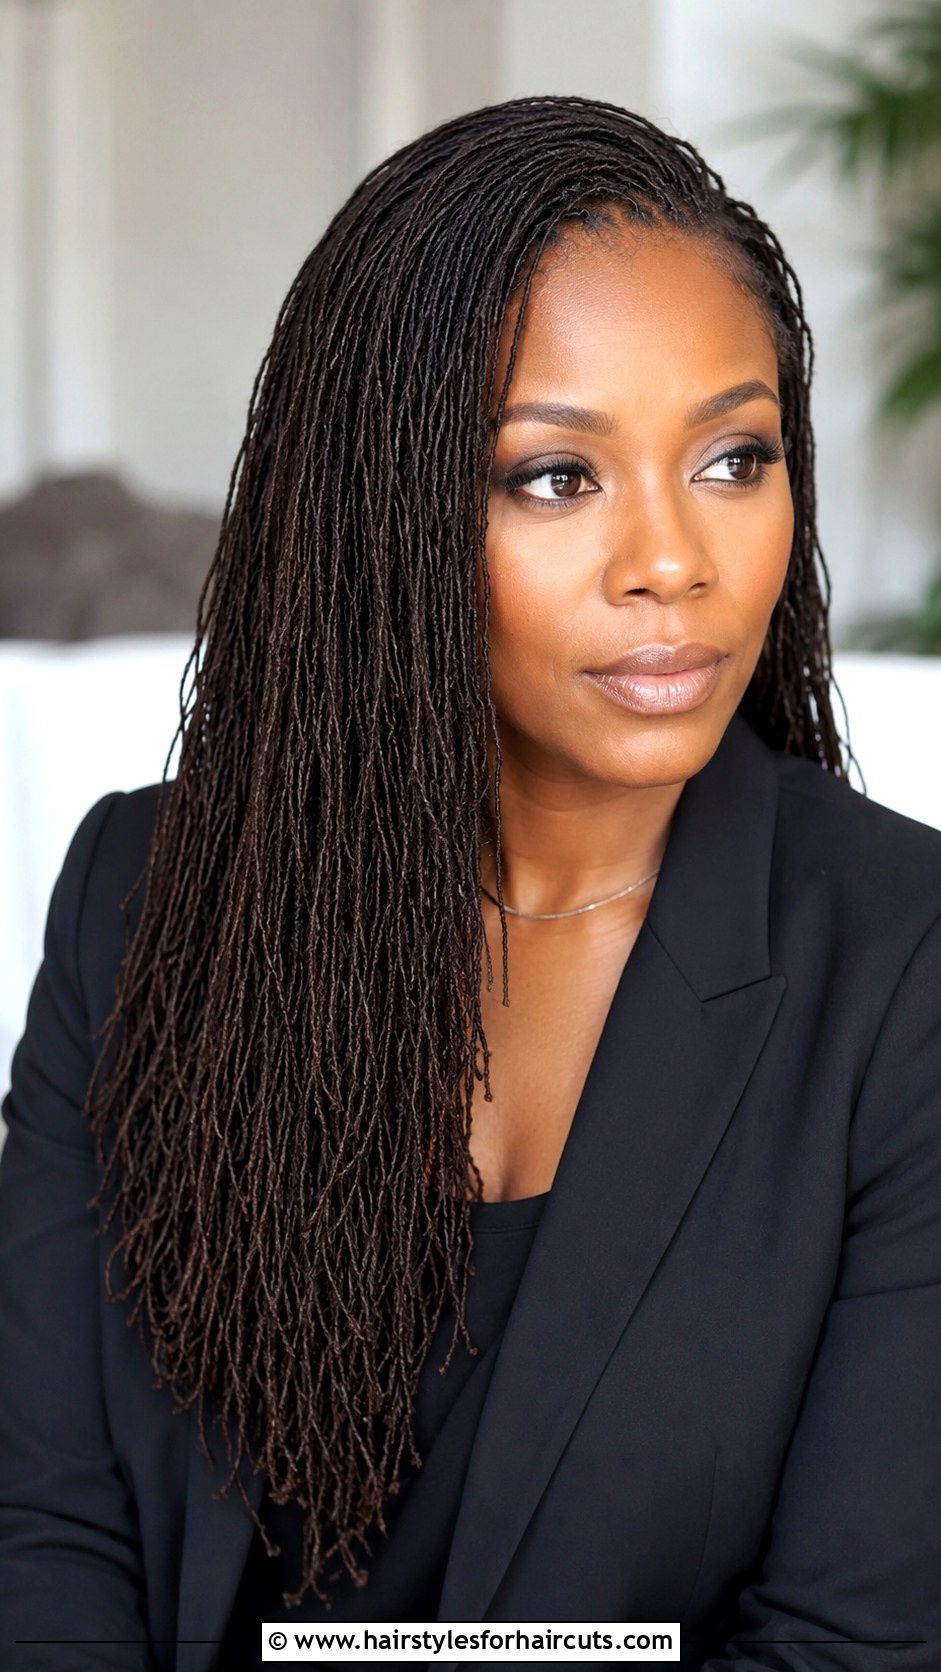
Sisterlocks are the most intricate and delicate form of locs. They are extremely thin, creating a highly versatile and incredibly detailed hairstyle. Drawing sisterlocks requires a very fine touch. You should not draw them as thick ropes. Instead, use a fine-tip pen to draw tiny, sinewy strands that group together loosely. Because they are so fine, sisterlocks have a lot of natural movement and can easily be styled into curls or waves. Show this by drawing the tiny locks curving and flowing together. The volume is still there, but it is made up of hundreds of micro-locs. This level of detail will elevate your artwork, showing a deep appreciation for the meticulous artistry of natural hair.
Conclusion:
Mastering the art of illustrating Black hair opens up a world of creative possibilities. This list of 25 black hairstyles drawing references showcases the incredible diversity, texture, and beauty of natural hair and protective styles. Whether you are sketching the thick, bold lines of goddess braids or the delicate, wispy spirals of finger coils, each style brings its own unique energy to your canvas. Remember to focus on the overall shape, the specific texture, and the way light interacts with the hair. Keep practicing these different looks, and your ability to render stunning, realistic portraits will grow immensely. Now grab your sketchbook, pick your favorite reference, and start bringing these gorgeous hairstyles to life on paper.

Leave a Reply