
Have you ever struggled with sketching realistic and stunning hair on your characters? Mastering the art of rendering beautiful locks is a common challenge for many artists. Whether you are an aspiring illustrator or just looking for a fun creative outlet, exploring 25 different hairstyles drawing can drastically improve your artistic skills. Understanding how to illustrate various textures, flows, and shapes adds incredible depth to your artwork. From intricate braids to sleek bobs, each style presents a unique opportunity to practice shading and line work. This comprehensive guide will walk you through a variety of stunning looks, giving you the inspiration and techniques you need. Get ready to elevate your sketchbook with these gorgeous and diverse hair concepts.

1. How To Draw A Classic French Braid
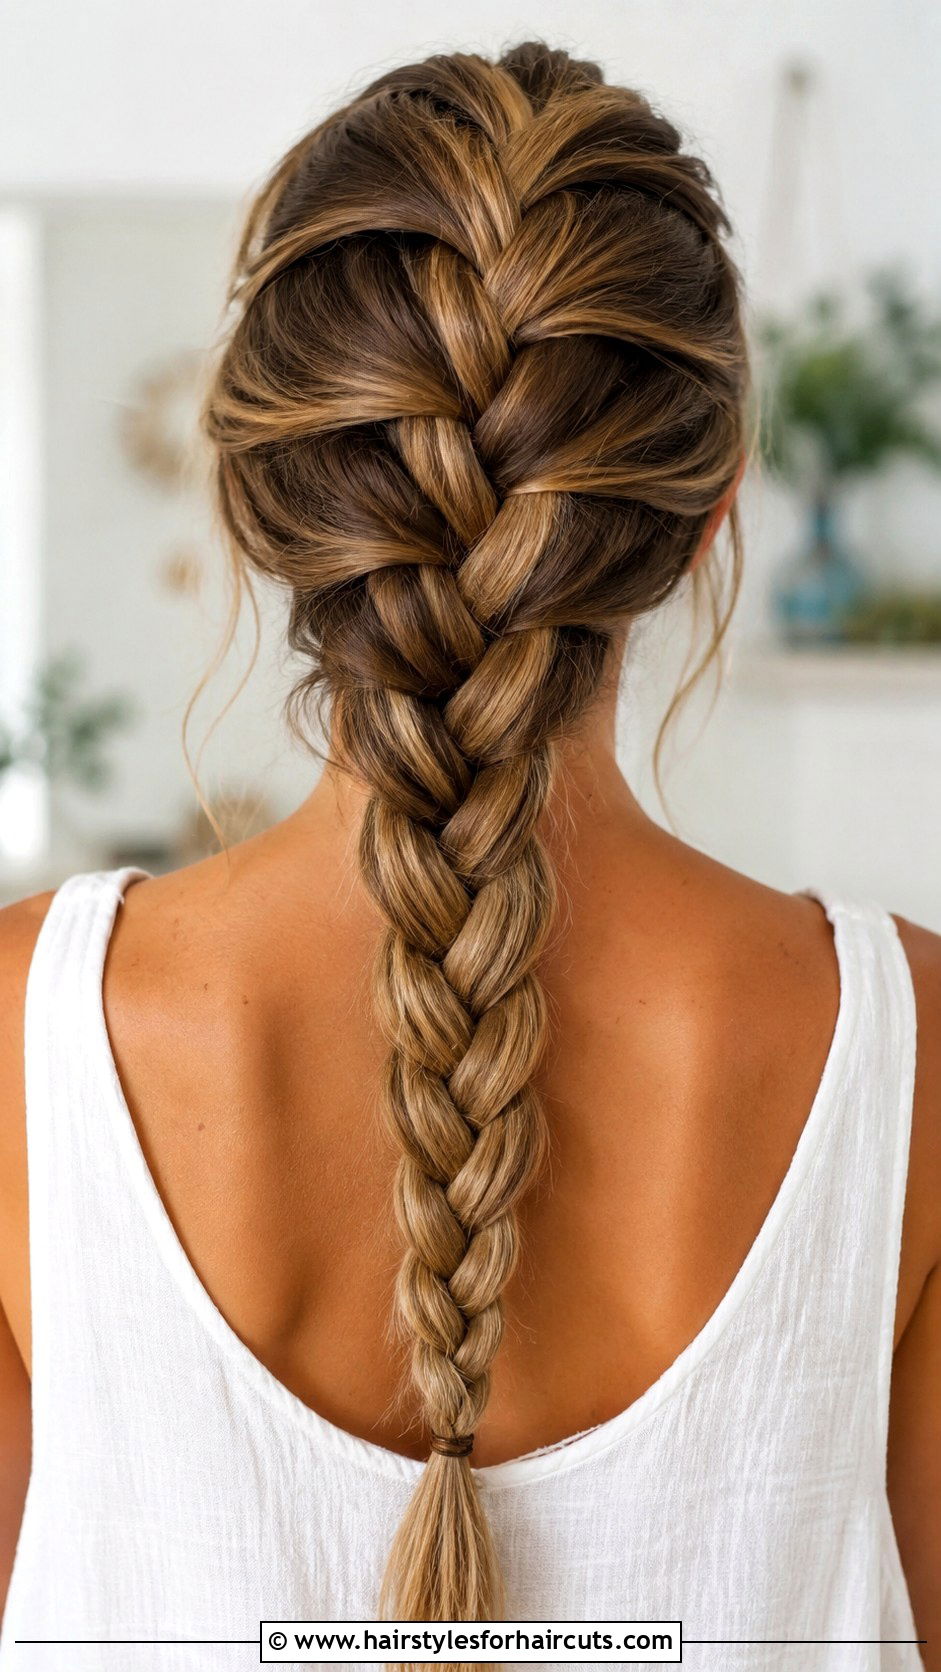
Capturing the woven elegance of a traditional plait starts with understanding its overlapping structure. Begin by outlining the basic shape of the braid, ensuring it tapers naturally towards the end. Draw curved lines that cross over one another, creating the illusion of interlocking strands. Add fine, subtle lines within each section to represent individual hairs and give texture. Shading is crucial here; darken the areas where the strands cross to create depth and dimension. Remember that hair is not flat, so let your pencil strokes follow the rounded form of the head. This technique will make your artwork look incredibly realistic and beautifully textured, transforming a simple sketch into a lifelike masterpiece.
2. Drawing A Sleek High Ponytail

Want to illustrate a polished and energetic look? Start by drawing the hair pulled tightly against the scalp, leading up to a high crown point. Use smooth, sweeping lines that converge at the tie to emphasize the tension. The tail of the ponytail should flow outward with a slight bounce, reflecting movement and vitality. Add a few stray hairs escaping the tie to make the sketch feel organic and natural. When shading, keep the top portion smooth and highly reflective, suggesting a gel or sleek finish. The tail can have softer gradients to show volume and separation. This approach guarantees a dynamic and striking result for your character designs.
3. Sketching A Textured Bob Haircut
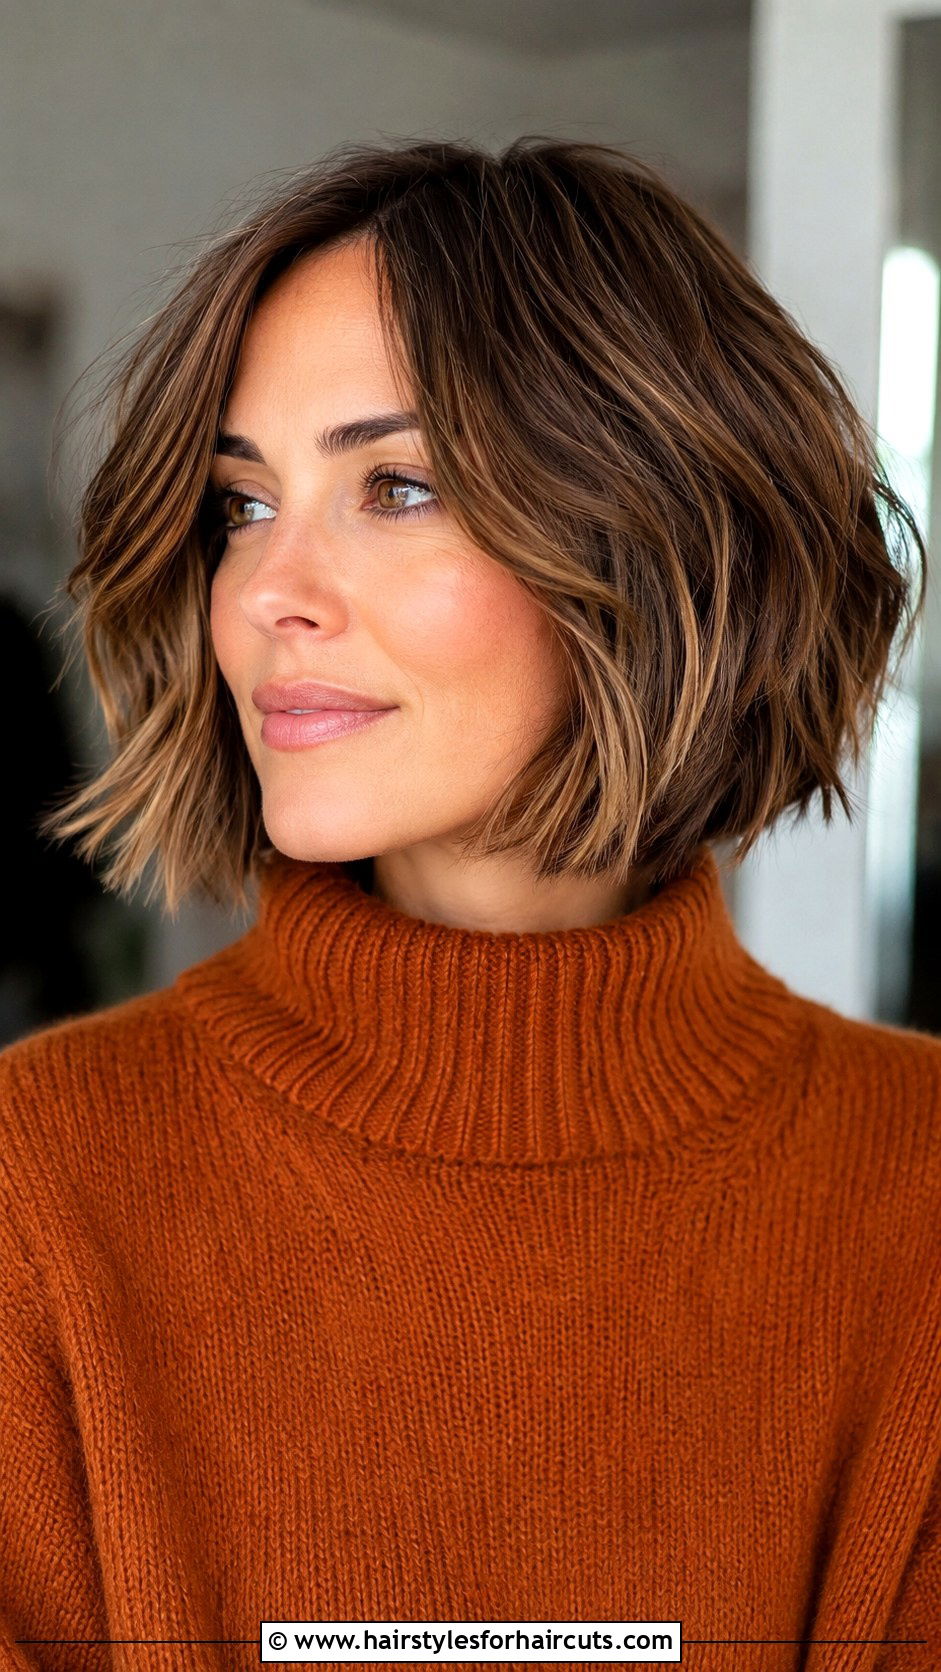
There is something undeniably chic about a short, layered cut. To capture this modern look, focus on the overall rounded silhouette that frames the face. Start with the outline, making sure the ends hit right around the jawline. Instead of drawing every single strand, group the hair into textured clumps to convey a choppy, piece-y vibe. Use quick, flicking pencil strokes at the ends to create that effortlessly tousled appearance. Incorporate soft shadows under the top layers to give the style lift and body. Avoid making the edges too blunt or harsh, unless you are aiming for a razor-sharp finish. This method brings a fashionable and bouncy feel to your illustrations.
4. How To Draw Voluminous Curly Hair
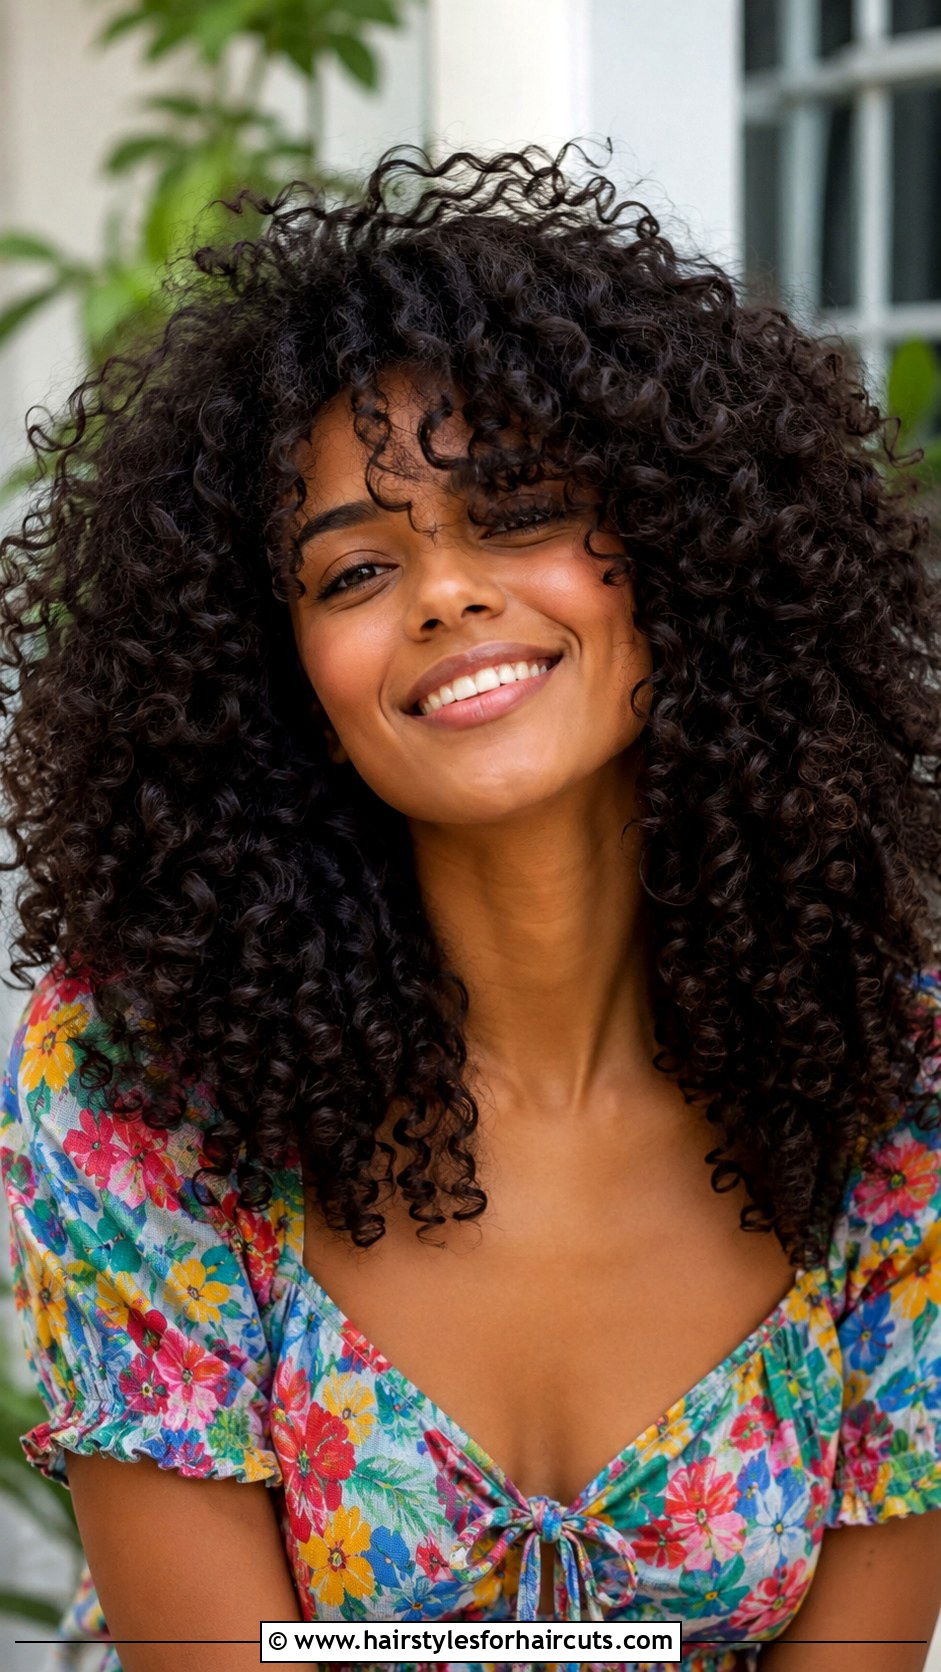
How do you capture the bouncy beauty of tight coils on paper? The secret lies in drawing the shadows and volumes rather than individual strands. Begin by mapping out the overall cloud-like shape of the curls. Use looping, circular strokes to build the texture, working from the roots outward. Let some curls overlap others to create a sense of deep, rich thickness. Darken the recessed areas between the curls heavily to push them back in space, and leave the outer edges light to simulate sunshine hitting the hair. Avoid rigid lines, letting your pencil flow organically. This technique will give your artwork incredible bounce and authentic, gorgeous texture.
5. Drawing A Messy Top Knot

Imagine the effortless grace of a casual updo sitting right at the top of the head. To sketch this relaxed look, start by drawing a circular or bun shape that feels soft and slightly irregular. Draw loose strands wrapping around the base, letting the ends feather out naturally. The key to a convincing messy bun is imperfection, so allow random wispies to escape around the ears and the nape of the neck. Use light, sketchy lines to build up the volume inside the bun, creating an airy, pulled-through texture. Shade the base of the knot to anchor it to the head. This creates a comfortable yet stylish everyday aesthetic.
6. How To Draw A Blunt Lob Haircut

Achieving the sharp precision of a long bob requires careful attention to clean lines. Start by outlining the hair hugging the head closely before making a dramatic, straight drop right at the collarbone. The defining feature here is the crisp, unbroken edge at the bottom. Use a ruler or a steady hand to ensure the line is perfectly horizontal and sharp. Add subtle shading near the roots to lift the hair off the forehead, but keep the lower sections smooth and uniform. You can include a slight curve inward at the ends to show natural movement. This creates a highly sophisticated and structurally flawless illustration that looks incredibly modern.
7. Sketching Loose Beach Waves

Can you picture the relaxed vibe of sun-kissed, salty hair? Begin by sketching the overall wavy silhouette without worrying about partings just yet. Draw flowing, S-shaped curves that cascade down the shoulders. The trick to realistic waves is ensuring the bends are soft and gradual, never harsh or crimped. Use a chisel pencil to shade in the direction of the wave, leaving the peaks light and darkening the troughs. Add a few delicate flyaways near the top to mimic the effects of ocean breezes. This gives your drawing that signature effortless and breezy aesthetic, making it absolutely perfect for summer character illustrations or casual portrait studies.
8. How To Draw A Fishtail Braid
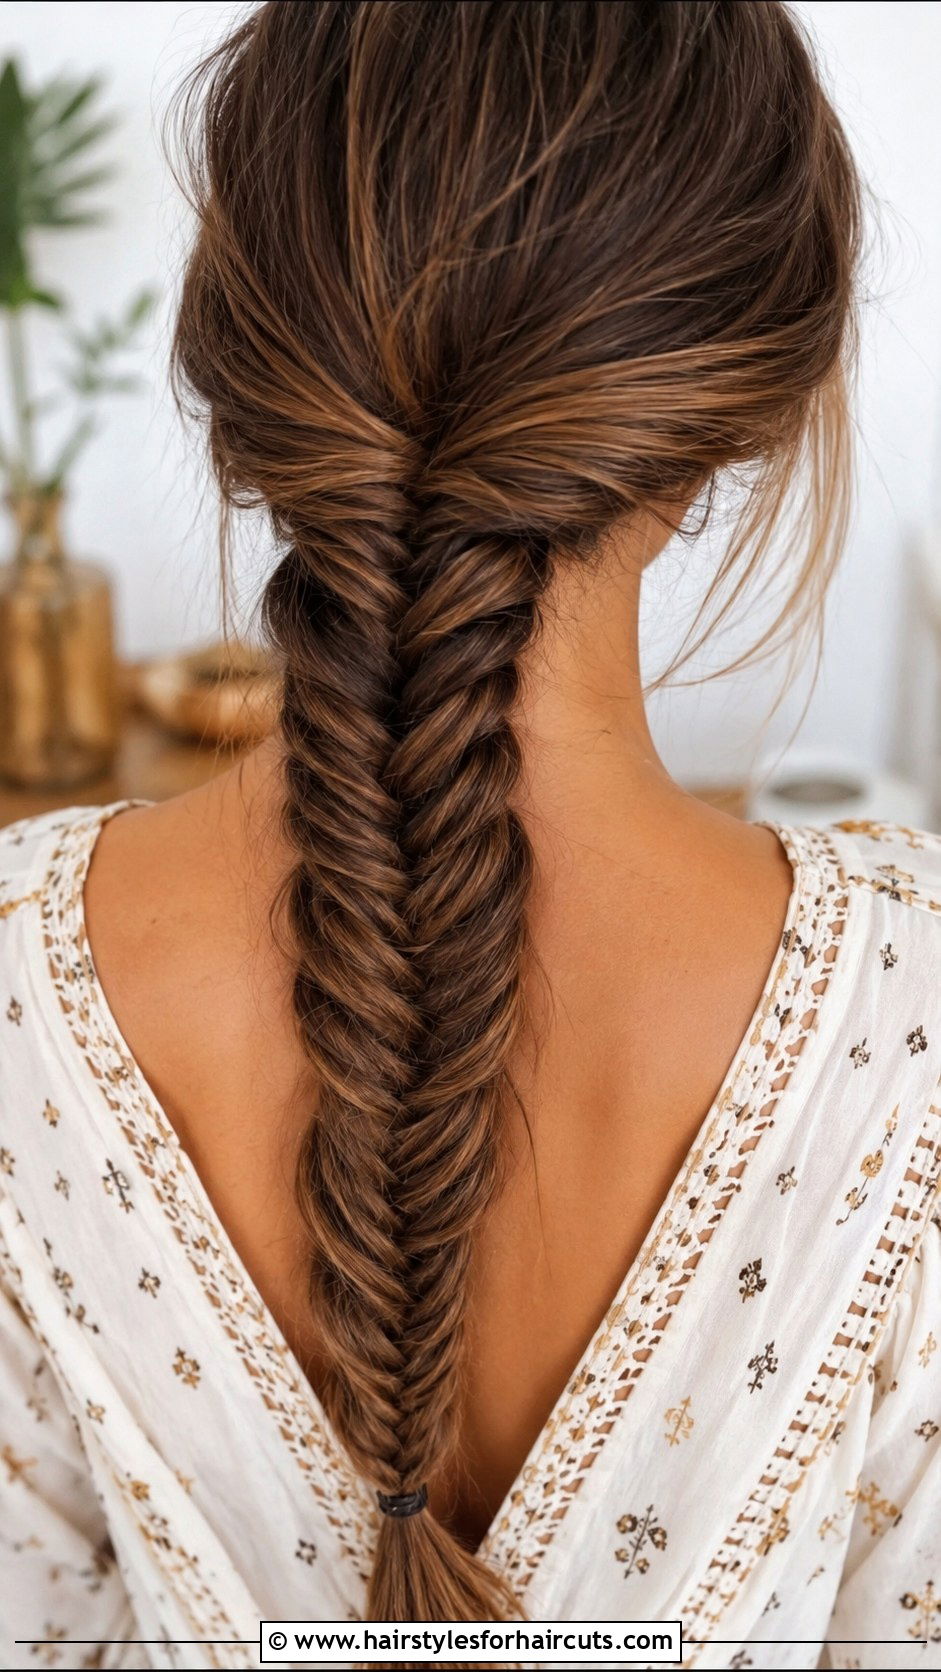
The intricate beauty of a woven two-strand plait is surprisingly simple to sketch. Unlike a traditional three-strand braid, this style uses two sections crossed over each other. Start by drawing two thick ribbons of hair tied together. Then, draw small, diagonal lines crossing from one side to the other, alternating as you move down. These tiny overlapping sections create the signature herringbone pattern. Make sure the braid narrows slightly toward the bottom. Add light shading beneath each crossing strand to provide essential depth and realism. A few stray pieces at the end make it look soft and wearable. This technique yields a highly detailed and stunningly elegant result.
9. Drawing A Side Swept Updo
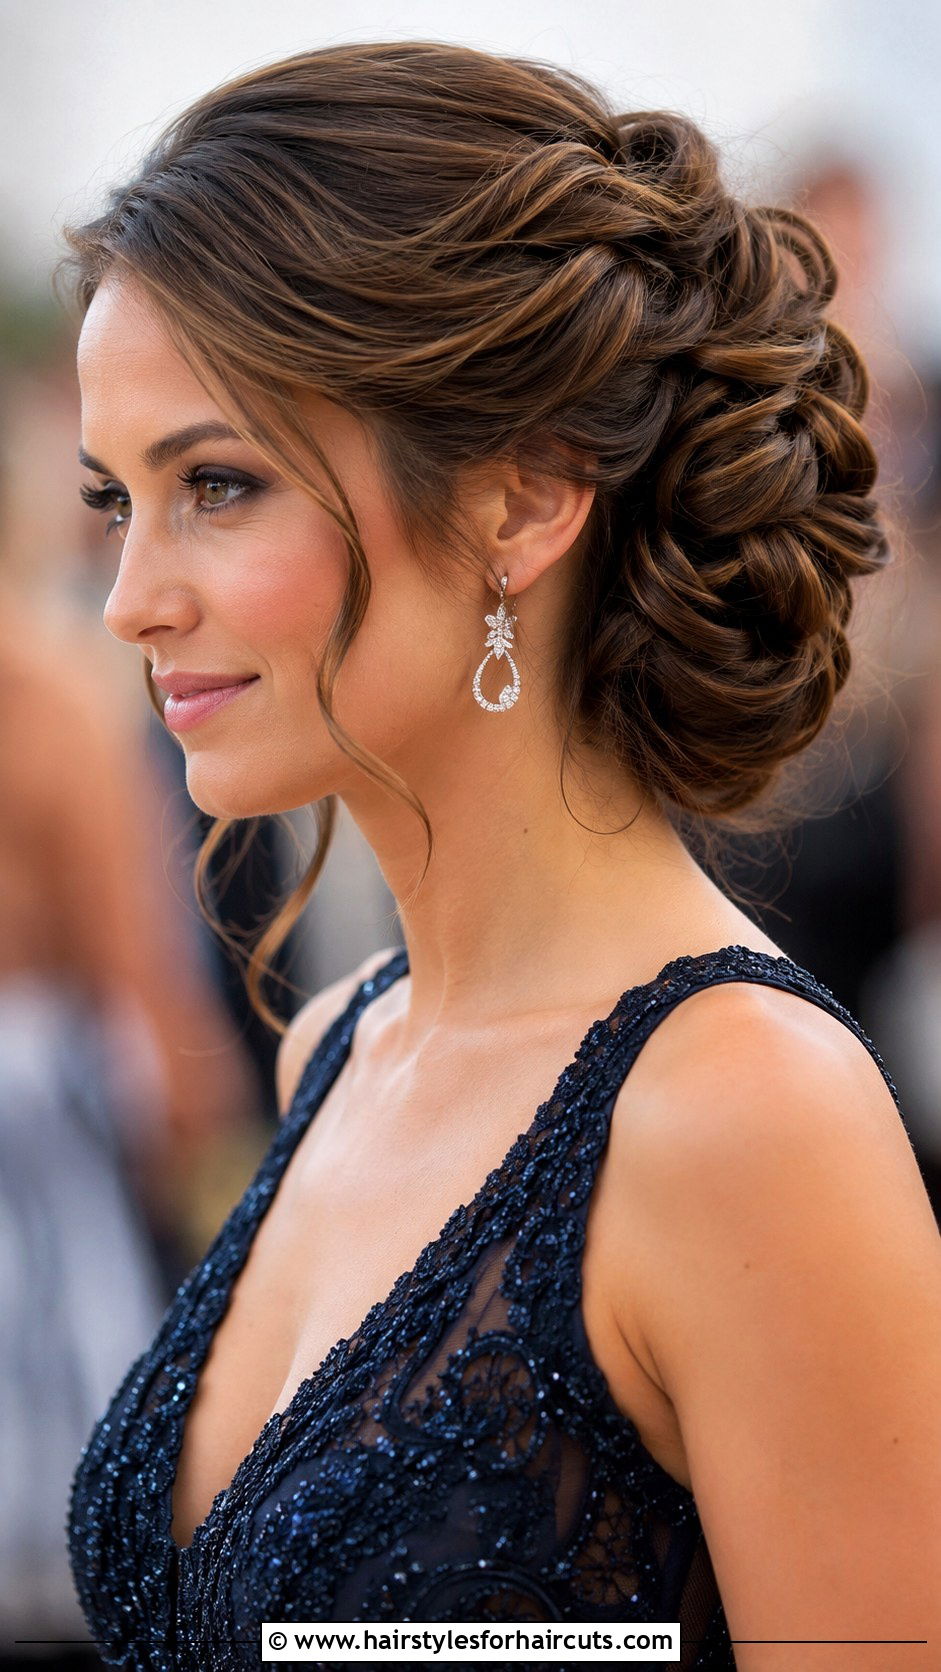
There is an undeniable romance to hair pinned softly to one side. Begin by sketching the hair sweeping across the nape of the neck and gathering near the ear. Draw soft, voluminous rolls and tucks, using curved lines to show the direction of the pinning. Do not worry about making it look too perfect; a few loose tendrils framing the face add a beautiful, organic touch. Darken the shadows within the folds of the updo to create a sense of hidden pins and structural depth. Highlight the top swoop to show shine and smoothness. This approach produces a glamorous and highly sophisticated look for any formal character portrait.
10. How To Draw A Pixie Cut

Have you ever wanted to illustrate a bold, gamine aesthetic? Focus on the close-cropped silhouette hugging the head. Start with the underlying skull shape, then add the hair in short, tapered layers. The top can be slightly longer and styled with a bit of sweep or texture. Use short, quick strokes to create a feathered appearance along the edges, especially around the ears and neck. Shading should be minimal but effective, concentrating on the crown to give the style lift. Leave the tips of the hair light to emphasize the choppy, textured ends. This method guarantees a striking, confident, and beautifully modern character illustration every time.
11. Sketching A Half Up Half Down Hairstyle
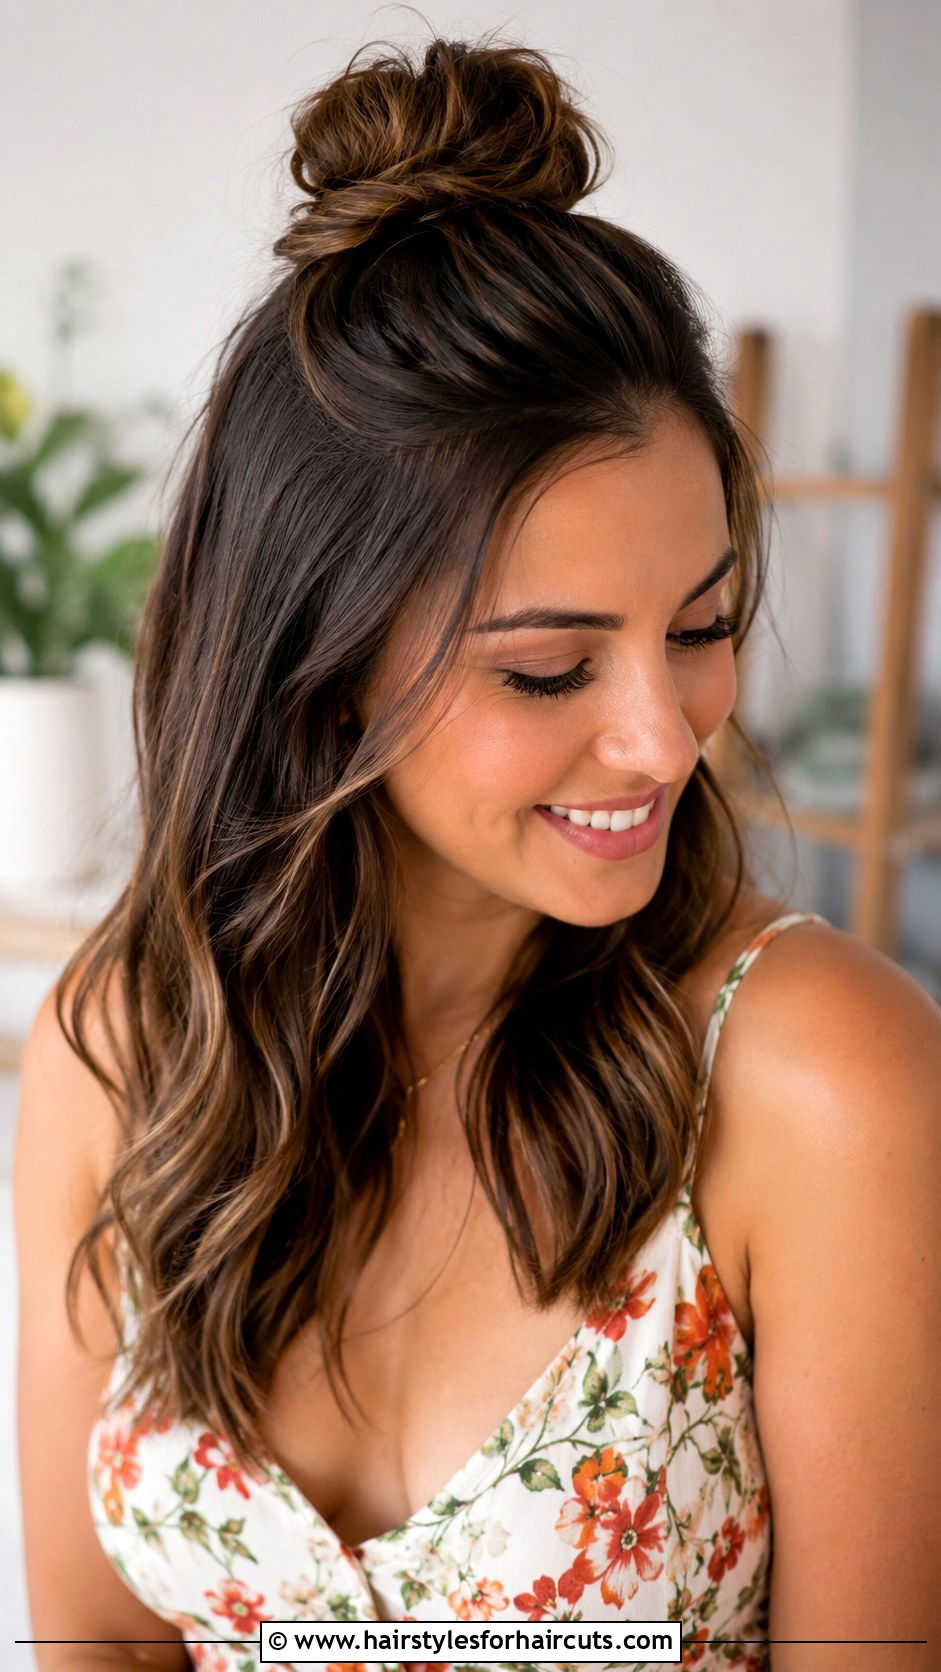
Combining the elegance of an updo with the freedom of loose hair is a fantastic artistic challenge. Start by mapping out the loose hair falling over the shoulders. Then, draw the top section pulled back and secured at the crown, forming a small bun or twist. Ensure the transition from the pulled section to the loose hair looks seamless and natural. Add gentle shading where the top layer overlaps the bottom to separate the two sections visually. Soft waves in the lower portion will beautifully balance the sleekness of the top. This approach creates a highly versatile and beautifully balanced composition for your character sketches.
12. How To Draw Dreadlocks
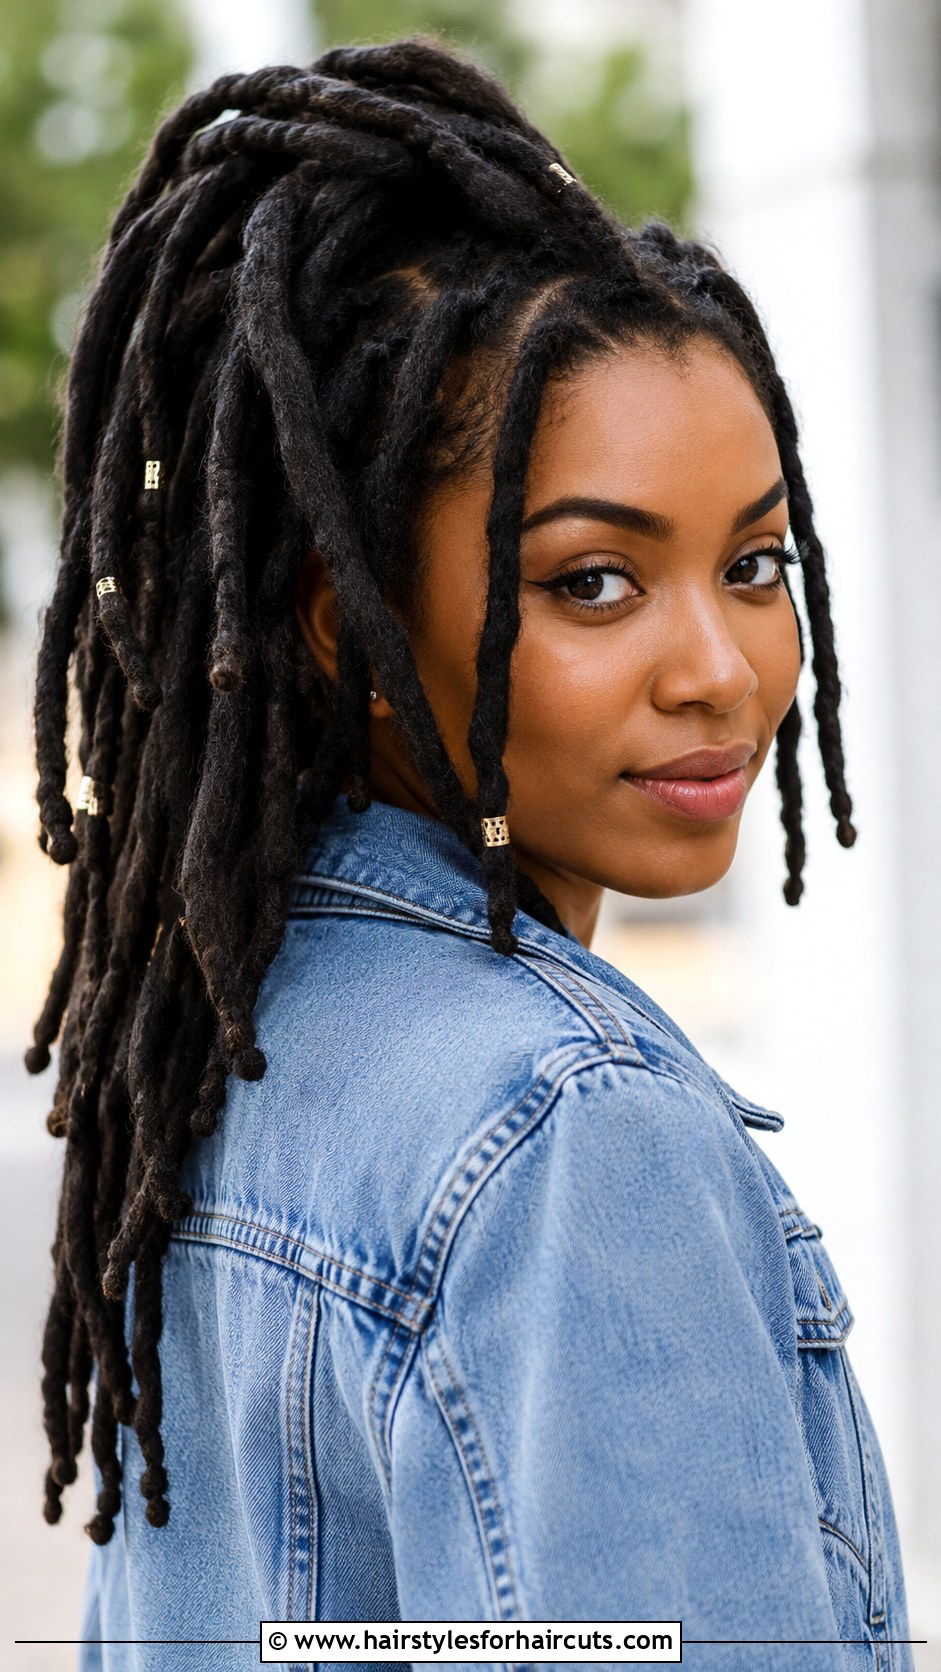
Capturing the rich, sculptural quality of locked hair requires a shift in perspective. Instead of fine strands, think of drawing thick, tubular ropes. Begin by outlining the overall shape of the style, whether it is long and free-flowing or tied back. Draw each lock as an individual cylinder, varying their thickness and direction for a natural look. Add texture by sketching crosshatch or wavy lines along the length of each dread to represent the matted texture. Deepen the shadows between the locks to make them pop forward. This approach ensures your artwork celebrates the striking and beautiful three-dimensional nature of this traditional and cultural hairstyle.
13. Drawing A Retro Pin Curl Look

Step back into the glamorous era of vintage Hollywood with this classic styling. Begin by mapping out the iconic S-waves that frame the forehead. Draw the hair in distinct, sculpted sections rather than loose strands. Each curl should loop neatly into itself, forming a cohesive, rounded shape. Use smooth, confident lines to emphasize the high-shine, slicked appearance typical of this era. Shading is essential for defining the deep waves; darken the valleys and highlight the peaks sharply. Keep the overall silhouette close to the head but with dramatic, structured volume. This technique will give your illustrations a timeless and incredibly polished vintage aesthetic effortlessly.
14. How To Draw A Low Chignon
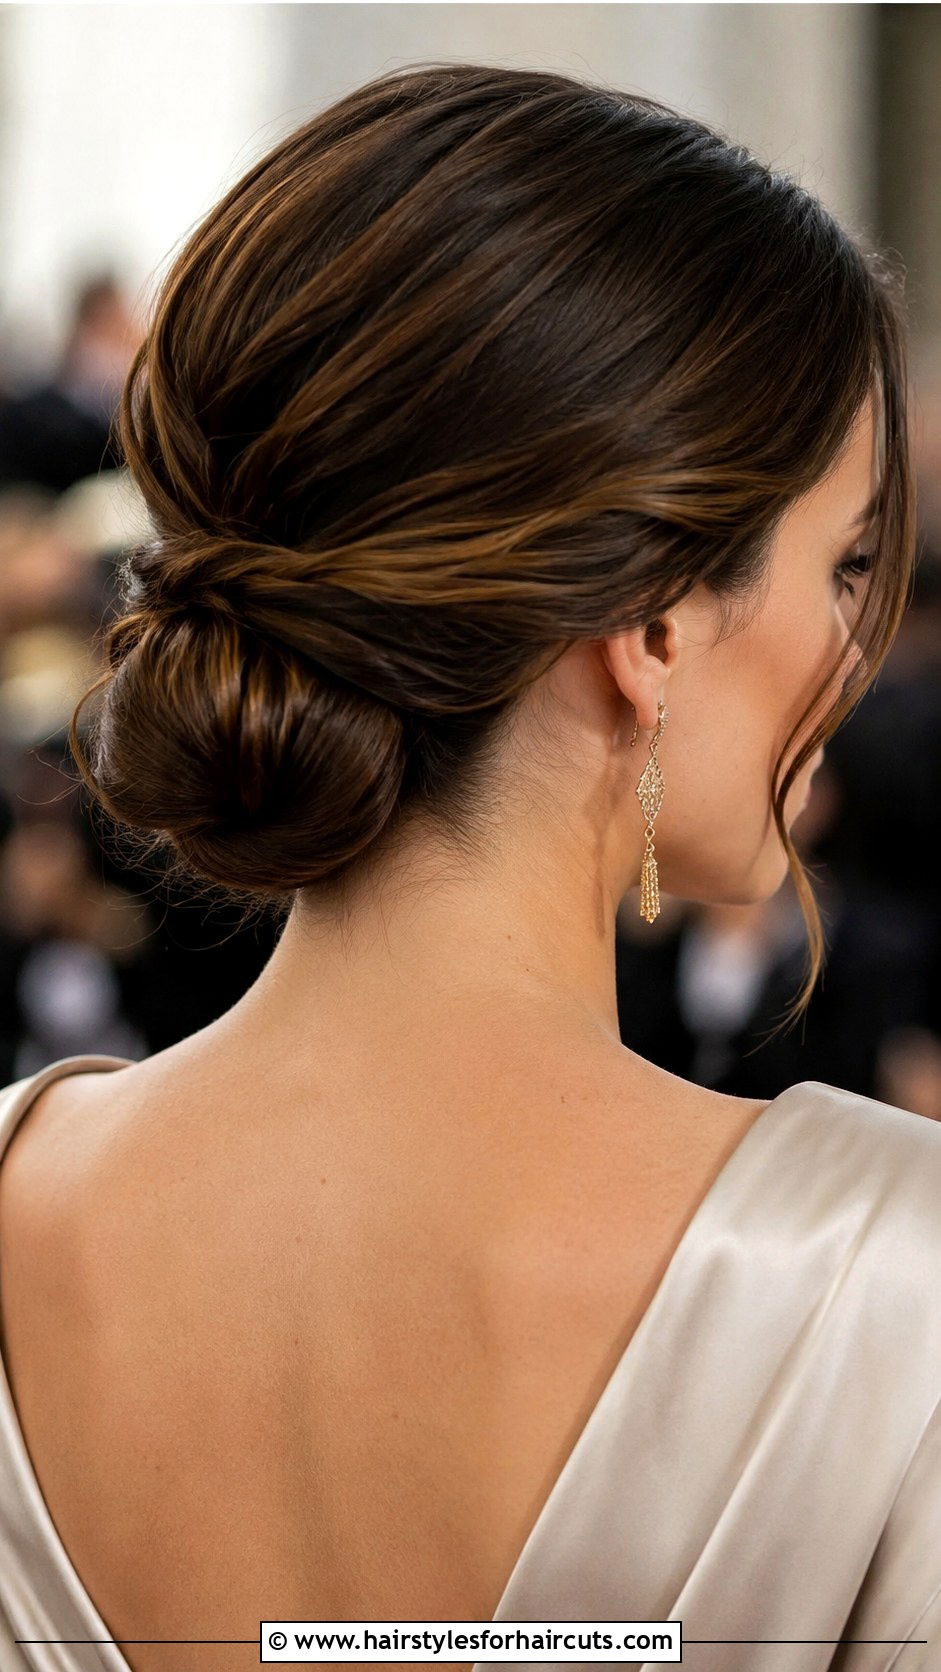
Elegance often lies in absolute simplicity, and a low, rolled bun perfectly embodies this principle. Start by sketching the hair swept smoothly back and gathered at the nape of the neck. Draw the hair twisting into a cylindrical roll, tucking the ends underneath. The lines should be fluid and clean, suggesting a sleek and refined texture. Add subtle shading along the edges of the roll to give it dimensional weight. A few soft face-framing pieces can be added to keep the look from feeling too severe. This approach guarantees a sophisticated, timeless, and utterly graceful result for any formal portrait or bridal character design.
15. Sketching A Shag Haircut

Want to capture that effortlessly cool, rock-and-roll vibe on paper? Focus on heavy layers and tons of movement. Begin by drawing the overall silhouette, which should be full at the top and heavily textured at the ends. Use jagged, overlapping lines to create the signature choppy layers throughout the cut. Draw abundant wispy pieces around the face to frame it softly. When shading, emphasize the separate layers by darkening the spaces between them, creating a fluffy, voluminous appearance. Avoid making the bottom edge look solid or thick. This technique ensures your drawing radiates a fun, edgy, and beautifully undone energy that defines the classic shag.
16. How To Draw Space Buns
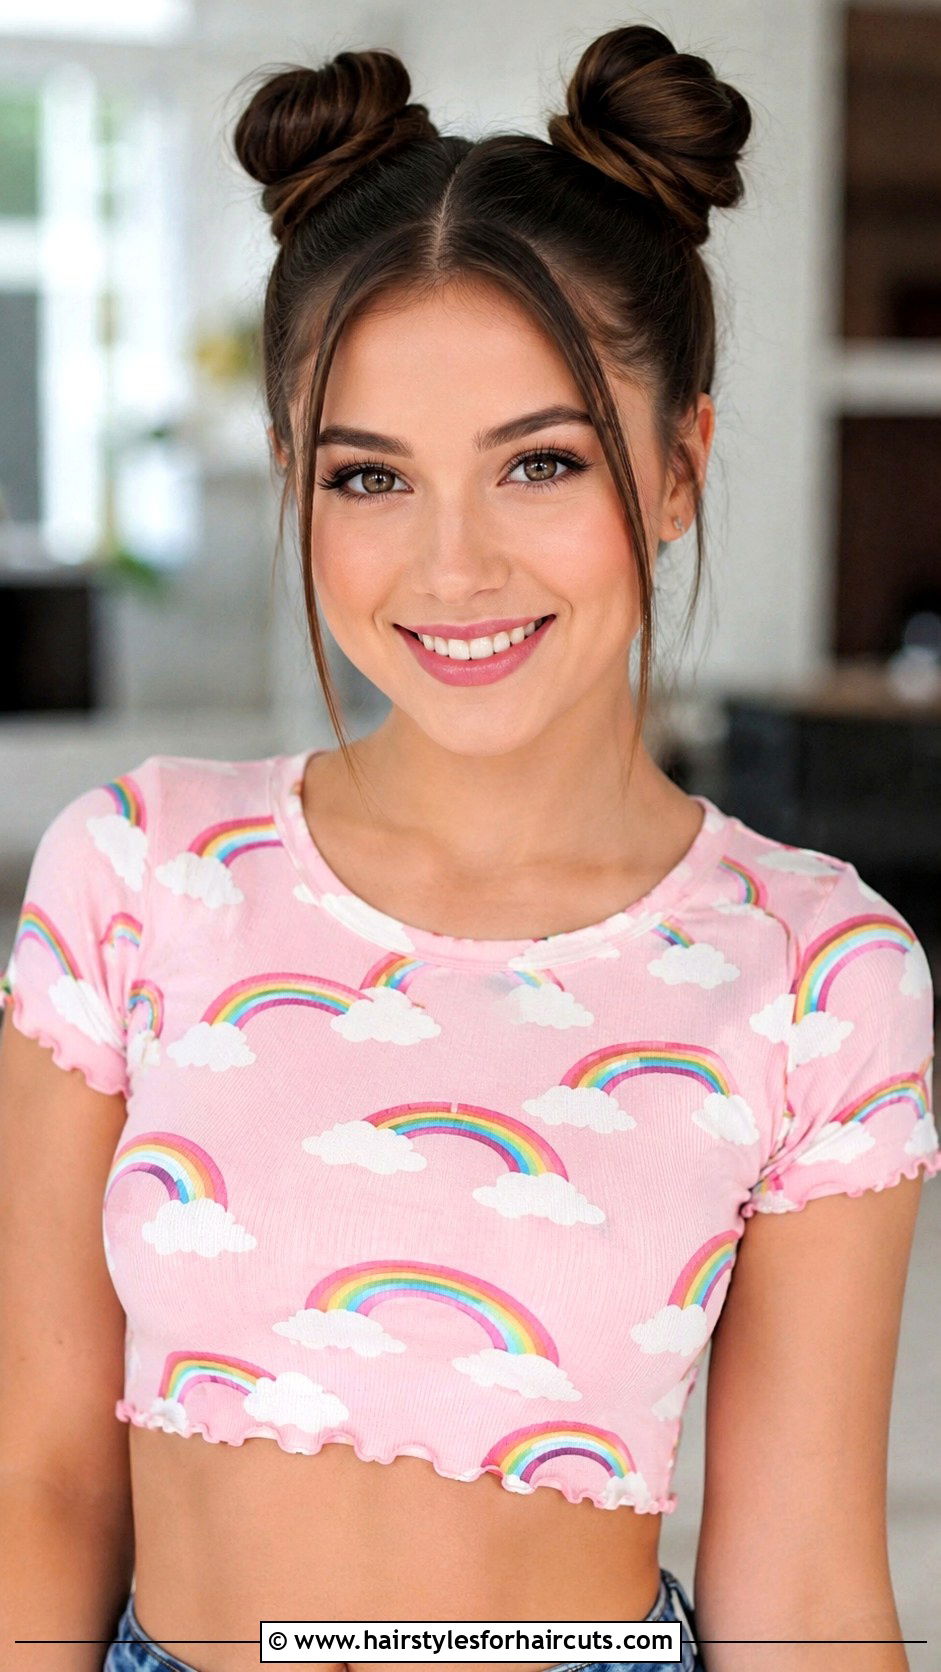
Ready to add a playful, futuristic pop culture touch to your sketchbook? Start by parting the hair down the middle and drawing two high pigtails. Transform each pigtail into a rounded bun, positioning them symmetrically on either side of the crown. Use swirling lines inside each bun to show the hair wrapping around itself securely. Leave a few strands loose to keep the look fresh and youthful. Add a slight shadow beneath each bun to anchor them securely to the head. This approach creates a fun, energetic, and highly expressive hairstyle that instantly brings personality and a touch of whimsy to your character illustrations.
17. Drawing A Curtain Bangs Lob

Framing the face perfectly requires mastering the soft, cheekbone-skimming fringe. Start by sketching the center-parted, sweeping bangs that arc gently downward. Draw the rest of the hair falling to the collarbone, ensuring the ends look slightly tapered. The key to this look is the seamless blend between the shorter front pieces and the longer back sections. Use soft, directional shading to emphasize the flow of the hair sweeping away from the face. Highlight the curved ends of the fringe to give them a bouncy, voluminous feel. This approach yields a trendy, incredibly flattering, and modern aesthetic that looks fantastic in any contemporary portrait drawing.
18. How To Draw A Waterfall Braid
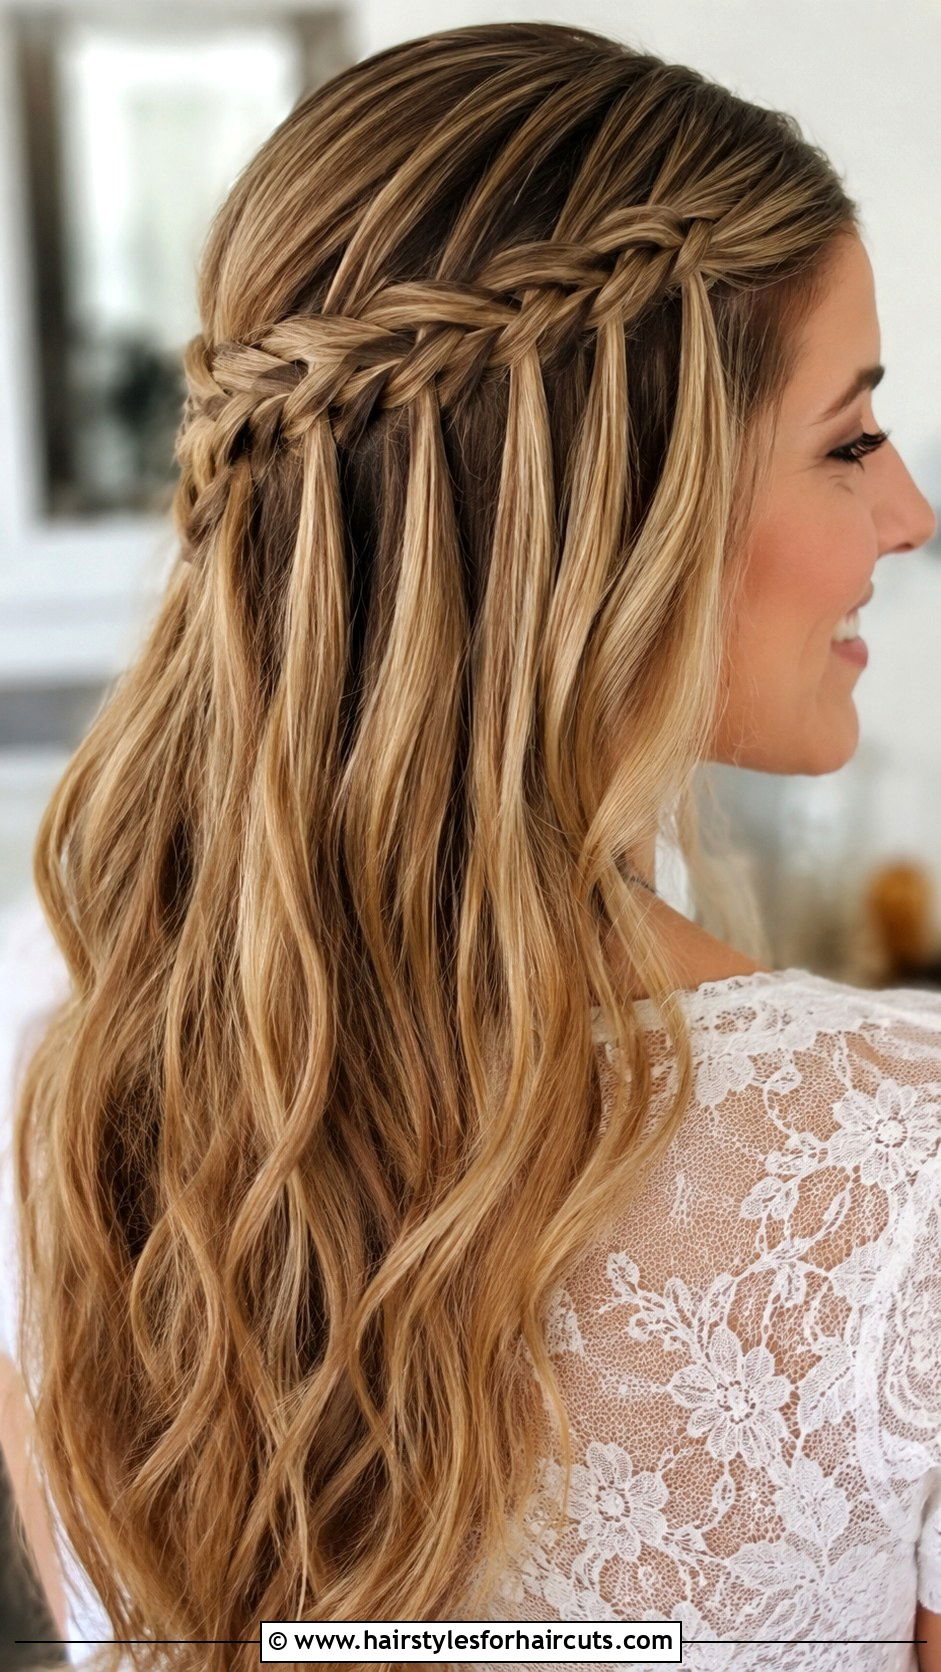
Have you ever wondered how to illustrate a cascading plait? This look involves a standard braid that drops sections of hair as it moves across the head. Begin by drawing a French braid starting at the temple. As the braid progresses, draw curved strands falling out of the bottom loops, creating the waterfall effect. Continue the braid with new pieces added from the top. Ensure the dropped strands flow naturally into the rest of the loose hair. Shading under the plait itself will make it pop, while the falling pieces should look soft and un-restricted. This creates a romantic, beautifully intricate design for your artistic portfolio.
19. Sketching A Cropped Buzz Cut

Sometimes the most powerful drawings are the most minimal. Illustrating a nearly shaved head requires focusing entirely on the shape of the skull and subtle shadow. Instead of drawing strands, use a very light shading technique to cover the head, following its spherical contour. Add a bit of texture by using a stippling or very short, uniform flicking motion to suggest the fine stubble. Leave the top and forehead slightly lighter to indicate where light naturally hits. Darken the sides and the area above the ears to show the fade or length transition. This method produces a striking, bold, and incredibly realistic interpretation of this low-maintenance style.
20. How To Draw A Twisted Updo
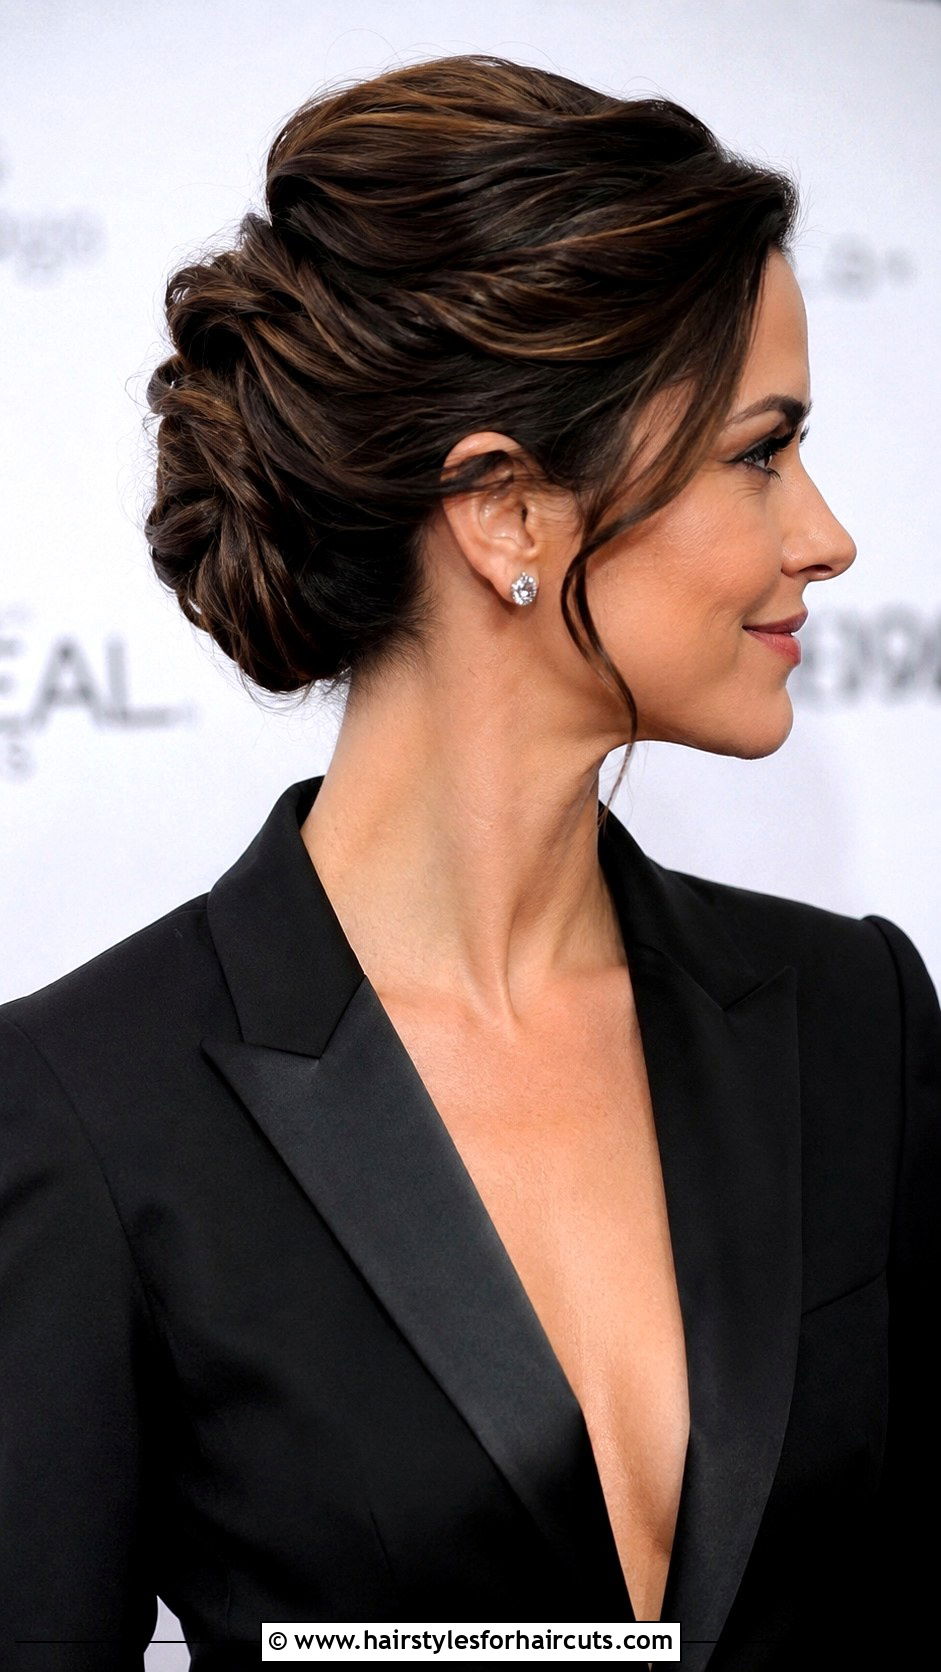
Capturing the graceful elegance of rolled hair is all about fluid lines. Begin by drawing two sections of hair twisted back from the front of the face. Show these sections meeting at the back of the head and intertwining into a soft, roped effect. Use smooth, sweeping lines to indicate the direction of the twist. Darken the inner parts of the twist to create a shadow that emphasizes the overlapping structure. Let the ends of the twist tuck under or spill out softly in a small bun. This technique results in a highly sophisticated, beautifully graceful, and structurally dynamic illustration for any formal setting.
21. Drawing Long Straight Hair With Layers
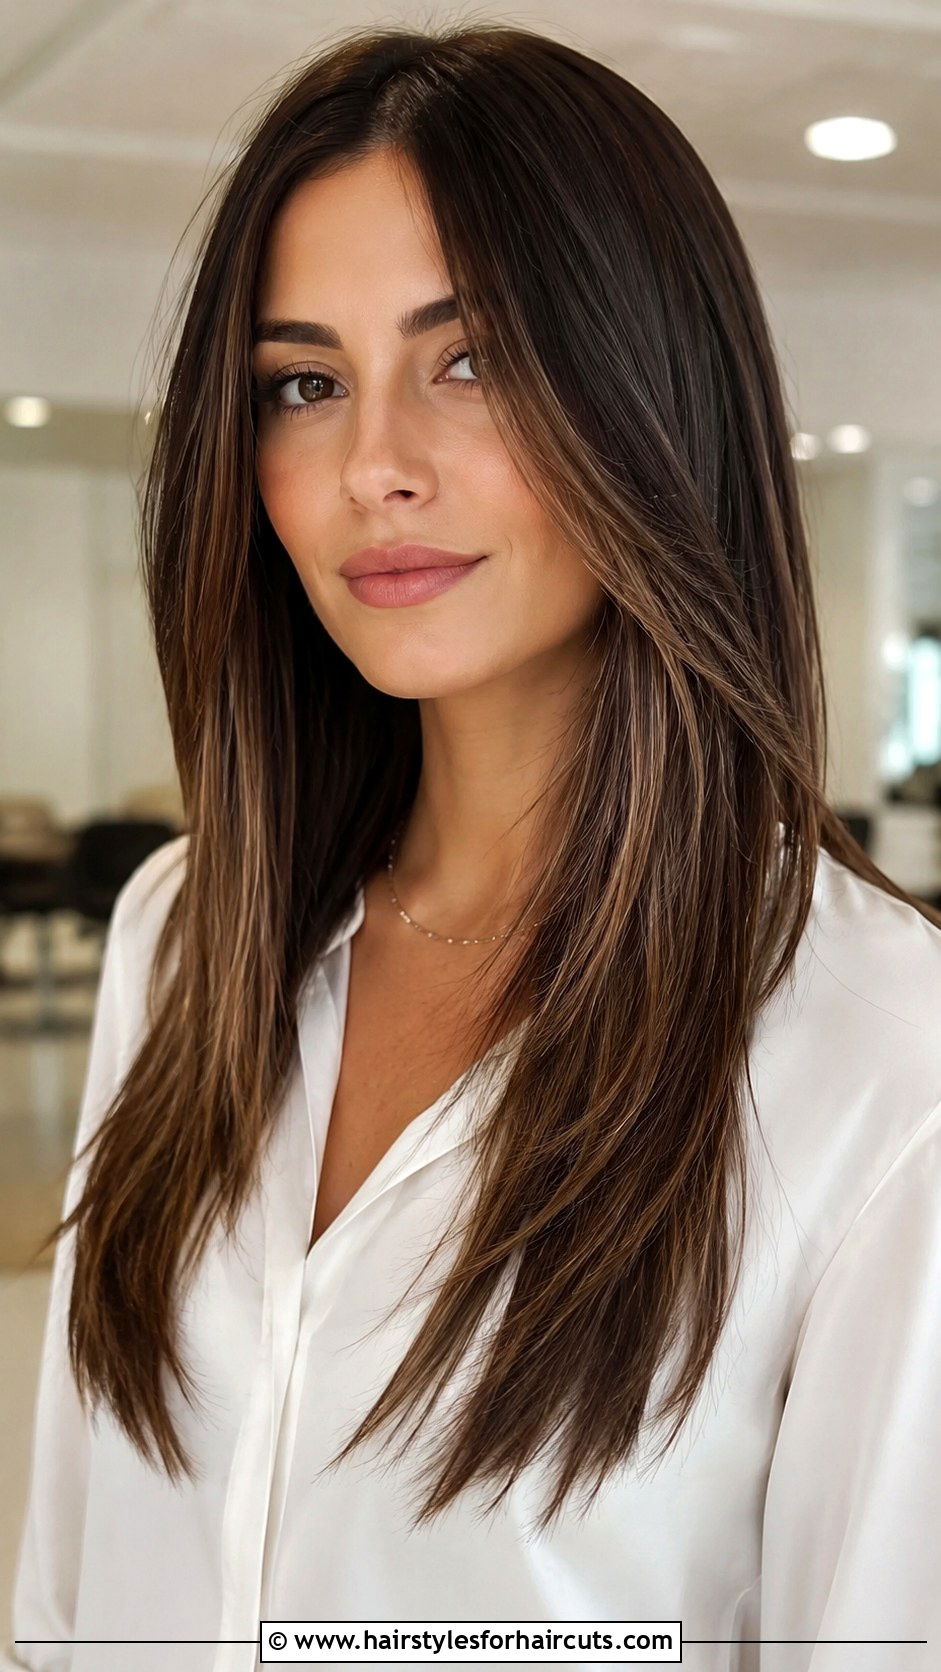
The subtle complexity of varying lengths in sleek hair can be a joy to sketch. Start by outlining the long, cascading silhouette. To show layers, draw varying lengths of hair starting from different points around the crown and face. The front pieces should be shorter, blending seamlessly into the longer back sections. Use long, confident, downward strokes to emphasize the smooth, straight texture. Add shading at the tips where the layers overlap to visually separate the different lengths. A few soft flyaways will keep the straight hair from looking stiff or unnatural. This approach ensures a dynamic, fluid, and beautifully realistic drawing every single time.
22. How To Draw A Milkmaid Braid
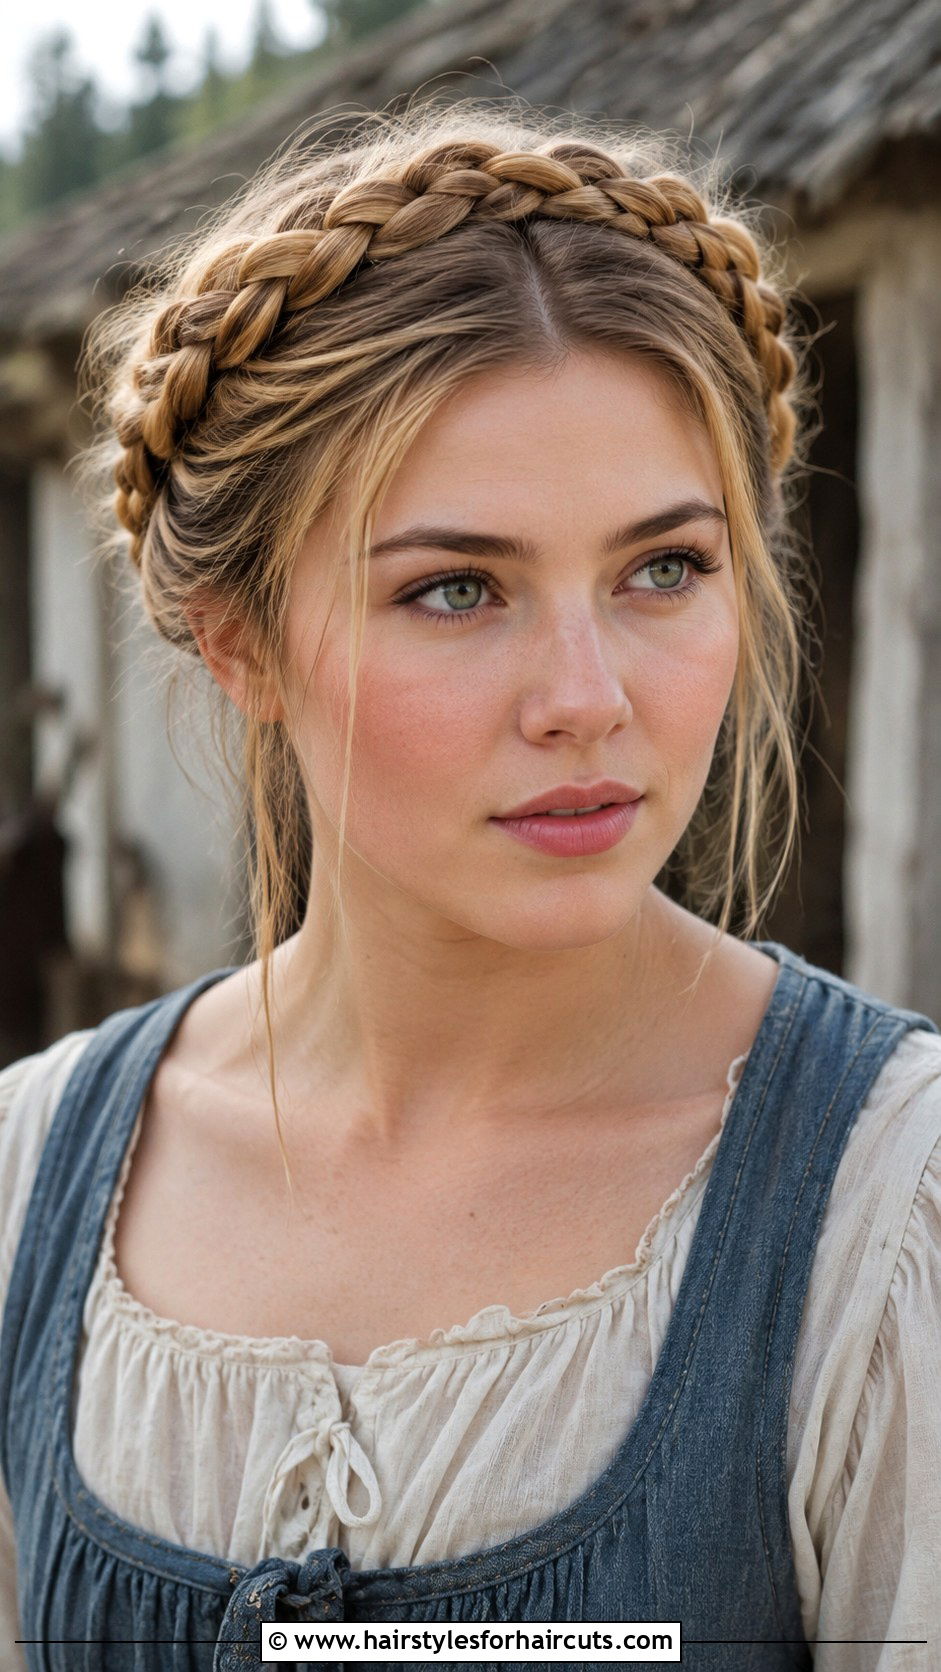
Looking for a charming, rustic aesthetic for your next character? This style features two braids wrapped over the top of the head like a crown. Start by drawing two standard plaits on either side of the head. Then, sketch them crossing over the top, tucking the ends under each other. Add texture to the braids by drawing the overlapping sections with care. Use heavier shading under the braids where they rest against the head to ground them firmly. Leave a few soft pieces around the forehead and ears to keep the look gentle and approachable. This creates a sweet, picturesque, and wonderfully traditional hairstyle illustration.
23. Sketching An Asymmetrical Bob
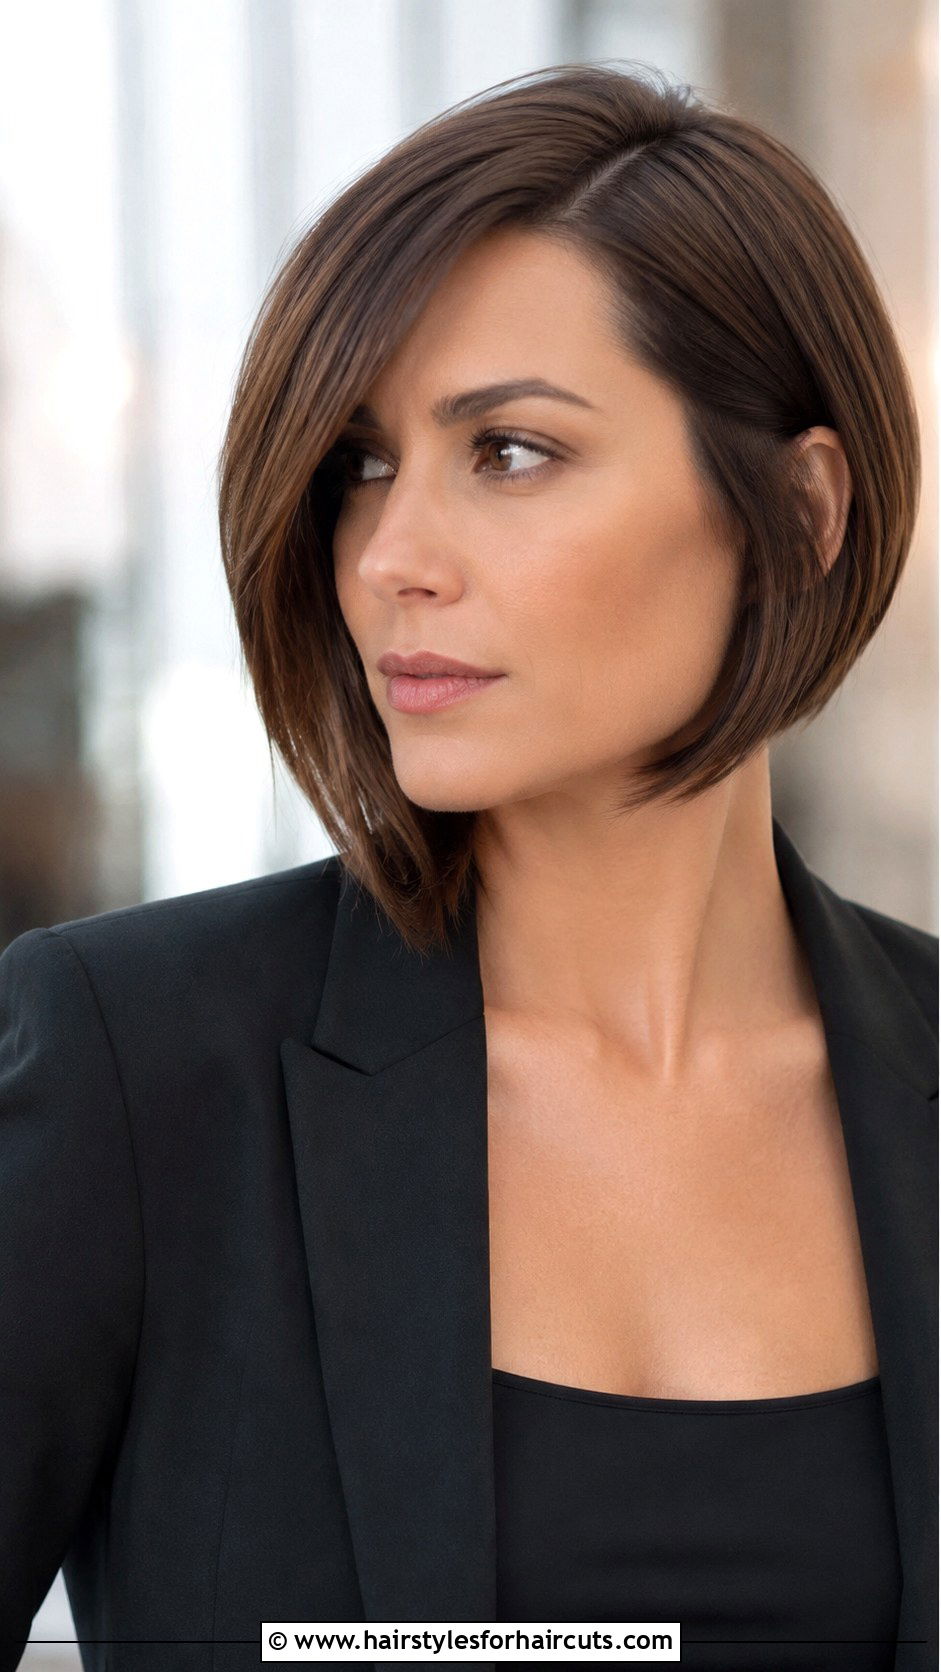
Breaking the rules of symmetry can result in a strikingly modern sketch. Start by drawing the hair closely hugging the head. One side should cut sharply at the jawline, while the other angles down dramatically, perhaps reaching the collarbone. The key is getting the steep, diagonal line at the bottom correct. Use crisp, clean lines for the longer side to emphasize the sharp cut. Add subtle shading near the nape to show the undercut or shorter layers beneath. This contrast in lengths creates a bold, edgy, and highly fashion-forward aesthetic that will make your character designs stand out with incredible style and attitude.
24. How To Draw A Pompadour Hairstyle
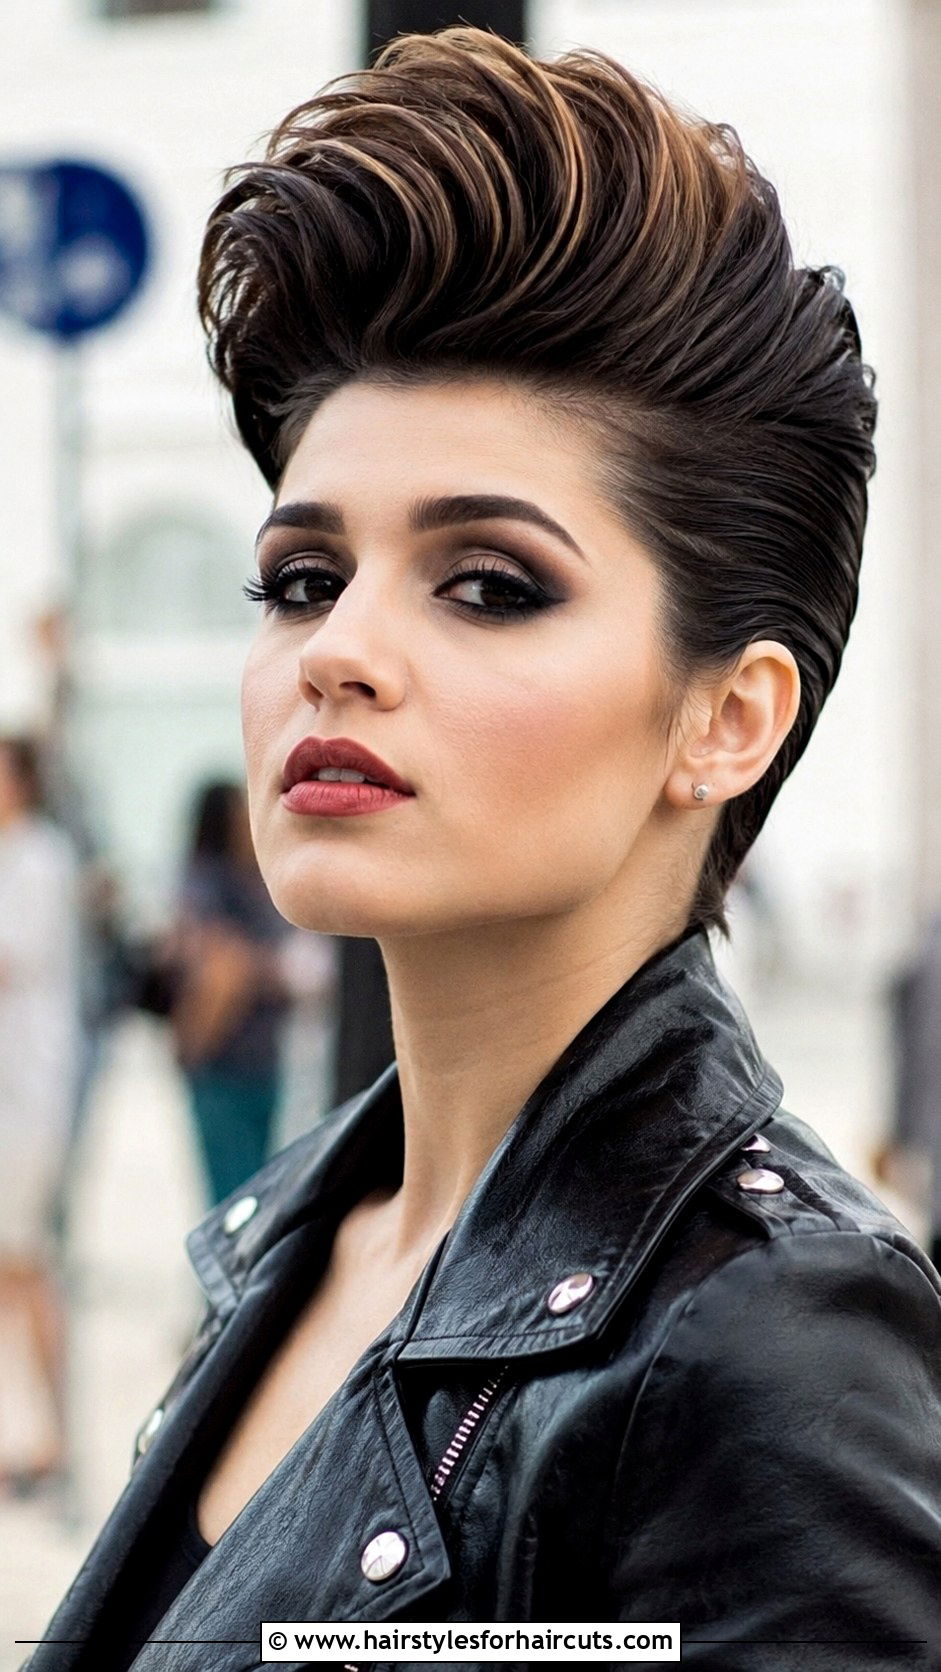
Height and volume are the stars of this dramatic, vintage-inspired look. Begin by drawing the hair sweeping upward from the forehead in a massive, sweeping wave. The sides should be styled close to the head, contrasting with the towering top. Use bold, curved lines to map out the high roll, ensuring it looks thick and substantial. Shading is critical here; darken the area right at the forehead where the hair is swept up to create an illusion of massive height and shadow. Smooth out the sides to keep the focus on the voluminous top. This technique guarantees a bold, confident, and remarkably striking character portrait.
25. Drawing A Braided Crown Updo

Encircling the head with a woven halo creates a beautifully ethereal effect. Begin by sketching a thick braid that wraps entirely around the perimeter of the head, from the nape to the crown. Show the rest of the hair gathered and pinned up underneath this braided band. Draw the interlocking loops of the braid with careful attention, making them look full and robust. Shade the bottom edges of the braid where it meets the pinned hair to create necessary depth. A few soft, illuminating highlights on the top loops of the braid will give it a realistic shine. This results in a romantic and breathtakingly beautiful illustration.
Conclusion:
Exploring these diverse techniques is a fantastic way to expand your artistic range. Whether you prefer sleek, textured, or intricately woven designs, practicing these concepts will elevate your artwork significantly. Remember that hair should always look like it has movement and life, rather than sitting flat on the page. Mastering light, shadow, and directional lines is the ultimate key to success. Keep experimenting with different lengths, volumes, and textures in your sketchbook. By studying these 25 different hairstyles drawing references, you are well on your way to creating stunning, professional-level illustrations. Grab your favorite pencil and start bringing your beautiful, dynamic hair sketches to life today!

Leave a Reply