
Have you ever stood in front of your mirror feeling completely stuck on what to do with your hair? We have all been there, staring at the same boring routine and wishing for a quick change. Finding easy and trendy ways to switch up your look does not have to be a struggle anymore. This comprehensive 25 hairstyles tutorial is exactly what you need to transform your daily routine. Whether you are heading to work, getting ready for a casual weekend, or just wanting a fresh vibe, there is something here for every hair length and texture. You will discover simple step-by-step methods that anyone can master at home. Say goodbye to bad hair days and hello to gorgeous, salon-worthy results. Let us dive right into these amazing looks!

1. Messy Bun Hairstyle Tutorial

Are you looking for that perfectly effortless vibe without spending hours getting ready? The messy bun is your ultimate go-to option. Start by gathering your hair into a high ponytail and secure it with an elastic. Do not worry about bumps or flyaways because they add character. Next, twist the ponytail loosely around the base and pin it into place. Pull out a few face-framing pieces to soften the overall look. You can gently tug at the bun to make it look thicker and more voluminous. This style works wonderfully on second-day hair when you have plenty of natural texture. It takes less than two minutes to achieve. You will look chic and relaxed wherever you go.
2. French Braid Hairstyle Tutorial

Ever wonder how to get that classic, timeless look that stays put all day long? The French braid is an elegant solution that keeps your hair secure and out of your face. Begin at the top of your head and separate a section of hair into three equal parts. As you cross the outer sections over the middle, add small pieces of hair from the sides. Keep your hands close to your scalp for a tight, polished finish. Continue adding hair until you reach the nape of your neck. Then, simply finish with a standard three-strand braid and tie it off. This technique is perfect for busy days or outdoor adventures. Practice makes perfect with this beautiful style.
3. Half Up Half Down Hairstyle Tutorial

Want the best of both worlds by showing off your length while keeping hair out of your eyes? The half up half down style is incredibly versatile and flattering on almost everyone. Simply section the top portion of your hair from ear to ear. Brush this top section smoothly and lift it up. You can secure it with a clear elastic or a decorative clip. For extra volume, gently pull at the secured section to create a slight poof at the crown. You can also curl the loose bottom sections for a softer, more romantic feel. This look transitions seamlessly from a casual office environment to an evening out. It is truly a universally appealing option.
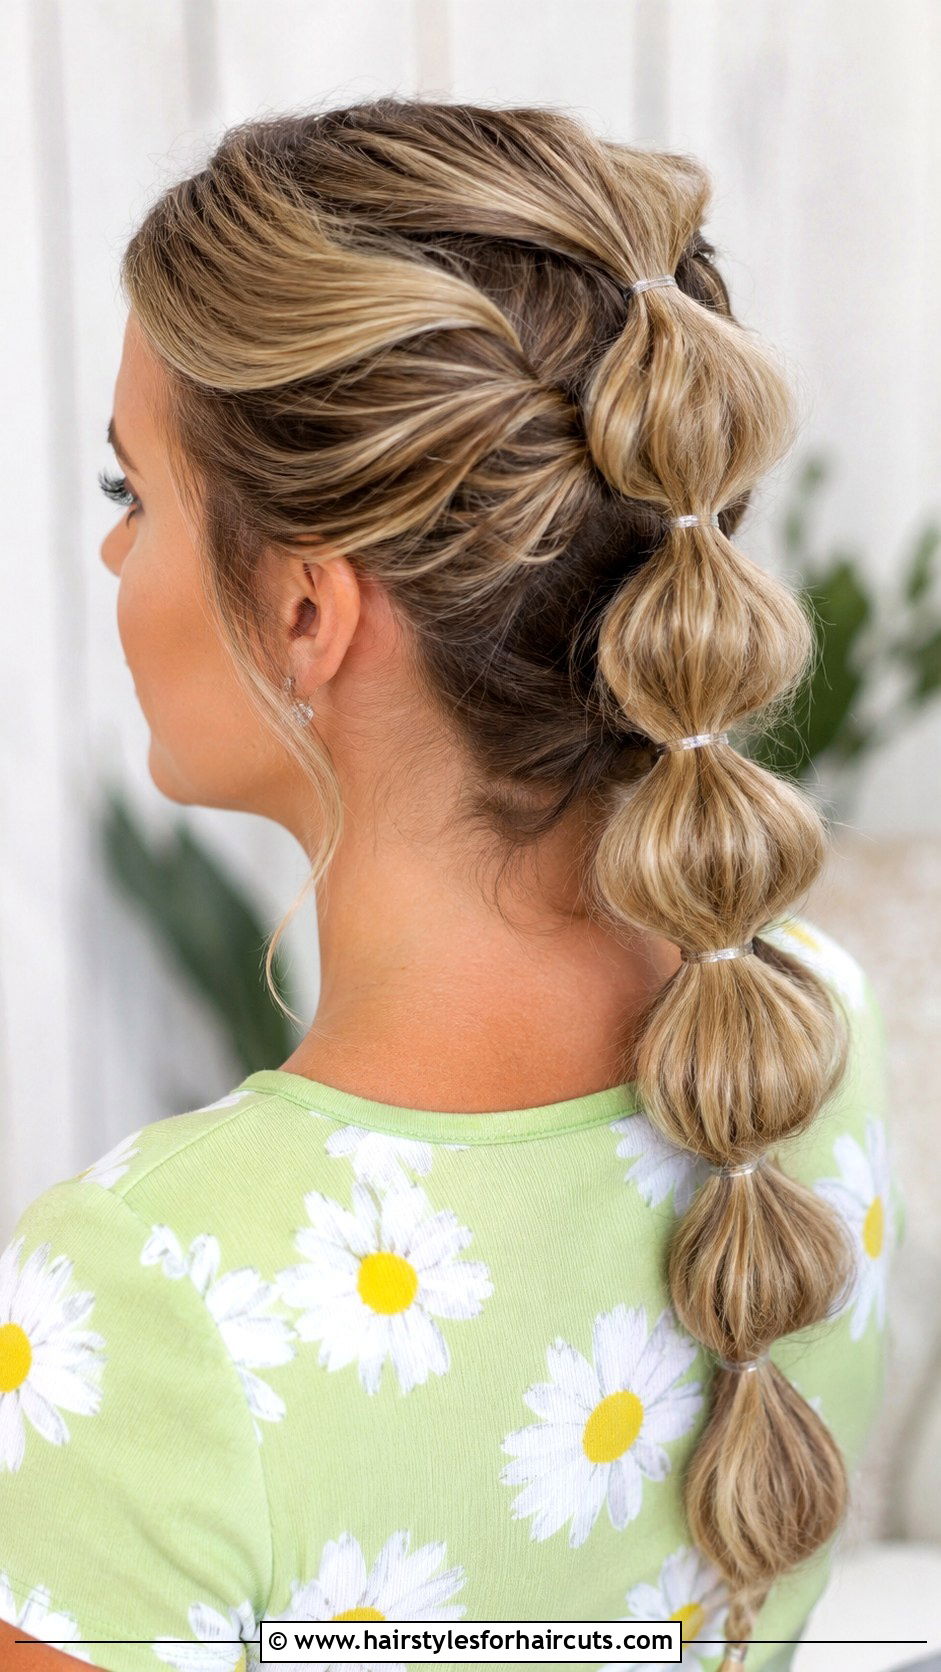
4. Bubble Braid Hairstyle Tutorial

Looking for a fun way to spice up a basic ponytail in just minutes? The bubble braid creates an illusion of complexity but requires zero braiding skills. First, pull your hair into a sleek ponytail at your desired height. Take a small elastic and wrap it a few inches down the ponytail. Gently tug at the hair between the two elastics to create a rounded bubble shape. Repeat this process down the entire length of your hair until you reach the ends. You can leave the bubbles loose for a softer feel or make them tight for bold structure. This playful style is amazing for adding fun dimension to your everyday look.
5. Space Buns Hairstyle Tutorial
Are you ready to embrace your playful side with a look that stands out in any crowd? Space buns are quirky, cute, and surprisingly simple to create. Part your hair straight down the middle from your forehead to the nape. Secure each side into two high pigtails with elastics. Take one pigtail and twist it around its base into a small bun. Pin it securely and repeat the exact same process on the other side. Pull a few strands loose around your face for a more relaxed aesthetic. This double bun look is fantastic for music festivals, casual outings, or just bringing some joy to your daily routine. Have fun with this unique style.
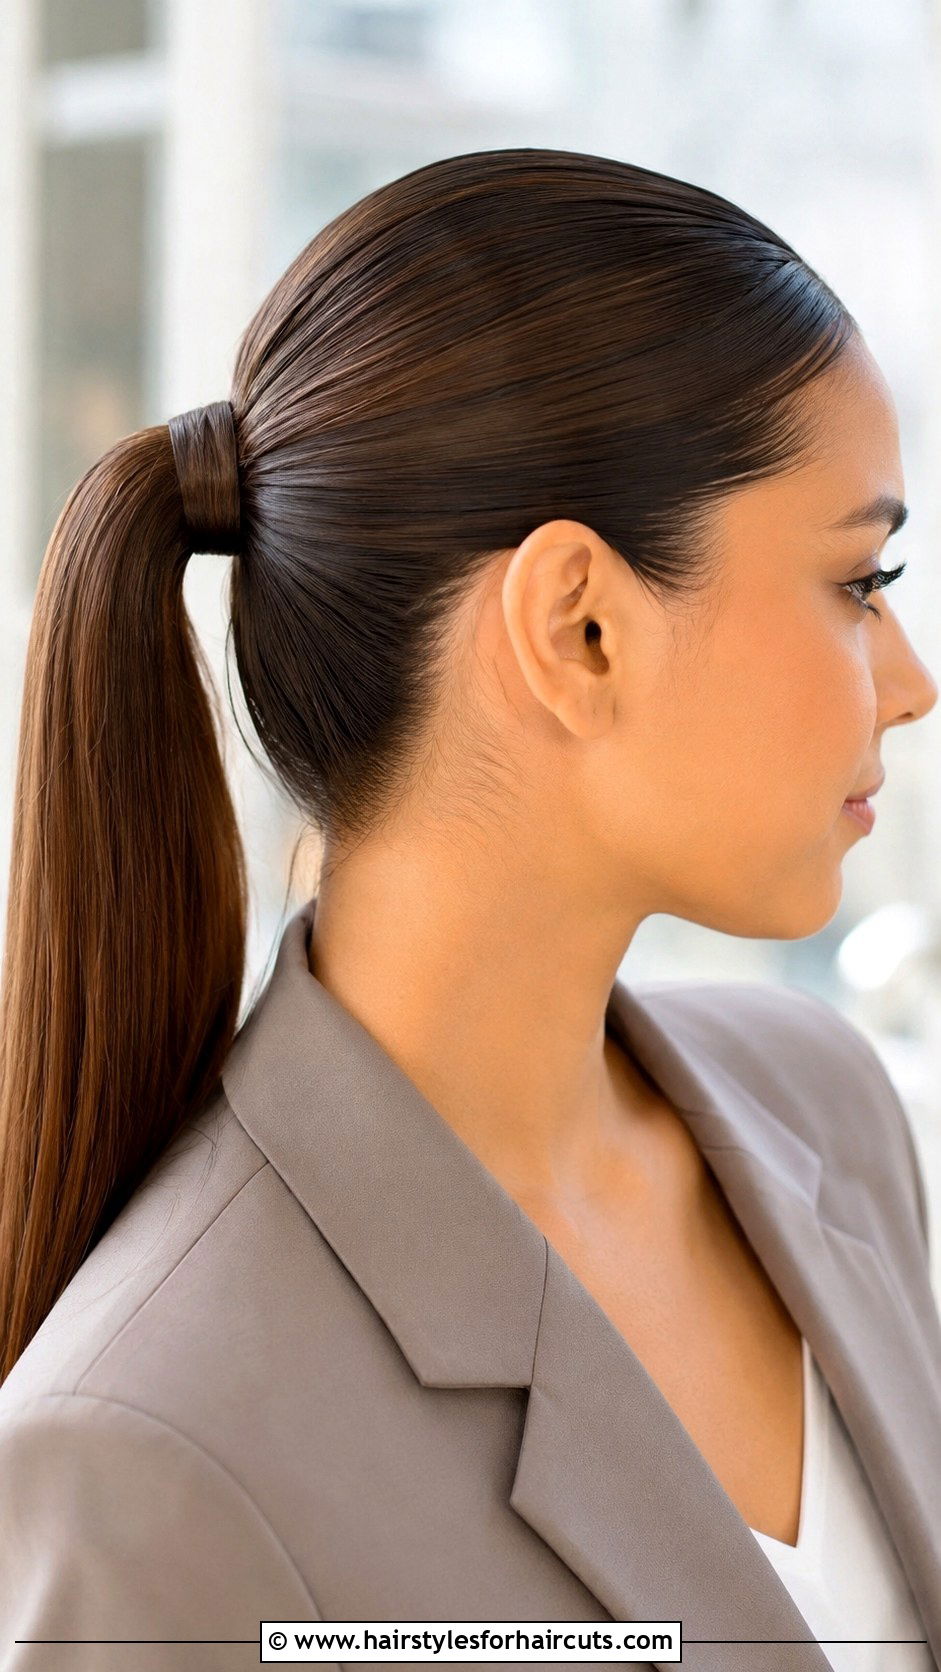
6. Slicked Back Ponytail Hairstyle Tutorial

Craving a sleek, sophisticated look that commands attention and stays perfectly in place? The slicked back ponytail delivers instant polish and confidence. Start by applying a smoothing gel or pomade through your roots and lengths. Using a fine-tooth comb, brush your hair back tightly and upwards towards the crown. Secure it firmly with a strong elastic. Take a small section of hair from the underside of the ponytail and wrap it around the elastic to hide the band. Pin it underneath to keep it secure. The key to this style is eliminating flyaways and creating a smooth, wet-look finish. It is a powerful choice for professional settings or formal occasions.
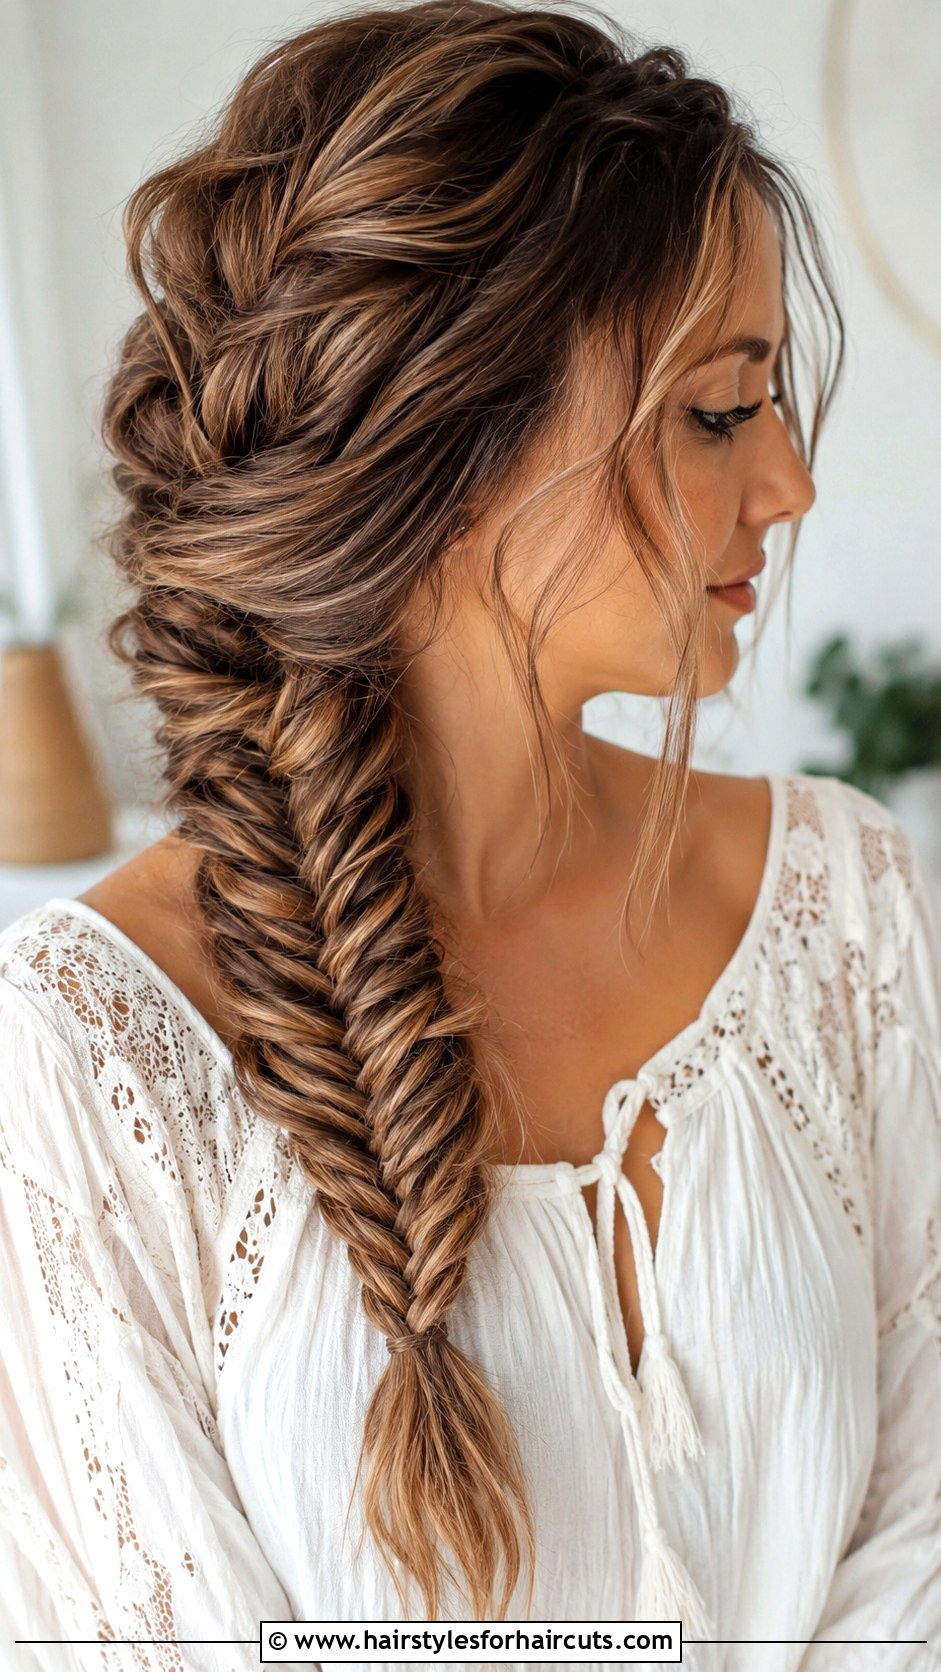
7. Fishtail Braid Hairstyle Tutorial
Have you ever admired those intricately woven braids that look impossible to recreate? The fishtail braid appears complicated but is surprisingly easy once you get the rhythm. Gather your hair to one side and split it into two equal sections, rather than three. Take a tiny piece from the outside of the left section and cross it over to the right. Then, take a small piece from the outside of the right section and cross it to the left. Keep alternating sides all the way down. The smaller the pieces you use, the more detailed the braid will look. Tie it off at the bottom and gently pull at the edges for a thicker appearance.
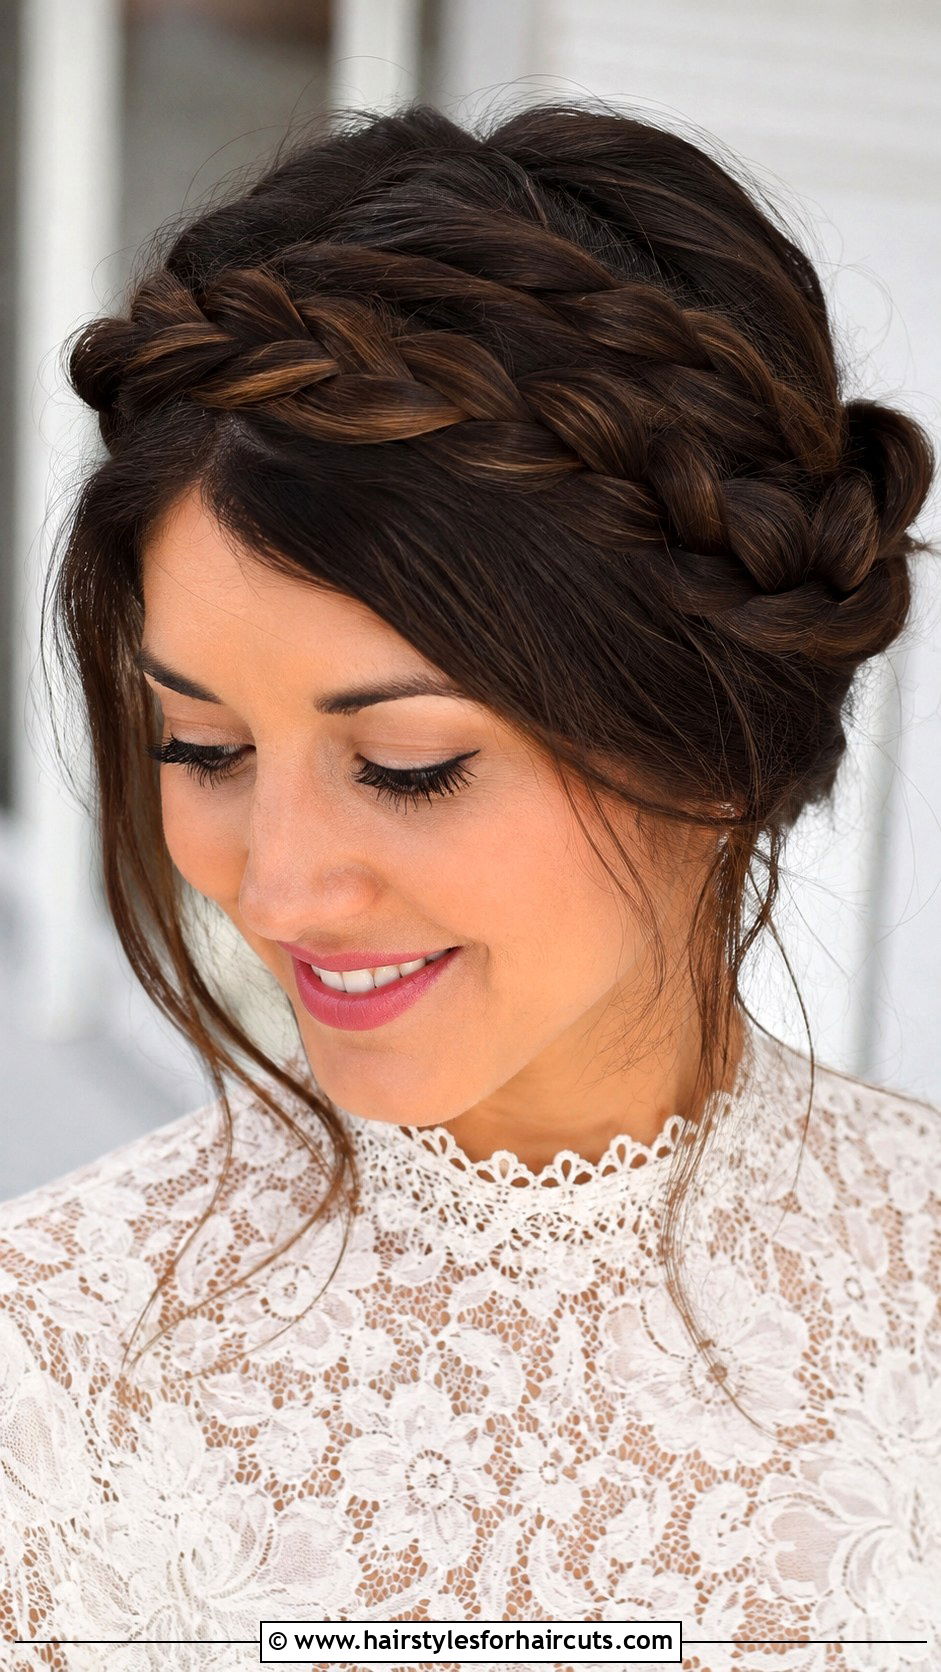
8. Braided Crown Hairstyle Tutorial
Dreaming of a romantic, ethereal look that makes you feel like royalty? The braided crown wraps beautifully around your head for a stunning visual effect. Start by parting your hair down the back and creating two low pigtails. Braid each pigtail into a standard three-strand braid and secure the ends. Take the right braid and drape it over the top of your head like a headband. Pin it securely along the way. Now, take the left braid and wrap it behind the right one, crossing over the top as well. Tuck the ends under each other to hide them. This gorgeous style is perfect for special events or a dreamy everyday look.
9. Waterfall Braid Hairstyle Tutorial
Want to add a touch of magic to loose, flowing hair without a complicated updo? The waterfall braid creates a stunning cascading effect that looks incredibly elegant. Begin a French braid at the front of your hair, near your part. When you cross the top section over the middle, let it drop down and pick up a new section of hair from behind it to replace it. This dropping technique creates the waterfall illusion. Continue this process around the back of your head until you reach the opposite side. Secure the end with a bobby pin or a small clear elastic. The remaining hair flows beautifully through the dropped sections effortlessly.
10. Flat Iron Curls Hairstyle Tutorial

Tired of using a bulky curling iron that takes forever to heat up and style? Flat iron curls offer a faster, more modern alternative with beautiful, bouncy results. Clamp a small section of hair between the plates near the root. Turn the iron half a turn away from your face and slowly glide it down the hair shaft. The slower you move, the tighter the curl will be. Once you finish all sections, run your fingers through the curls to break them up into soft waves. This technique creates a relaxed, beachy vibe that lasts all day. It is a quick method for transforming straight hair into something spectacular.
11. Dutch Braid Hairstyle Tutorial
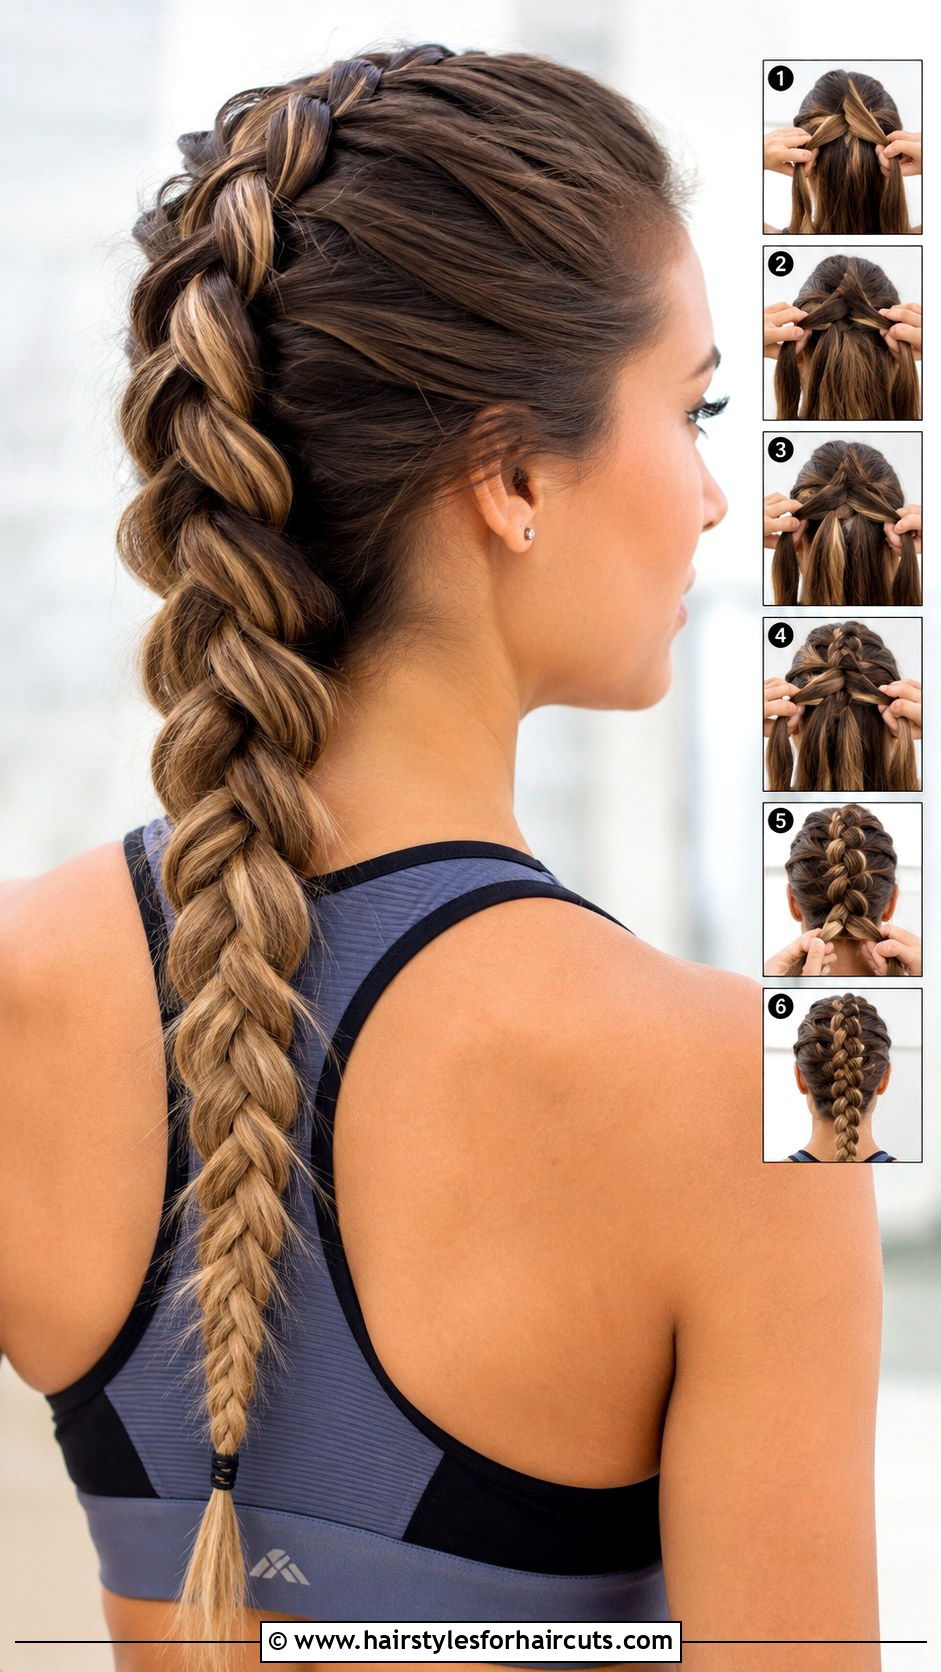
Looking for a braid that pops out and creates amazing dimension against your head? The Dutch braid is essentially a reverse French braid that sits on top of the hair. Start with a section at the top of your head and divide it into three parts. Instead of crossing the outer sections over the middle, cross them under the middle. Add hair from the sides as you work your way down. Crossing under is what pushes the braid outward, giving it that cool 3D effect. Once you reach the nape, finish with a standard braid. This bold style is fantastic for workouts, running errands, or making a stylish statement.
12. Twisted Updo Hairstyle Tutorial
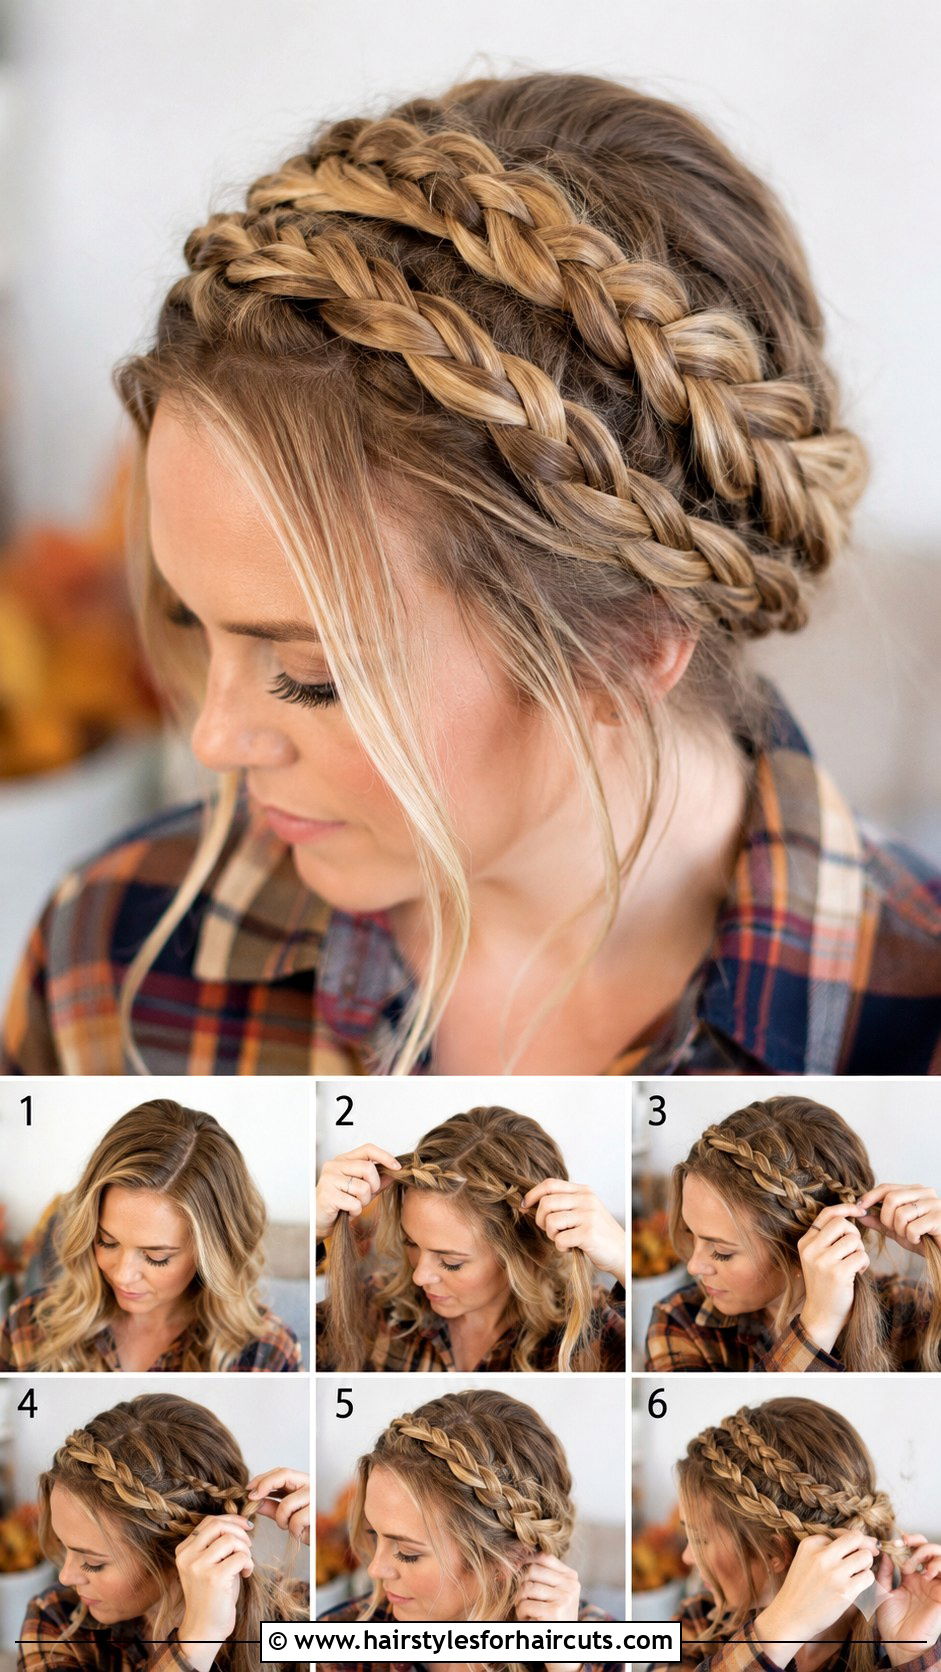
Need an elegant updo that takes barely any effort but looks totally professional? The twisted updo is your answer for those rushed mornings. Gather your hair into a low ponytail at the nape of your neck, but do not pull it all the way through the elastic on the last loop. This creates a small looped bun. Take the remaining loose ends and twist them around the elastic. Pin the twisted sections securely into place. Pull a few pieces out around your face for a soft, lived-in feel. This style is incredibly forgiving and looks much harder to create than it actually is. You will look polished and put together in minutes.
13. Low Chignon Hairstyle Tutorial

Searching for a timeless, sophisticated look that works beautifully for formal events or professional meetings? The low chignon is the epitome of classic elegance. Start by smoothing your hair back into a low ponytail at the nape of your neck. Twist the entire ponytail until it begins to coil naturally around itself. Wrap the twisted hair around the base of the ponytail to form a neat knot. Tuck the ends underneath and secure the entire shape with bobby pins. You can keep it tight and sleek for a strict dress code, or pull out a few strands for a softer approach. It always looks incredibly refined and graceful.
14. Milkmaid Braid Hairstyle Tutorial

Ever wanted a cute, rustic look that keeps all your hair completely off your neck? The milkmaid braid is charming and perfect for warmer weather. Part your hair down the middle and tie it into two low pigtails. Braid each pigtail down to the ends and secure with small elastics. Take the right braid and flip it up and over the top of your head. Pin it flat against your scalp. Do the exact same thing with the left braid, crossing it over the right. Tuck the ends under each other to hide them. This creates a lovely crown effect that is both practical and stylish for any casual outing.
15. Rope Braid Ponytail Hairstyle Tutorial

Want to upgrade a boring ponytail with some clever texture that catches the eye? The rope braid ponytail adds a twisted, nautical vibe to your everyday look. Pull your hair back into a secure ponytail at your preferred height. Divide the ponytail into two equal sections. Twist both sections to the right until they are tight. Then, wrap the two twisted sections around each other to the left. This counter-twisting motion prevents them from unraveling. Secure the bottom with an elastic. The resulting rope effect looks intricate but requires only two simple twisting steps. It is a fantastic way to add visual interest to a simple and quick hairstyle.
16. Retro Waves Hairstyle Tutorial

Longing for the glamorous, polished waves reminiscent of old Hollywood movie stars? Retro waves bring unmatched vintage sophistication to any modern wardrobe. Start by curling your entire head with a medium-barrel curling iron, curling all sections in the same direction. Allow the curls to cool completely in place before touching them. Once cooled, brush out the curls thoroughly with a paddle brush. This transforms the distinct curls into smooth, connected waves. Use a side part and pin one side behind your ear for that classic silhouette. Add a shine spray to enhance the luxurious feel. You will feel like an absolute star with this stunning, elegant hairstyle.
17. Sleek Top Knot Hairstyle Tutorial

Do you need a reliable, high-fashion look that takes literally seconds to accomplish? The sleek top knot is a minimalist dream that always looks intentional and chic. Brush your hair up towards the very top of your crown. Secure it into a tight, high ponytail with a firm elastic. Twist the ponytail tightly and wrap it around the base of the elastic. As you wrap, the hair will naturally form a neat, circular knot. Secure the bun with another elastic or a few bobby pins. Smooth down any flyaways with a little edge control or hairspray. This style highlights your facial features beautifully and stays out of your way all day.
18. Boho Braids Hairstyle Tutorial

Craving a relaxed, carefree aesthetic that feels effortless and totally modern? Boho braids incorporate loose, messy textures that give you an instantly cool vibe. Begin by taking random, small sections of hair and creating loose, messy braids. You can do three or four braids scattered around your head. Leave the rest of your hair down and slightly wavy. Gently pull apart the braids to make them look thicker and more undone. You can even leave a few tendrils out around your face. This style is all about imperfection and personal expression. It looks amazing with flowy dresses or casual denim outfits for a fun weekend adventure.
19. Double Dutch Braids Hairstyle Tutorial

Need a sporty, secure style that will survive a tough workout or a windy day? Double Dutch braids are the ultimate blend of function and fierce style. Part your hair straight down the middle from your forehead to the nape, tying one side out of the way. On the other side, create a Dutch braid along the scalp, adding hair as you go. Secure the end with an elastic. Repeat the exact same process on the opposite side. Pull at the edges of the braids gently to make them look thicker and more voluminous. This bold look keeps your hair perfectly contained while looking incredibly trendy and athletic.
20. Twisted Half Up Hairstyle Tutorial

Want a simple alternative to braiding that still looks incredibly pretty and put together? The twisted half up style is delicate, quick, and gives a lovely framing effect. Take two small sections of hair from either side of your face. Twist each section away from your face until you reach the back of your head. Join the two twisted sections at the back with a small elastic or a decorative clip. Gently pull at the twists to loosen them and create a softer, more voluminous shape. You can leave the rest of your hair straight, wavy, or curly. This sweet style is perfect for everyday wear and takes almost no time.
21. Voluminous Curls Hairstyle Tutorial

Looking to turn heads with big, bouncy, beautiful hair that commands attention? Voluminous curls are all about building body and movement. Start by prepping your hair with a volumizing mousse at the roots. Blow dry your hair upside down to maximize lift at the crown. Use a large-barrel curling iron and take big sections of hair. Curl away from your face and pin each curl up to cool. Once all the curls are cool, remove the pins and brush them out with a wide-tooth comb. Tease the roots slightly for extra height and finish with a strong hold spray. You will have gorgeous, glamorous volume that lasts all day.
22. Easy Side Braid Hairstyle Tutorial
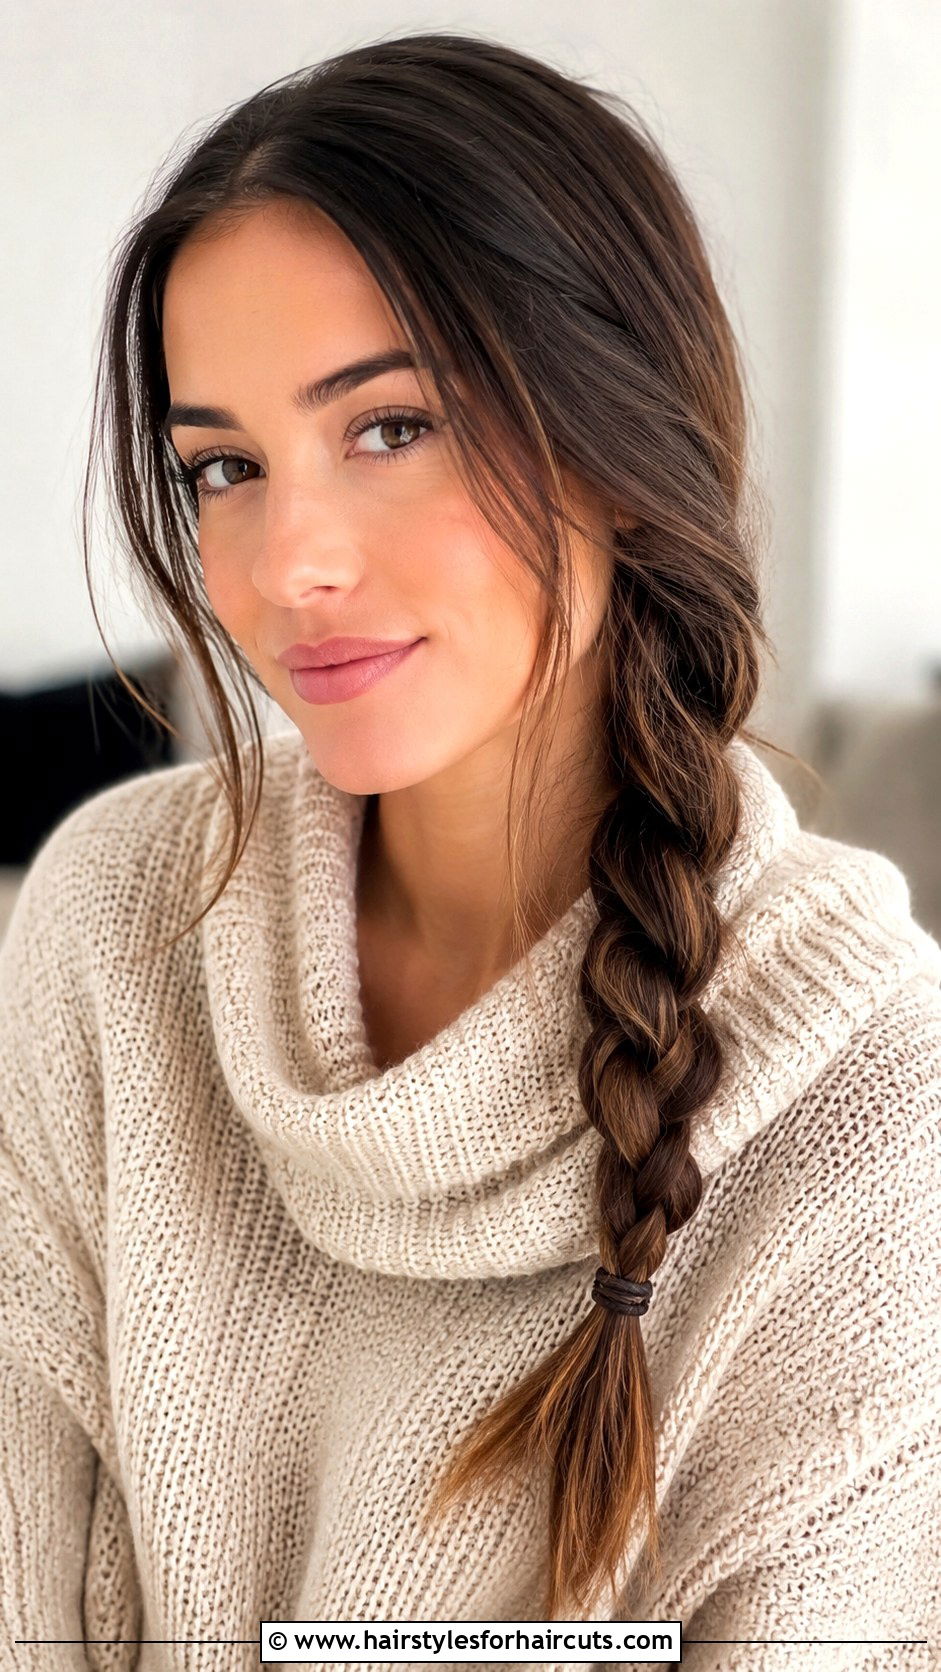
Are you running late but still want a cute hairstyle that looks intentional? The easy side braid is a lifesaver for busy mornings. Simply sweep all of your hair over to one shoulder. Divide the hair into three equal sections and do a standard braid all the way down. Tie it off at the bottom with an elastic. To make it look more stylish, gently tug at the loops of the braid to make it appear thicker and more relaxed. This asymmetrical look draws attention to your neck and collarbone. It is incredibly fast, low maintenance, and works wonderfully on hair that has not been washed recently.
23. Claw Clip Updo Hairstyle Tutorial

Tired of using a million bobby pins that just fall out halfway through the day? The claw clip updo is trendy, practical, and relies on one simple accessory. Twist your hair up as if you are putting it into a French twist. Hold the twisted roll of hair against the back of your head. Open a large claw clip and clamp it over the twisted section, securing it to the rest of your hair. Let the ends spill out of the top of the clip for a casual, modern finish. This style is incredibly fast and looks effortlessly chic. It is perfect for second-day hair and adds instant style to any outfit.
24. Bow Braid Hairstyle Tutorial

Want a whimsical, eye-catching detail that makes a standard braid look completely extraordinary? The bow braid adds cute little loops of hair that look like tiny ribbons along your plait. Start a regular three-strand braid. After one or two stitches, take a small piece of hair from the top strand and loop it through the braid using a hairpin to pull it halfway through. This creates a small bow shape. Continue braiding a bit and repeat the looping process down the braid. Pin the loops if they feel loose. This adorable detail elevates a simple braid into something magical and fun. It is a wonderful conversation starter at any casual event.
25. Pulled Through Ponytail Hairstyle Tutorial

Searching for a way to make a basic ponytail look incredibly thick and multidimensional? The pulled through ponytail gives the illusion of massive volume with a clever trick. Secure your hair into a high ponytail. Take a small section from the underside of the ponytail and tie it off with a clear elastic a few inches down. Create a gap in the middle of that small section and flip the rest of the ponytail up and through the hole. Repeat this process with another small section further down, flipping the remaining hair through again. This creates a stunning, layered effect. It looks like a complex updo but requires zero braiding skills.
Conclusion:
Mastering new looks does not have to be an overwhelming or frustrating process. With this detailed 25 hairstyles tutorial, you now have a variety of simple, trendy, and versatile options right at your fingertips. From messy buns and sleek ponytails to intricate braids and voluminous curls, there is a perfect style for every mood, occasion, and hair type. The key to success is practicing the steps and being patient with yourself as you learn the techniques. Keep bobby pins, clear elastics, and your favorite styling products nearby to make the process smoother. You can easily transform your daily hair routine and say goodbye to boring hair forever. Enjoy experimenting with these gorgeous looks and embrace your beautiful, renewed confidence!

Leave a Reply