
Learning how to do a fade haircut can save you time and money while unlocking a highly sought-after barbering skill. A flawless fade blends hair seamlessly from short to long, creating a clean and modern look that never goes out of style. Whether you are a beginner picking up clippers for the first time or someone wanting to refine your technique, mastering the fade requires patience, the right tools, and a solid understanding of guard sizes. This comprehensive guide breaks down twenty-five distinct fade variations, offering step-by-step instructions for each. From low tapers to burst fades, you will learn exactly how to execute every cut with confidence and precision. Get ready to elevate your grooming game and achieve professional-quality results right at home.

1. How To Do A Low Fade Haircut

Ever wondered where to start with the most subtle gradient? The low fade begins right above the ears and curves around the nape, leaving plenty of length on the sides. To achieve this look, start with a longer guard, like a number three, and cut the lower section. Then, switch to a number one to remove the bulk near the neckline. Use an open guard on your trimmers to blend the transition line between the two lengths. Move the clippers upward with a flicking motion, gradually reducing the hair. The key is patience; take your time blending so no harsh lines remain. This cut perfectly balances a professional appearance with a sharp, modern edge that works for any everyday setting.
2. How To Do A Mid Fade Haircut

Looking for a balanced cut that offers dramatic contrast without going too high? The mid fade hits right at the temples, creating a smooth transition that catches the eye. Begin by establishing your guideline around the head at the midway point. Cut everything below this line with a shorter guard, such as a number one. Next, use a number two guard to cut the area just above your guideline, overlapping slightly. To blend the two sections, use a scooping motion with your clippers, moving them sideways across the transition zone. Keep the clippers moving continuously to avoid leaving steps in the hair. This classic medium gradient provides a clean frame for almost any top style, from textured crops to slick backs.
3. How To Do A High Fade Haircut

Want a striking, high-contrast finish that emphasizes the top? The high fade starts near the crown, leaving only a small patch of longer hair on top. First, outline your high guideline carefully, ensuring it sits symmetrically around the head. Remove the bulk below this line with a zero guard. Then, use a number one or two guard to taper the area just below the top length. Blending a high fade requires careful upward strokes, using the corner of the clipper to gently fade the harsh line away. Because the transition area is tighter, you must work slowly to ensure a smooth gradient. This bold style is perfect for a sharp, clean look that highlights your top hairstyle with maximum impact.
4. How To Do A Skin Fade Haircut

Craving that ultra-sharp, down-to-the-skin aesthetic? The skin fade, also known as a zero fade, takes the hair down to the bare skin at the bottom. Start by attaching a zero guard or removing the guard entirely to shave the lowest section clean. Then, use a half-guard or a one-guard to create your next transition line slightly above the bare section. The real skill lies in blending the skin seamlessly into the half-inch length above it. Use clipper-over-comb techniques or adjustable levers to fine-tune the gradient. Keep the blade flat against the head and use controlled, upward flicking motions. Achieving this seamless blend takes practice, but the result is a remarkably crisp, fresh finish that looks incredibly professional and stays looking sharp for days.
5. How To Do A Taper Fade Haircut
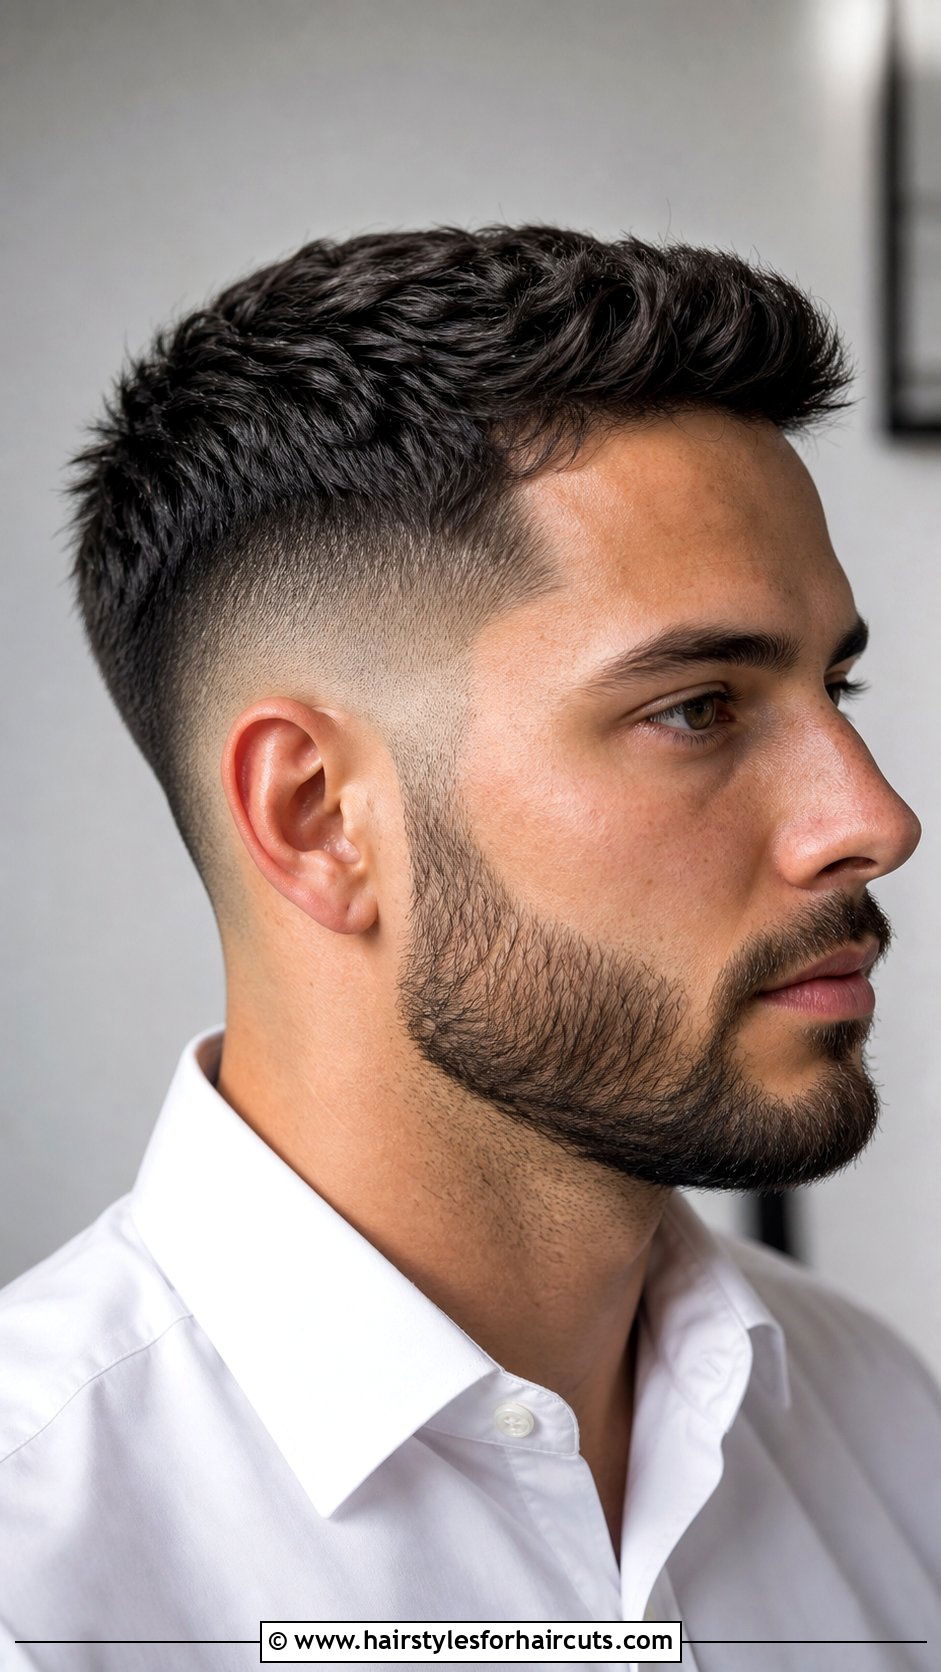
Need a versatile cut that looks great in the office and on the weekend? The taper fade gradually shortens the hair at the temples and neckline while keeping some natural length at the sides. Unlike a full fade, a taper does not cut the hair all the way down to the skin. Begin by trimming the nape and sideburns with a short guard. Leave the area above the ears slightly longer. Use a longer guard to blend the shorter hair into the longer sides, employing a smooth, sweeping motion. The taper fade is all about subtlety and neatness. It maintains a natural hairline while providing a clean, tailored appearance. This conservative yet stylish approach works flawlessly with business attire or casual everyday wear.
6. How To Do A Drop Fade Haircut

Have you seen those fades that curve elegantly behind the ear? The drop fade lowers in the back, creating an arc shape that follows the natural curvature of the head. To cut this, establish your initial fade line at the temples, then allow it to dip significantly toward the nape. Use your clippers to follow this curved path, removing bulk below the arc. When blending, you must rotate your wrist smoothly to maintain the curved transition line rather than a straight horizontal one. The descending curve creates a visually interesting silhouette that adds character to the cut. It pairs exceptionally well with longer top styles, as the dip draws attention to the volume and texture on top. It is a true standout.
7. How To Do A Burst Fade Haircut
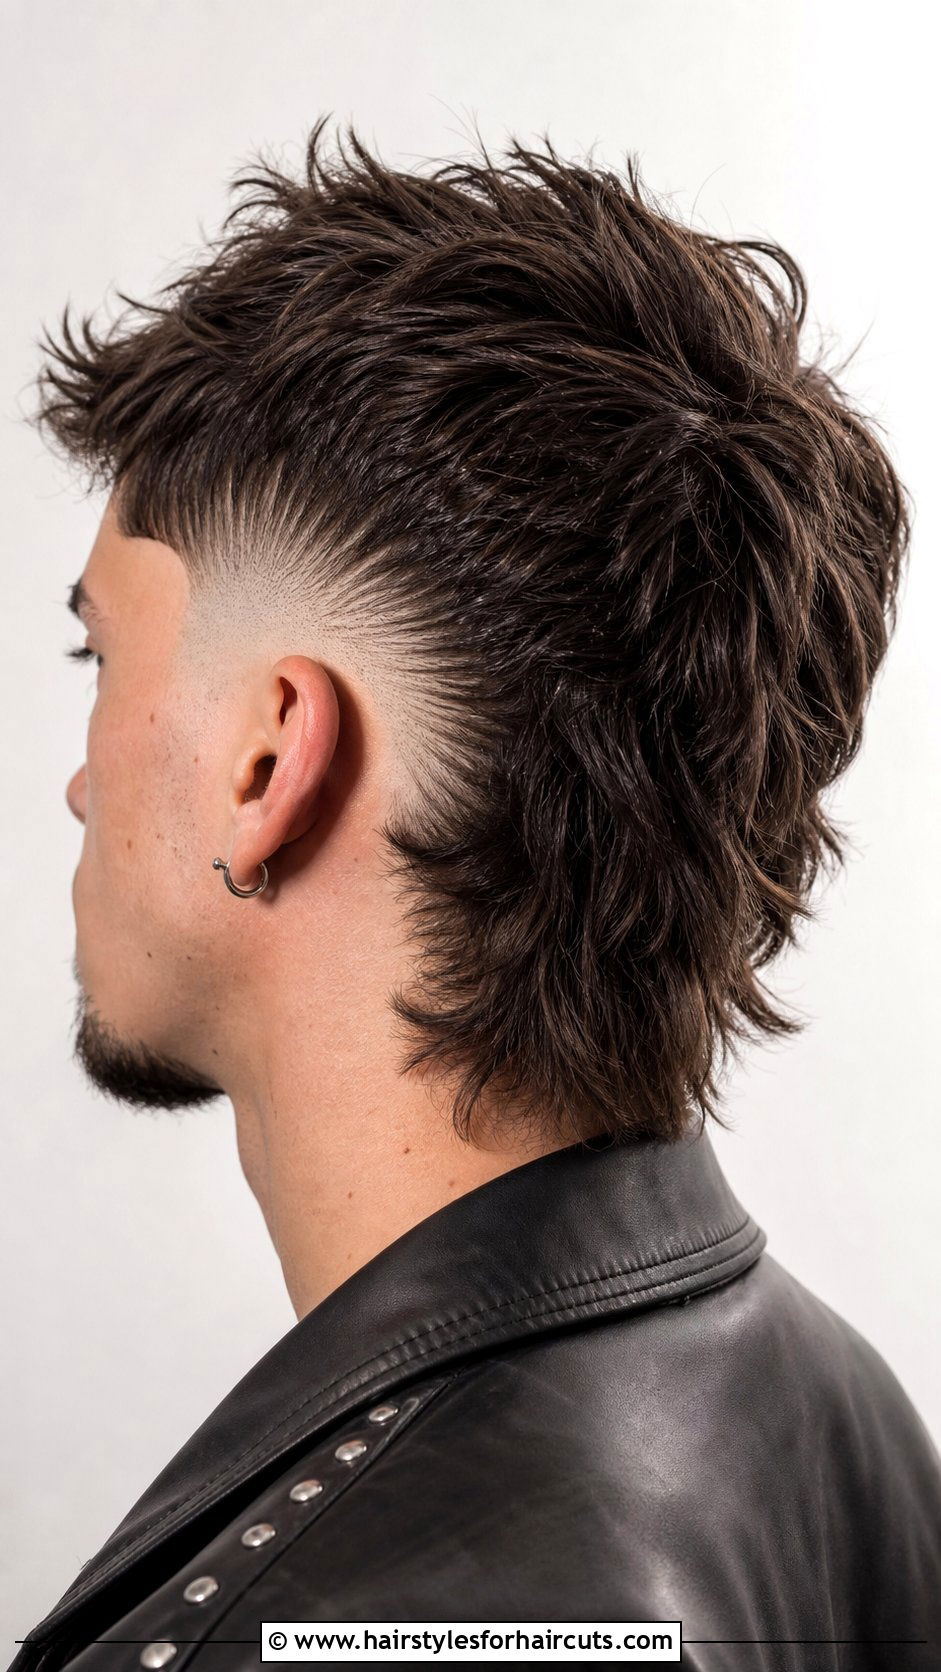
Looking for a burst of creativity in your haircut? The burst fade features a semi-circular fade that sits behind the ear, leaving length at the nape. This creates a sunburst or radial effect. Start by outlining the semi-circle behind the ear, making sure the bottom edge curves nicely. Shave the area inside the outline down to the skin or a very short length. Next, blend the outer edge of the burst into the surrounding hair using a flicking upward motion. The hair at the nape remains long and connects to the top, making it a popular choice for mohawk or mullet styles. Mastering the burst fade requires careful angle control, but it delivers a uniquely edgy look that separates you from the crowd.
8. How To Do A Temp Fade Haircut

Want to sharpen up your facial features instantly? The temp fade, or temple fade, focuses strictly on the edges of the hairline at the temples. It creates a crisp, defined line that highlights the face. Begin by outlining the hairline with trimmers, establishing a sharp boundary. Next, use a short guard to fade the hair just below this newly drawn hairline. Blend this short section into the longer hair above it using careful, upward strokes. The rest of the head remains at a uniform length, making the temples the focal point. This highly precise technique requires a steady hand and an eye for symmetry. A sharp temp fade offers a clean, fresh finish that instantly elevates any standard haircut into a polished, sharp look.
9. How To Do A Bald Fade Haircut

Seeking maximum contrast and a striking silhouette? The bald fade eliminates all hair at the sides and back, transitioning smoothly into the longer hair on top. Begin by using foil shavers or zero-guard clippers to remove hair completely at the lowest sections. Create a distinct guideline where the longer hair begins. From there, use progressively longer guards to blend the transition zone. The key to a flawless bald fade is eliminating any visible lines between the shaved skin and the hair. You will need to use careful, overlapping strokes and perhaps a clipper-over-comb method for the trickiest areas. The bald fade delivers a rugged yet refined appearance, offering a strong, masculine foundation for pompadours, quiffs, or textured fringes. It demands attention and respect.
10. How To Do A Shadow Fade Haircut
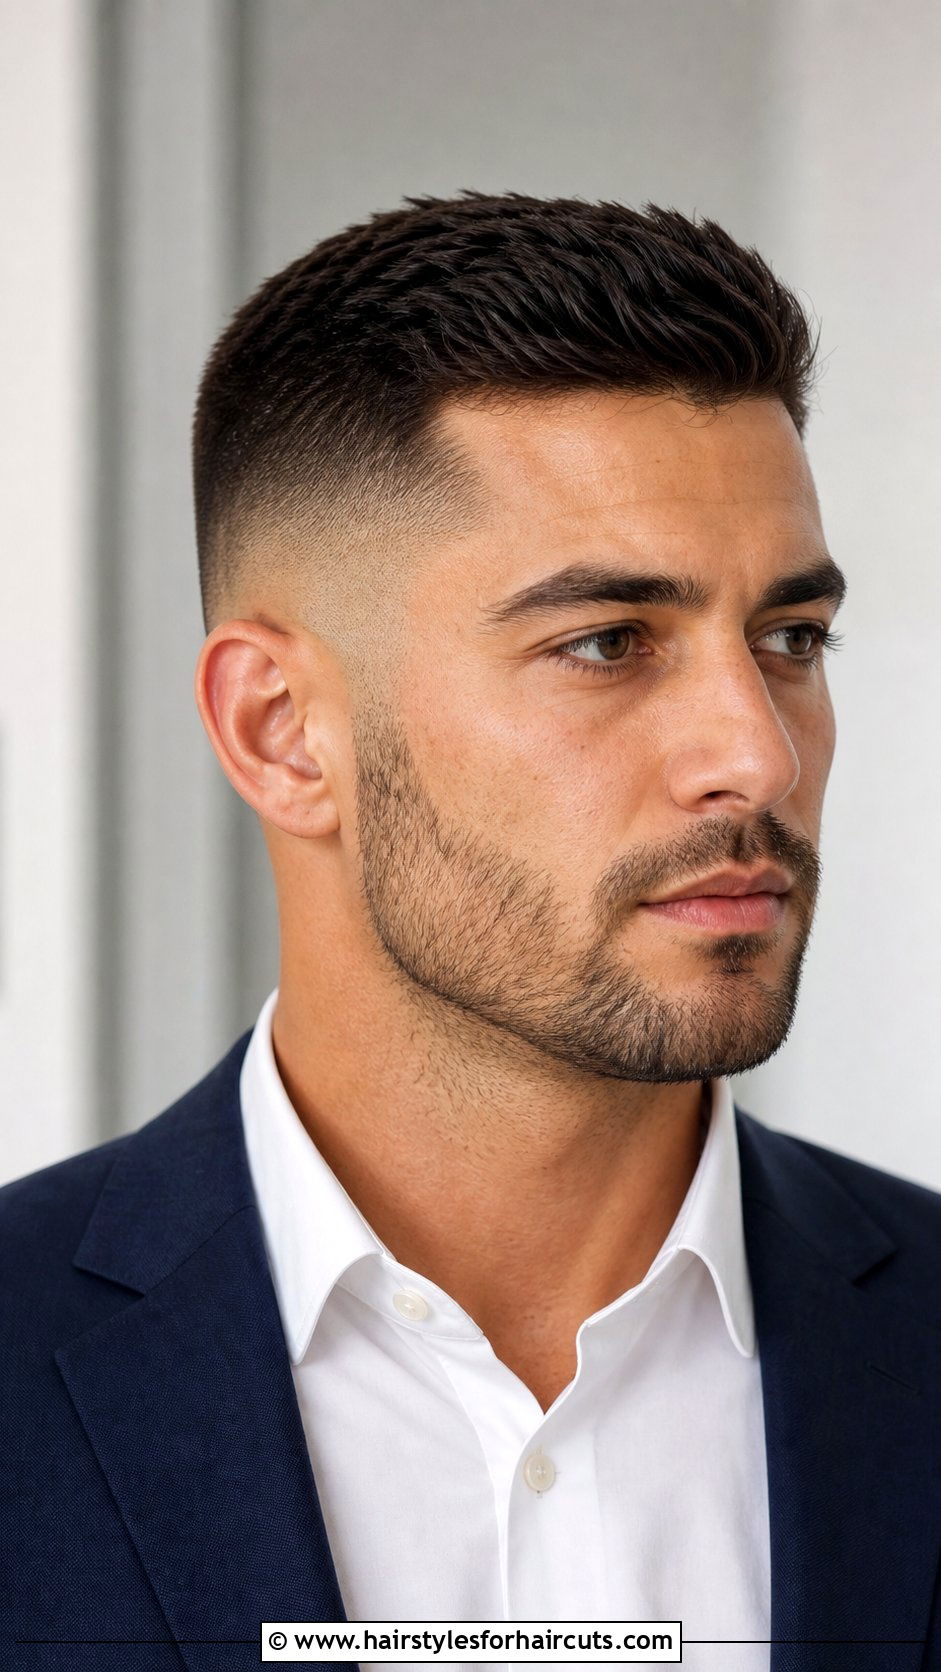
Prefer a subtle, shadowy transition rather than a severe skin shave? The shadow fade keeps a slight hint of hair at the bottom, creating a soft, dark gradient that looks incredibly refined. Start by cutting the lower sections with a number one guard, moving carefully around the head. Then, use a number two or three guard to cut the middle section, leaving the top untouched. The blending process is crucial here. You must use a scooping or rocking motion to seamlessly merge the different lengths without leaving harsh demarcation lines. Because you are not going down to the skin, the gradient resembles a shadow, offering a gentler contrast. This technique works wonders for professional settings or anyone wanting a smooth, low-maintenance finish with character.
11. How To Do A Fade With Beard

Want a seamless flow from your haircut down to your facial hair? Blending a fade into a beard creates a unified, polished look that frames the jawline perfectly. First, establish the lowest part of your fade, which should match the length of your beard at the sideburns. Use the same guard you used for the top of your beard to blend into the bottom of your fade. Trim the fade upward using increasing guard sizes, ensuring a smooth transition from the cheekbones up to the temples. If the hair on top is significantly longer, continue the gradient carefully. This connected approach creates harmony between your haircut and facial hair, ensuring nothing looks disjointed. It is a sophisticated, masculine style that highlights facial structure beautifully.
12. How To Do A Buzz Cut Fade
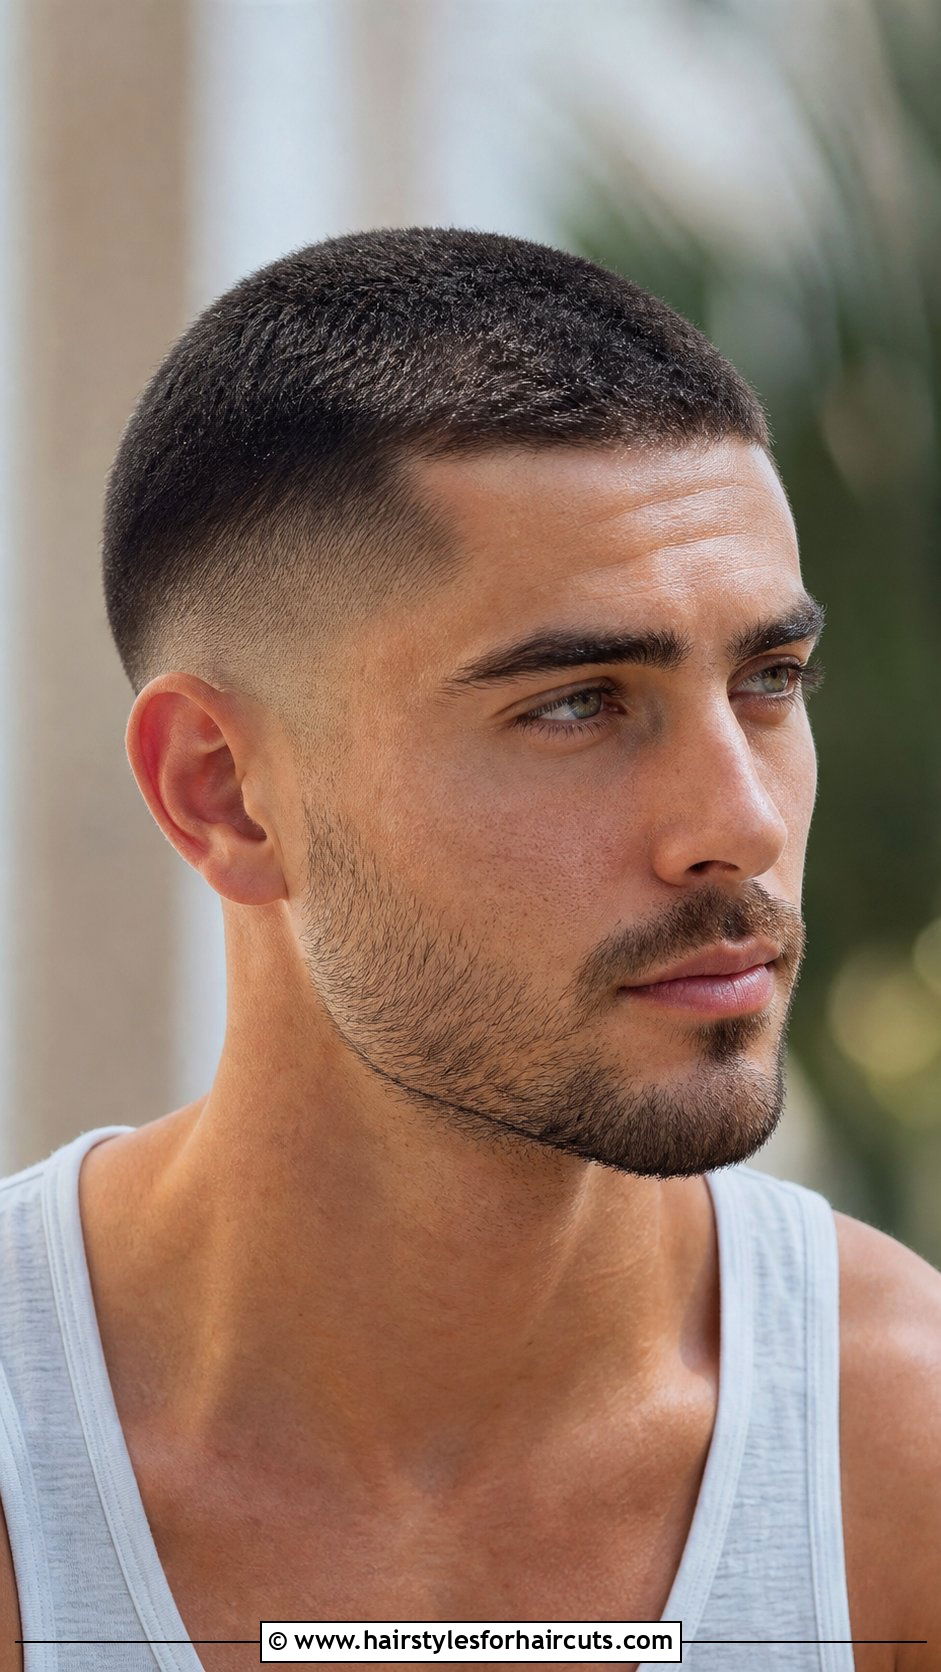
Looking for ultimate simplicity with a modern twist? The buzz cut fade combines the effortless maintenance of a buzz cut with the sharp aesthetics of a faded side. Start by choosing your desired length for the top, typically a number three or four guard, and buzz the entire top section evenly. Next, select a shorter guard, like a one, and cut the lower sides and back. Use a number two guard to create a middle transition zone. Blend these sections together by moving the clippers horizontally along the transition line with a flicking wrist motion. This creates a clean taper that adds dimension to an otherwise uniform buzz cut. It is a highly practical, no-fuss style that remains incredibly popular for its clean appearance.
13. How To Do A Crop Top Fade

Fancy a textured, forward-leaning fringe? The crop top fade pairs a short, textured top pushed forward with a clean fade on the sides and back. Begin by establishing your fade on the sides, whether you prefer a low, mid, or high gradient. Blend the fade smoothly into the longer top section. On top, use a scissor-over-comb technique or texturizing shears to cut the hair to about two inches, point-cutting the front fringe to create a choppy, textured edge. Apply a matte styling product and push the hair forward and slightly to the side. The contrast between the sharp, clean fade and the rugged, textured top creates a highly contemporary look that is taking the grooming world by storm right now.
14. How To Do A Comb Over Fade

Desire a classic, suave look with undeniable sharpness? The comb over fade takes a timeless hairstyle and adds a modern, high-contrast edge. Start by executing a clean mid or high fade on the sides and back, ensuring a seamless blend. Leave the top section about three to four inches long, keeping the front slightly longer to facilitate the sweep. Once the fade is blended, focus on the top. Use scissors to remove bulk and add subtle texture so the hair falls naturally. To style, apply a medium-hold pomade, sweeping the hair to one side. The tight fade on the sides amplifies the volume and sleekness of the comb over. It is a highly versatile look that transitions effortlessly from the boardroom to evening events.
15. How To Do A Quiff Fade
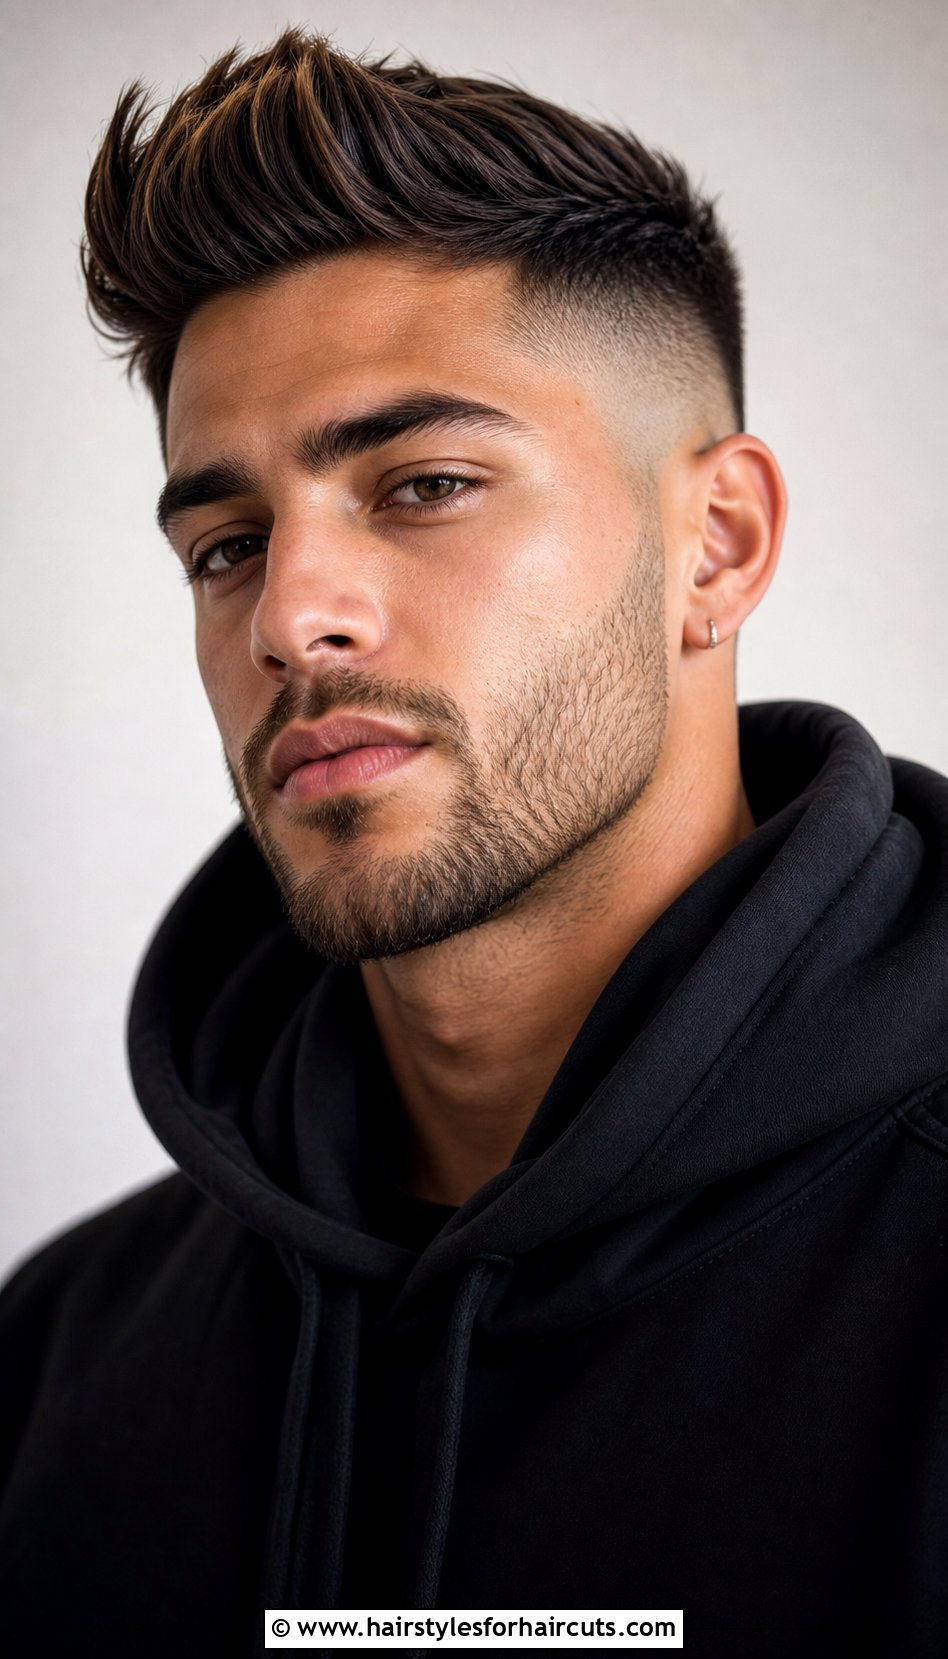
Want a voluminous, statement-making front? The quiff fade combines a sweeping, voluminous front with tightly faded sides for a striking silhouette. Begin by cutting the fade on the sides and back; a high fade works exceptionally well here to maximize contrast. Leave the front section long, typically four to five inches, gradually tapering the length toward the crown. Use scissors to texture the ends, removing weight so the quiff lifts easily. The gradient from the faded sides into the longer top must be smooth to keep the focus on the front volume. Style it by blow-drying the hair upward and backward using a round brush, then finish with a strong-hold product. The result is a bold, confident look that commands attention wherever you go.
16. How To Do A Pompadour Fade
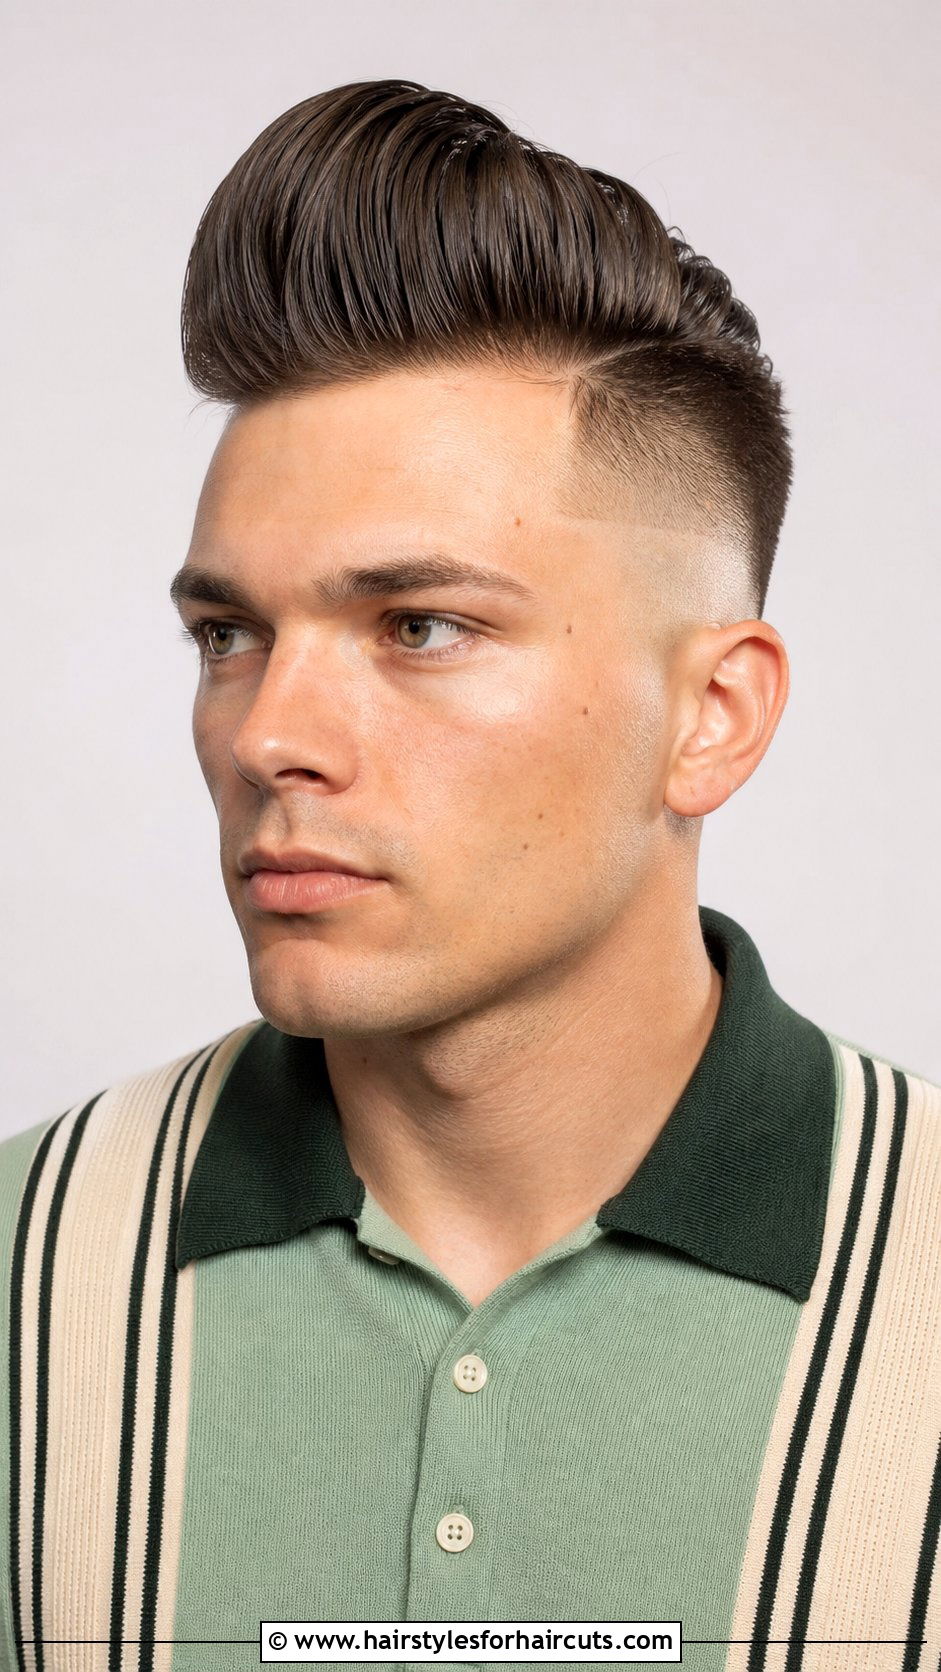
Craving retro charm blended with contemporary sharpness? The pompadour fade features a large, swept-back volume at the front, paired with clean, tight sides. Start by creating a skin or high fade on the sides and back, ensuring the transition into the longer top is virtually invisible. The top should be longest at the front, about four to six inches, and gradually shorter toward the crown. Use thinning shears sparingly to manage bulk without sacrificing height. When styling, blow-dry the front upward and back, using a vent brush to build maximum height. Apply a high-shine, high-hold pomade to secure the shape. The dramatic shift from the bare sides to the towering top makes this cut an absolute showstopper with serious vintage appeal.
17. How To Do A Mullet Fade
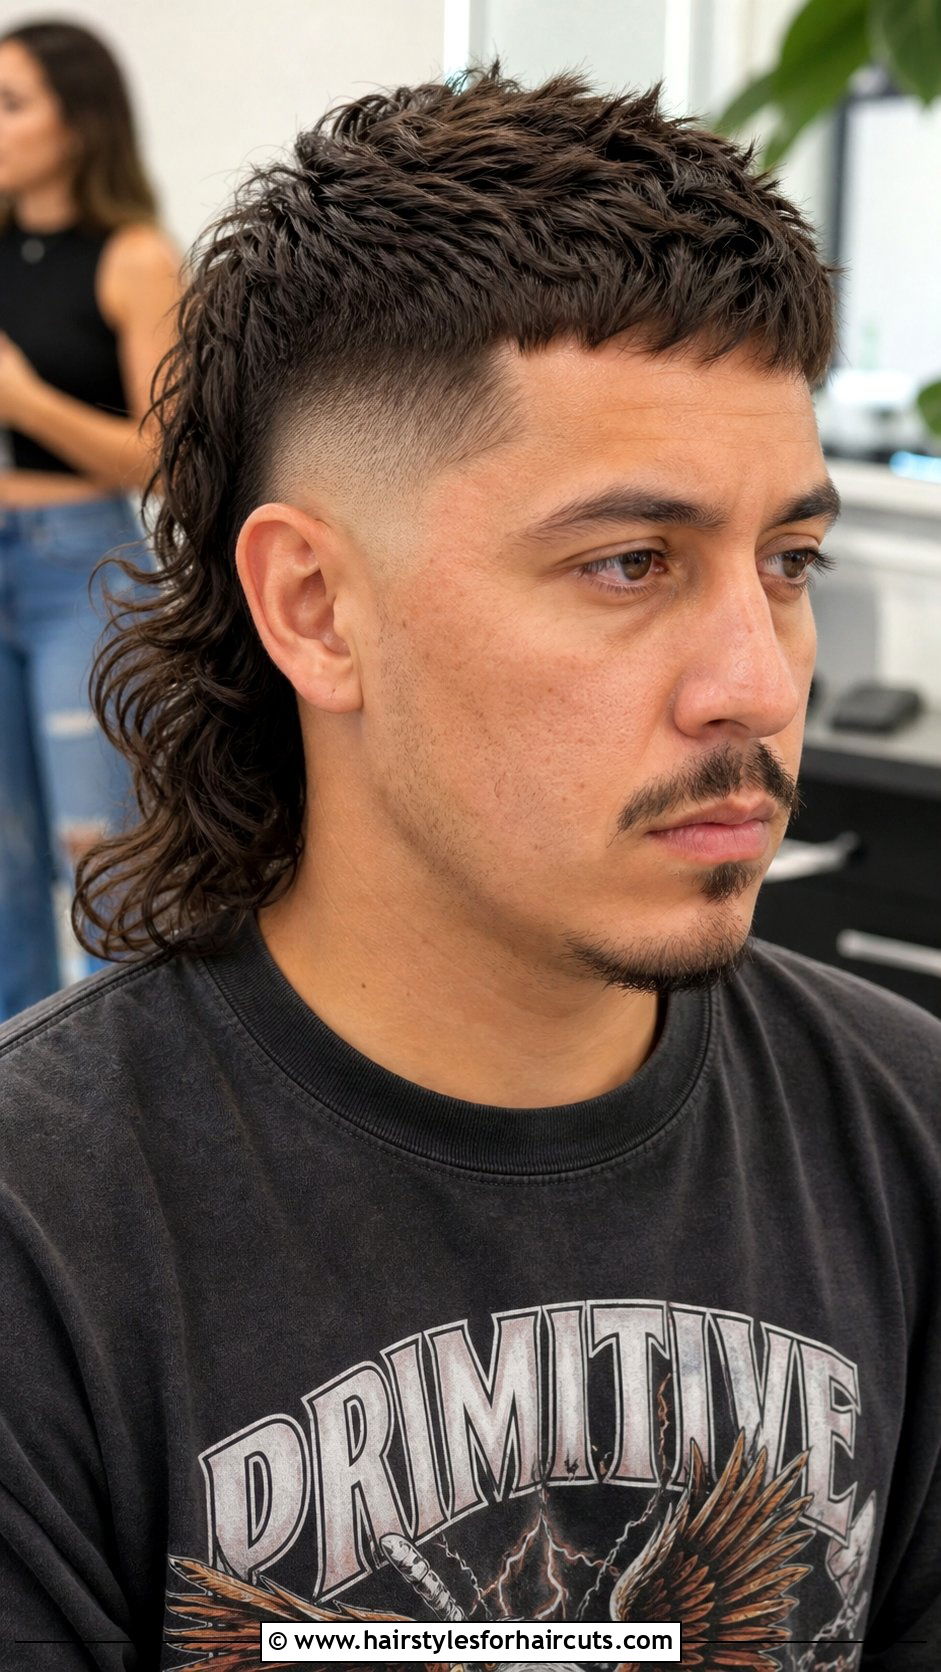
Ready to embrace business in the front and party in the back? The mullet fade modernizes a classic silhouette by adding a sharp fade to the sides. Leave the top and the back long, ensuring the back extends down the neck. Cut a mid or low fade on the sides, making sure to blend the top into the fade without taking off too much length. The contrast between the neatly faded sides and the lengthy back creates a highly distinct, edgy profile. You can enhance the look further by adding a burst fade behind the ears. Style the front with a matte paste for texture and let the back flow naturally. This cut is surprisingly versatile and oozes a cool, rebellious attitude.
18. How To Do A Curly Hair Fade

Struggling to manage thick curls on the sides? The curly hair fade removes the bulk where you do not want it, leaving curls on top to shine. When fading curly hair, always cut the hair dry, as curls shrink significantly when wet. Establish your fade line and use guards to create the gradient, working carefully around the natural growth patterns. Because curls are thick, you may need to use a comb to lift the curls away from the fade line while blending. The transition from the smooth, faded sides to the textured, curly top looks incredibly sharp. Use a curl cream on top to define your ringlets, and the crisp fade will naturally highlight the density and shape of your curls.
19. How To Do A Wavy Hair Fade
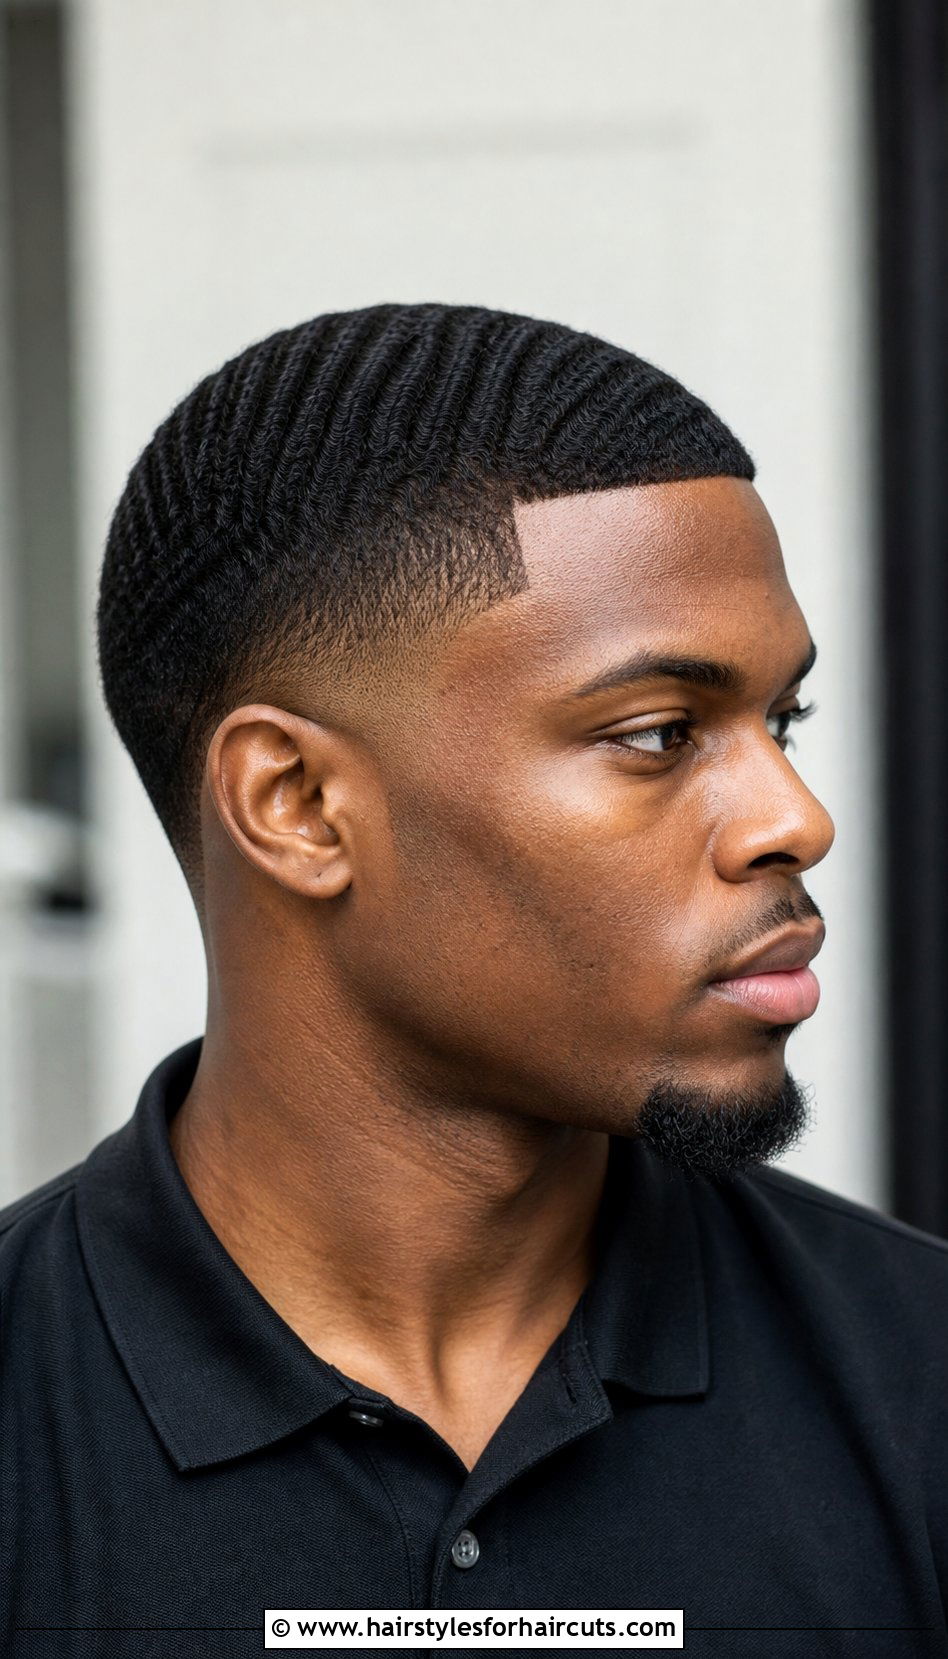
Want to maintain your waves while cleaning up the sides? The wavy hair fade keeps the iconic 360 waves intact while adding a fresh, tapered look. The most critical rule is never to cut the wave pattern too short; typically, a number one or two guard on top maintains the ripples. For the sides and back, execute a low or mid fade, ensuring you blend smoothly into the wave line. Use trimmers to sharpen the wave line slightly if needed, creating a distinct boundary. Keep the fade tight and the lines crisp. The contrast between the perfectly laid waves and the smooth fade is visually stunning. Brush your waves regularly and use a durag to maintain the pattern and keep the fade looking fresh.
20. How To Do A Fade With Designs
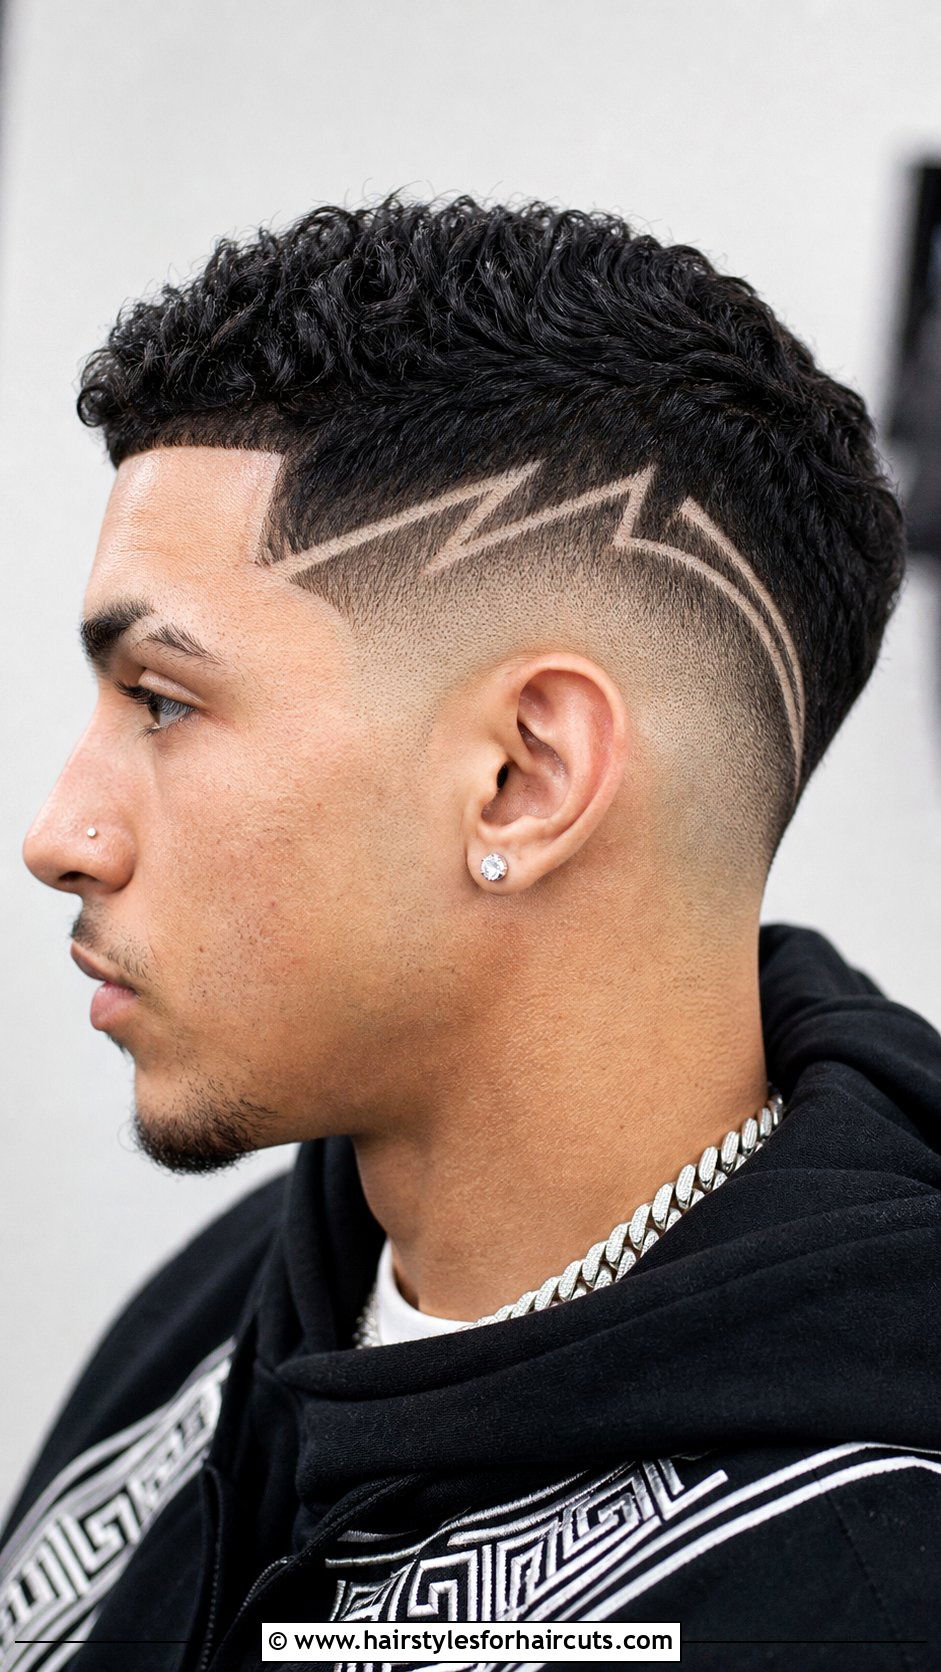
Feeling artistic and want to express yourself? A fade with designs incorporates line work or patterns shaved into the faded section. First, complete your fade, whether it is low, mid, or high. A skin fade provides the best canvas for designs because the contrast makes the lines pop. Once the fade is blended, use detail trimmers to carve out your desired pattern. Popular choices include geometric lines, tribal patterns, or simple parts. Move the trimmer slowly and confidently; any mistakes will be highly visible. You can use a straight razor for extremely fine details. This personalized touch transforms a standard haircut into a walking piece of art. It is a fantastic way to showcase individuality, but be prepared for regular touch-ups to maintain the clarity.
21. How To Do A Caesar Fade
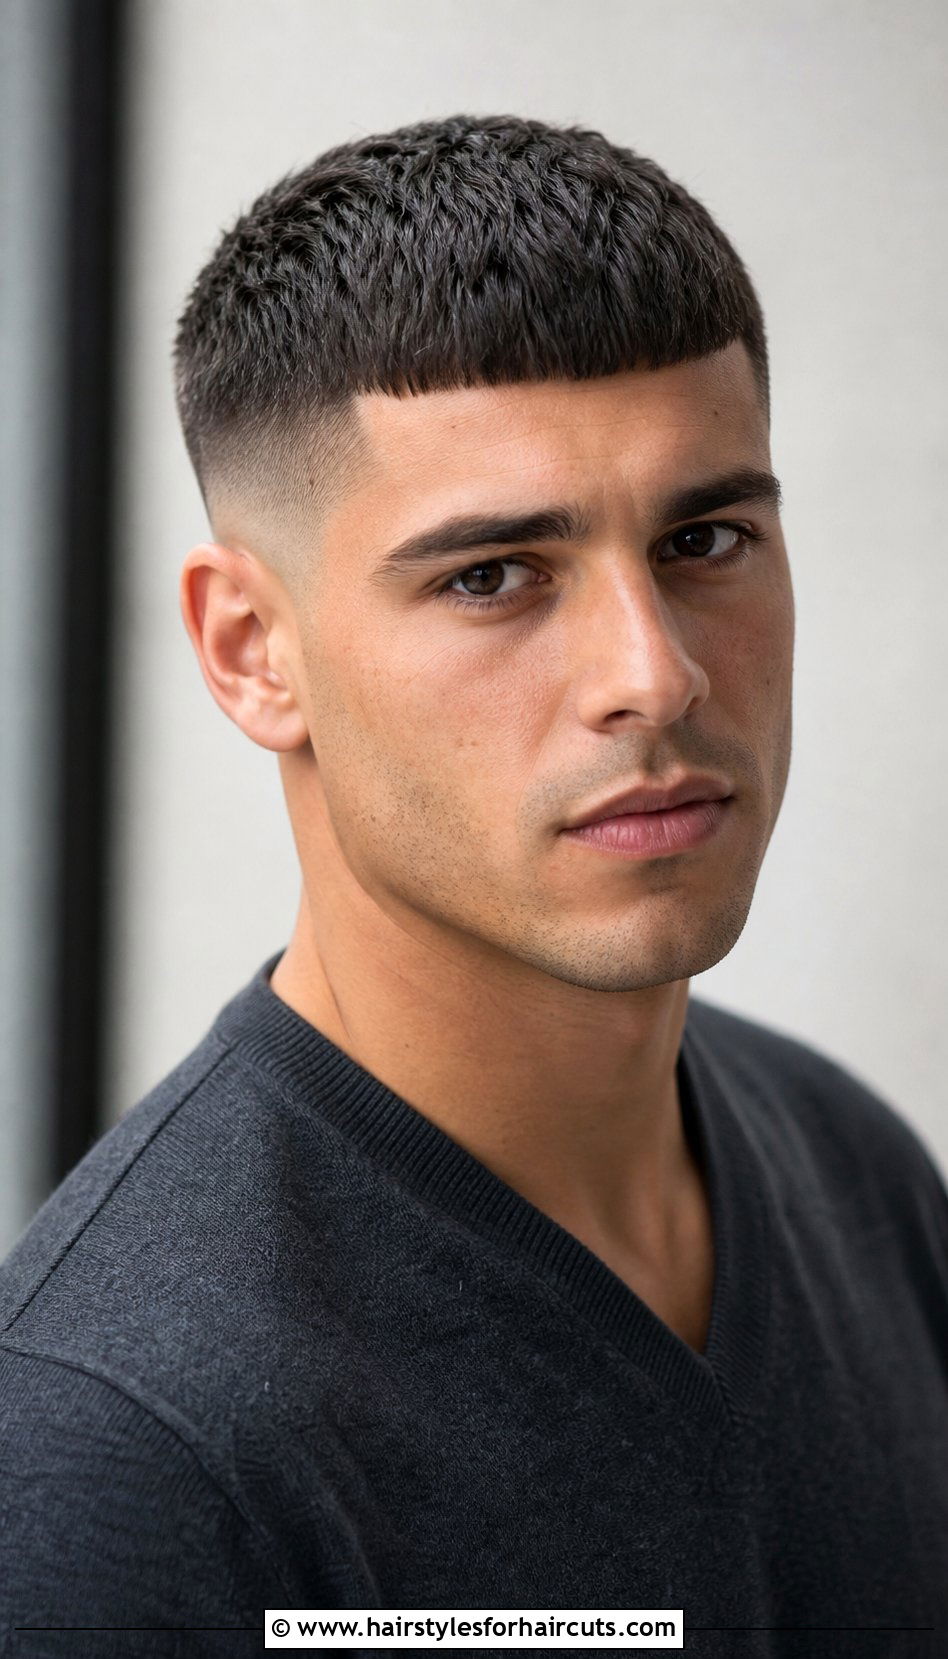
Looking for a short, horizontal fringe with clean sides? The Caesar fade updates the ancient Roman look with modern clipper work. The top is cut to a uniform short length, usually one to two inches, and the front fringe is chopped straight across. Start by executing a crisp fade on the sides and back. A mid fade usually complements the short top best, providing enough contrast without looking top-heavy. Blend the faded sides seamlessly into the uniform top length. When cutting the fringe, cut straight across the forehead using scissors. Style the top forward, ensuring the fringe lies flat and neat. The combination of the sharp, forward-swept front and the tight faded sides offers a highly structured, clean-cut appearance that never goes out of style.
22. How To Do An Ivy League Fade

Want a preppy, polished look that remains effortlessly stylish? The Ivy League fade refines the classic crew cut with a tighter, tapered side. The top is left slightly longer at the front, about two inches, tapering shorter toward the crown. Begin by creating a low or mid fade on the sides, keeping the gradient subtle and professional. Blend the sides smoothly into the longer top, using scissors for the final blending to ensure a natural transition. The front should be textured so it can be swept to the side casually. Apply a small amount of styling cream for a natural finish with low shine. This cut projects intelligence, cleanliness, and sophistication, making it perfect for university students or professionals seeking a refined, low-maintenance style.
23. How To Do A Faux Hawk Fade
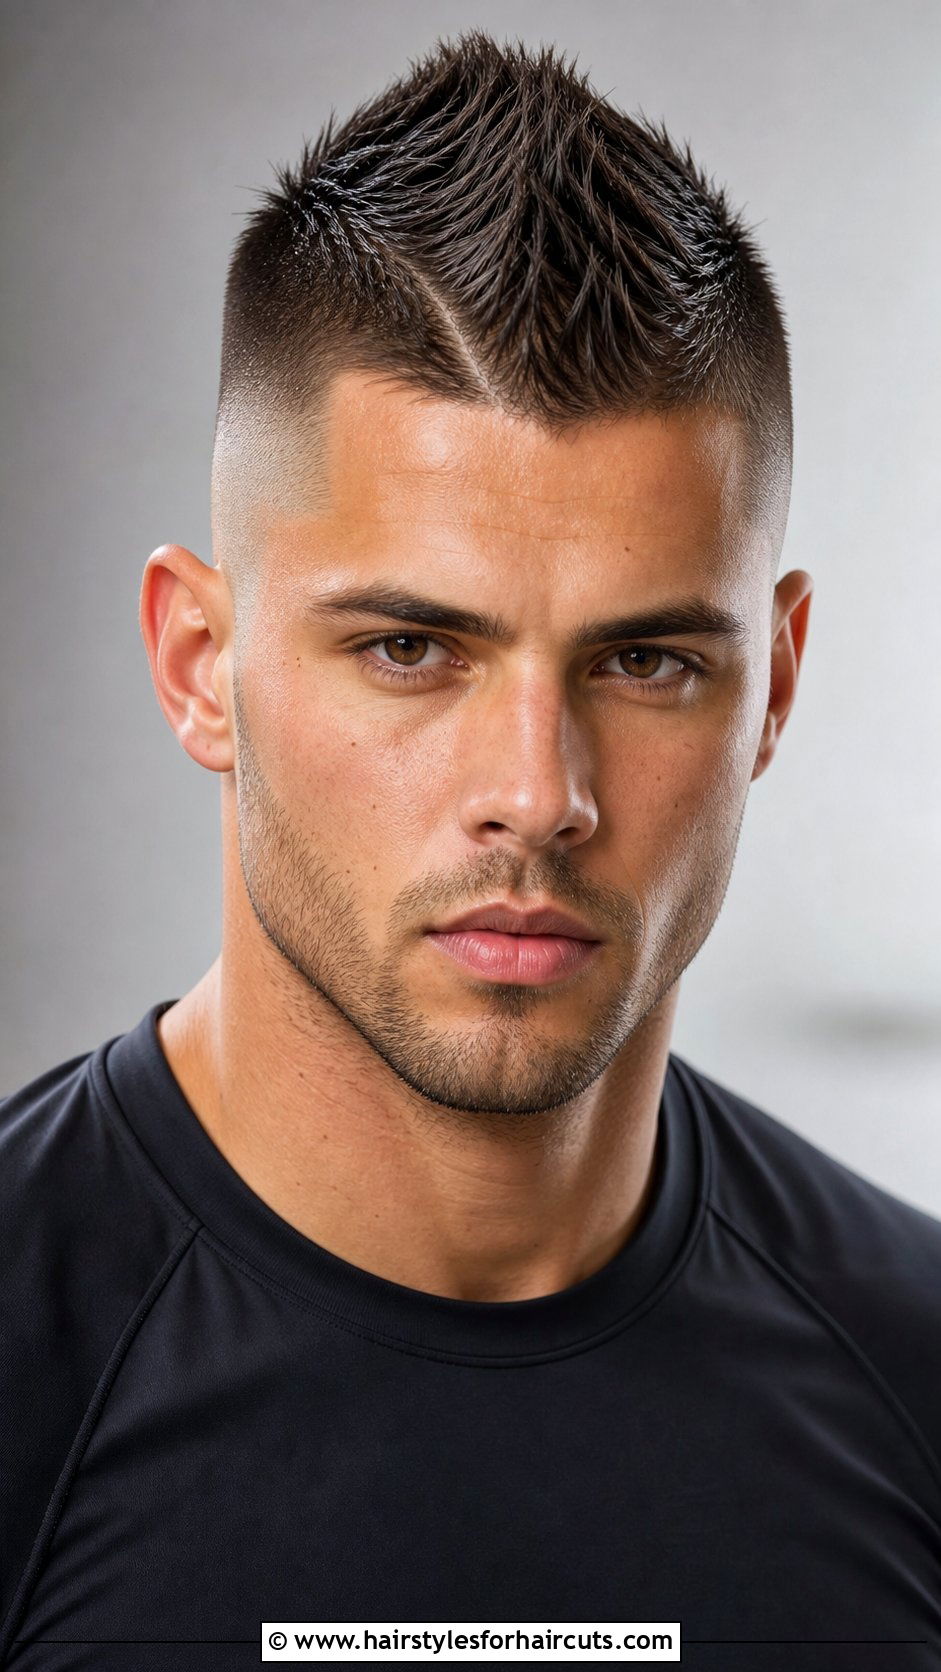
Want the rebellious spirit of a mohawk without the commitment? The faux hawk fade features a strip of longer hair down the center, fading tightly on the sides. Cut a high fade on the sides, bringing the hair down to the skin for maximum contrast. Leave the center strip about two to three inches long, tapering the length slightly as you reach the back of the crown. Blend the edges of the center strip into the fade carefully, creating a smooth slope rather than a harsh wall of hair. Style the center strip upward and slightly pinch it together using a strong-hold gel or clay. The resulting peak gives an edgy, athletic vibe that stands out in a crowd but remains acceptable in most settings.
24. How To Do A Crew Cut Fade

Seeking a low-maintenance, masculine classic? The crew cut fade shortens the top gradually from the front to the crown, paired with faded sides. The front hairline is left about one and a half inches long, tapering down to half an inch at the crown. Execute a mid or high fade on the sides and back, ensuring a smooth blend where the top meets the sides. The key to a great crew cut is the smooth taper on top; use scissors and a comb to ensure the transition from front to back is seamless. This style requires virtually no styling product—just a quick towel dry and you are out the door. The tight fade elevates the traditional crew cut, giving it a sharper, more modern edge.
25. How To Do A Blowout Fade

Want hair that looks like it is perpetually catching the wind? The blowout fade, famous for its voluminous, spiky top, relies heavily on a clean fade to look its best. The sides are faded tight—usually a skin or high fade—to contrast the massive volume on top. The top is cut to about two to three inches uniformly, with texturizing shears used to thin the ends slightly, allowing it to stand up. Blend the sides into the top meticulously to support the upward styling. Apply a strong-hold mousse or gel, and use a blow dryer to lift the hair straight up, creating that signature explosive look. The sharp faded sides make the top appear even thicker and more dramatic, guaranteeing a head-turning, high-energy aesthetic.
Conclusion:
Mastering how to do a fade haircut requires dedication, the right tools, and an understanding of blending techniques. As you have seen, the fade is incredibly versatile, adapting seamlessly to countless lengths, textures, and top styles. Whether you prefer the subtle elegance of a low taper or the striking impact of a high skin fade, the core principles of guard transitions and upward flicking motions remain the same. Practice on willing friends or mannequin heads before tackling your own head. Remember to keep your blades clean and oiled for the smoothest cut possible. With patience and consistent effort, you can achieve professional, barbershop-quality fades right in your own bathroom, keeping your look fresh, sharp, and impeccably styled every single day.

Leave a Reply