
Tackling your own hair at home can feel daunting, but it is also incredibly empowering. Searching for 25 diy short haircuts is the perfect first step to finding a style you can confidently achieve yourself. Whether you want a fresh choppy look, a sleek bob, or a carefree shag, doing it yourself saves money and lets you control the exact length and texture. You do not need to be a professional stylist to get great results. With the right shears, a few clips, and a bit of patience, you can transform your look right in your bathroom. This guide breaks down twenty-five unique, approachable short haircuts that are easy to execute at home, ensuring you end up with a salon-quality finish without ever leaving your house.

1. Diy Pixie Cut

Ready for a major change? A diy pixie cut is a bold, liberating choice that removes bulk and makes styling effortless. Start by sectioning your damp hair into a top, left, and right section. Begin at the back, cutting close to the nape using short, upward snips. Work your way to the crown, leaving the top longer for that classic pixie volume. Pull the side sections straight down and trim to the desired length, usually just below the ears. For the top, pull small sections straight up and cut vertically to create soft, piecey texture. Point cutting the ends prevents a harsh, blunt line. Keep checking your symmetry in the mirror frequently. This short, cropped look highlights your facial features beautifully and dries in minutes.
2. Diy Buzz Cut Women

Have you ever wondered how liberating a nearly shaved head feels? A diy buzz cut women style is the ultimate low-maintenance option. You only need a good quality hair clipper with guard attachments. Start with a longer guard, like a number four, to avoid cutting too short initially. Move the clippers slowly up the back of your head, against the hair growth. Continue over the sides and the top until the length is uniform. If you want a slightly longer top, switch to a higher guard for just the crown. Use a smaller guard or no guard to clean up the edges around the ears and the nape for a polished finish. This daring haircut looks incredibly striking and washes effortlessly.
3. Diy French Bob
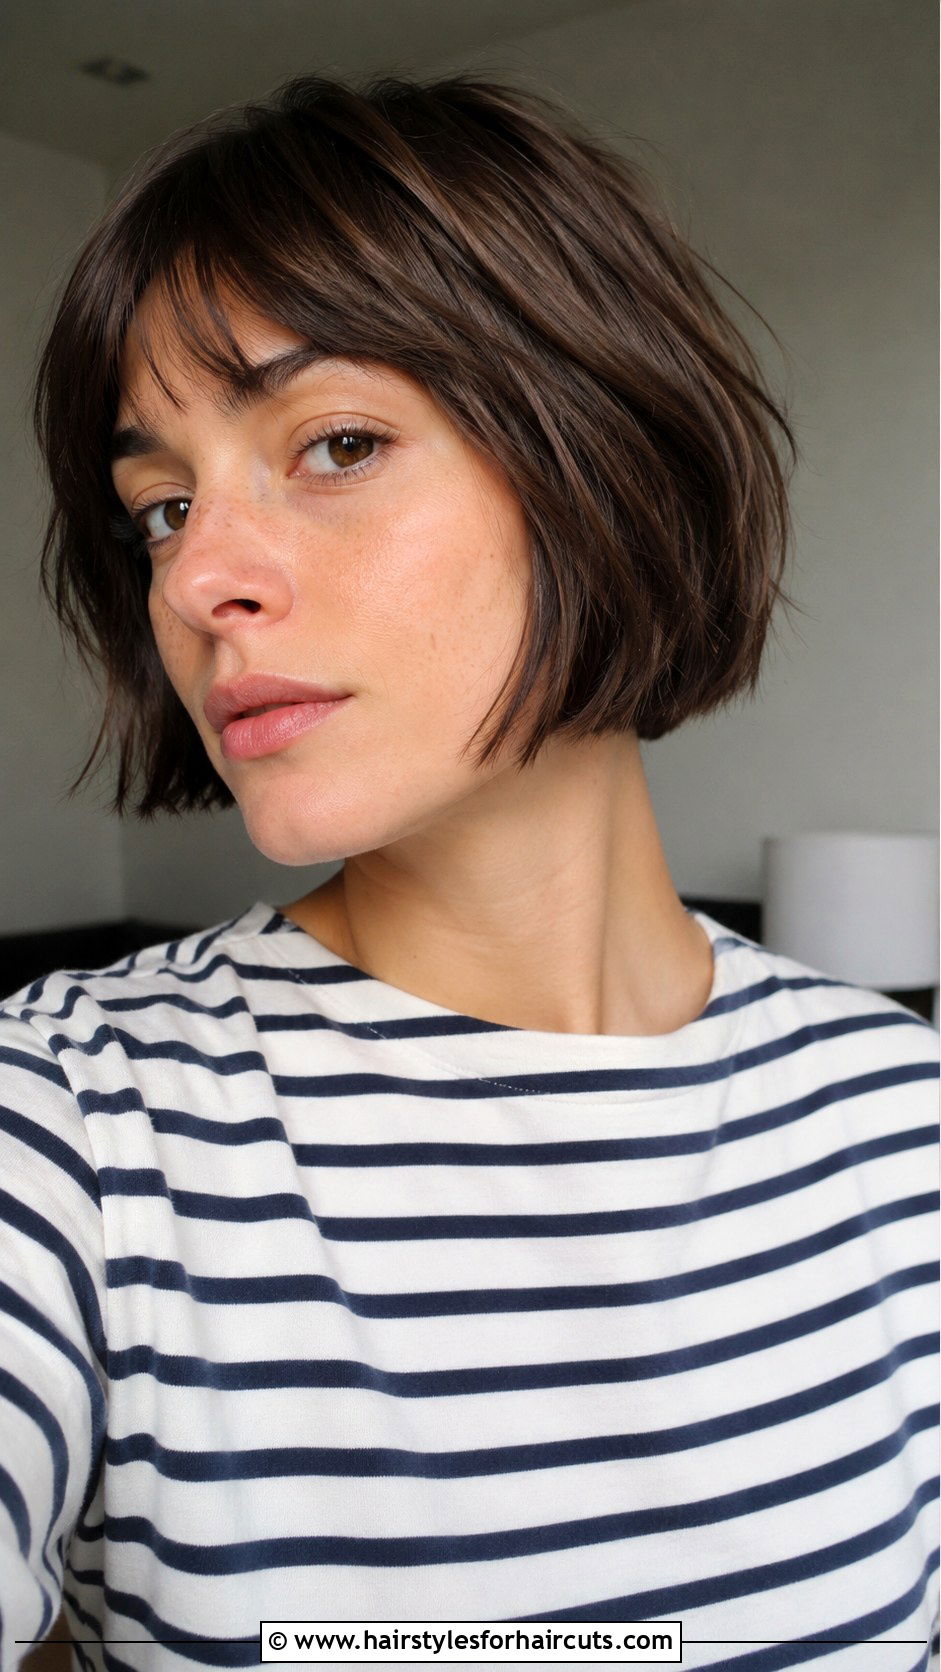
Craving that effortlessly chic Parisian aesthetic? The diy french bob is a timeless, jaw-length cut that frames the face perfectly. Start with completely dry, straight hair so you can see the exact length. Part your hair down the middle and bring both sides forward. Cut the front sections right at your jawline, angling slightly upward as you move toward the back. The back should be slightly shorter than the front to create a natural curve under your neck. Use point cutting on the ends to add that signature messy, lived-in texture rather than a sharp edge. This style works wonders for straight and wavy hair. It requires minimal styling, looking best with a natural air dry and a bit of texturizing spray.
4. Diy Blunt Bob
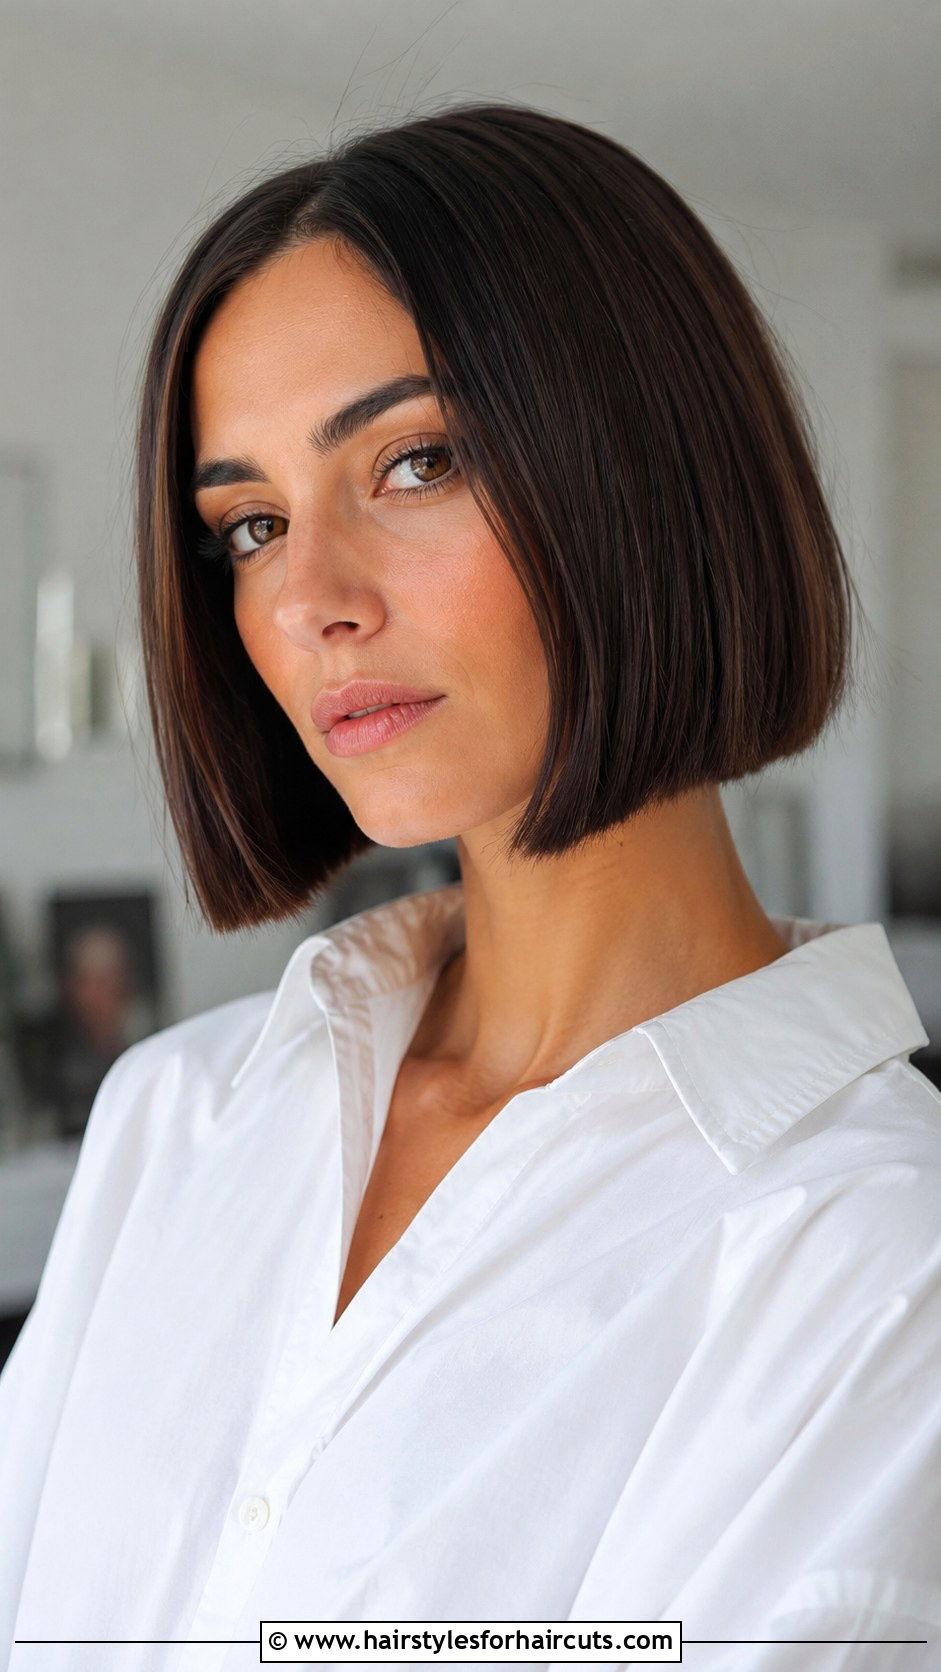
Looking for a sleek, clean line that looks professionally done? A diy blunt bob delivers a sharp, dramatic effect. Brush your clean, damp hair straight down. Create a clean center part and ensure both sides are perfectly even. Comb a thin section at the nape of your neck straight down and cut horizontally to your desired length, usually right at the chin. Use this bottom section as your guide. Pull down the next half-inch section of hair and cut to match the guide line. Repeat this process all the way around your head, always combing the hair down smoothly before snipping. Avoid layering. A blunt edge creates the illusion of thicker, denser hair. Flat iron the ends for a flawlessly smooth finish.
5. Diy Textured Crop
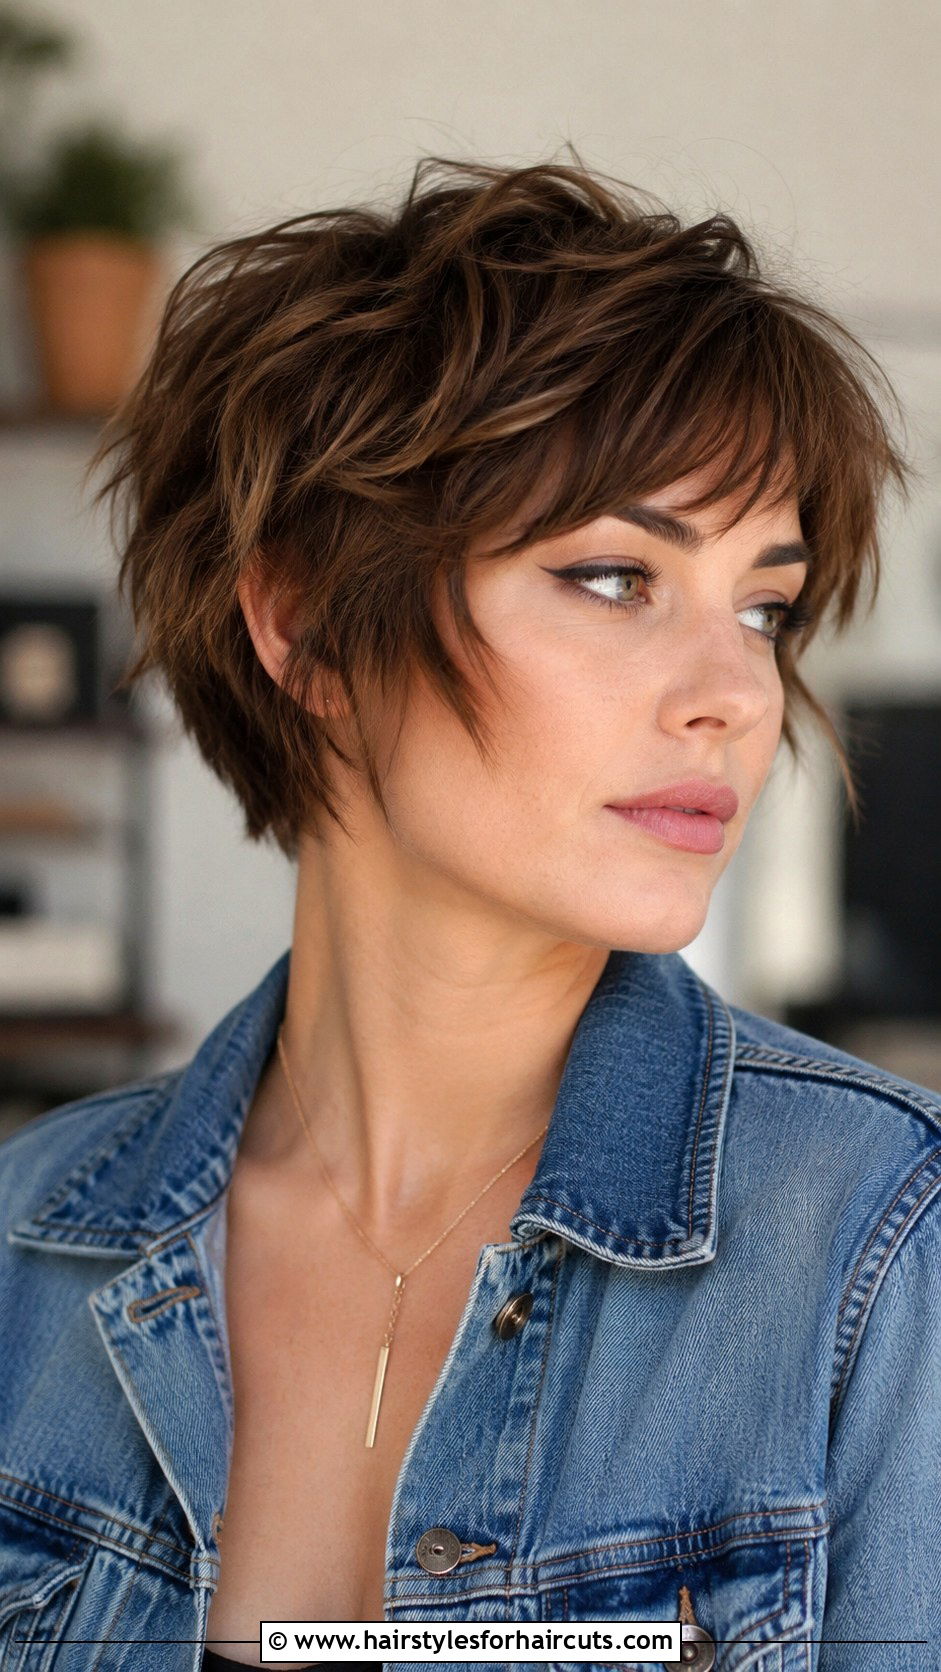
Want a playful, edgy vibe without the heavy maintenance? A diy textured crop relies on choppy layers to create volume and movement. Begin by cutting the perimeter to your desired short length, perhaps just above the ears. The secret to this look is vertical cutting. Lift small sections of the top hair straight up and snip into the ends vertically. This removes weight and creates a messy, feathery effect. Keep the sides and back relatively close to the head, leaving the crown longer. You can use thinning shears on the ends if your hair is very thick. This effortlessly cool style looks amazing with a bit of matte paste rubbed into the ends to define those choppy layers.
6. Diy Short Shag Haircut

Missing the rock-and-roll days of the seventies? The diy short shag haircut brings serious volume and messy texture to short hair. This cut thrives on heavy layers. Pull the top section of your hair into a high ponytail at the crown and cut it to about four inches. Release the hair, and you have instant shaggy layers on top. Next, comb the sides down and cut at an angle toward your jaw. The back should be slightly longer than the top, creating a mullet-like shag shape. Use point cutting aggressively on all the ends to break up the weight. This heavily layered look requires zero precision, making it highly forgiving for home haircutters. Scrunch in some mousse for a wild finish.
7. Diy Bowl Cut
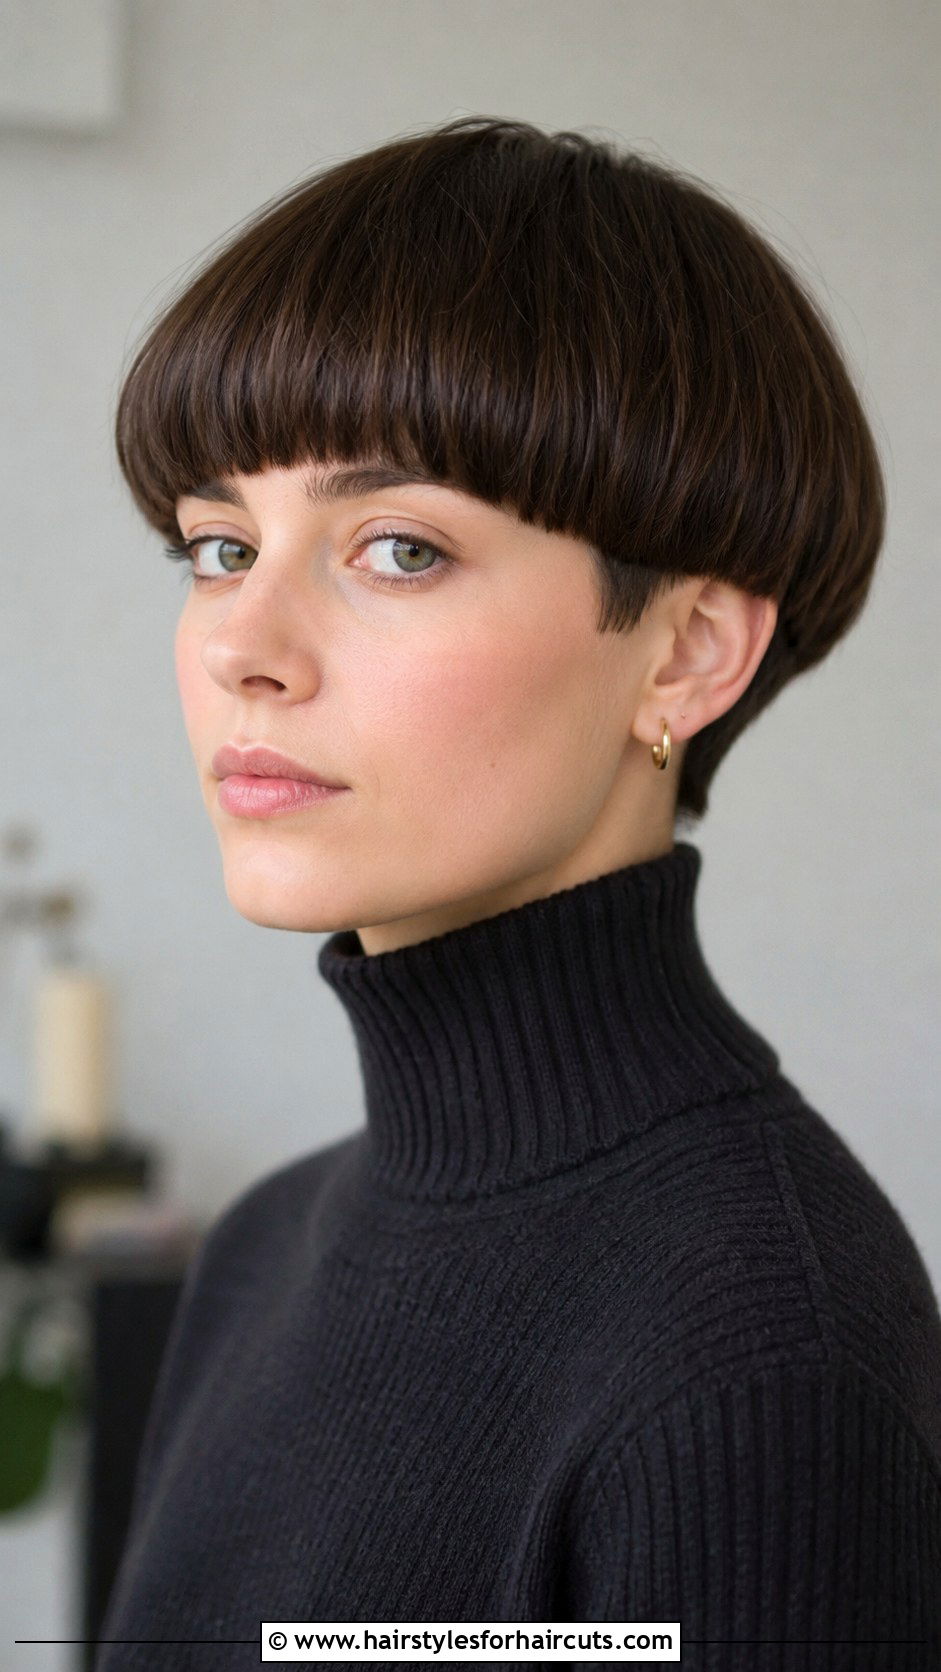
Think a bowl cut is just for kids? Think again. The diy bowl cut has made a massive comeback as a high-fashion, minimalist statement. Place a bowl or a wide headband over the top of your head to act as a guide. Ensure the bowl sits exactly where you want the shortest layer to hit, usually around the eyebrows. Comb all the hair beneath the guide straight down. Cut horizontally along the edge of the bowl or headband. Remove the guide and check your work. The result is a perfectly rounded, evenly cut top that blends into a slightly longer, tapered nape. This geometric look is striking and easy to maintain. It pairs beautifully with thick, straight hair.
8. Diy Layered Bob

Tired of flat, lifeless hair? A diy layered bob adds bounce and shape to your style. Start by determining your baseline length and cut the bottom perimeter evenly across the nape. To add layers, pull the top section of your hair straight up to a ninety-degree angle. Trim the ends to your desired top layer length. Take down the next section, pull it up, and cut to match the guide. Continue this until all the hair is layered. The sides should sweep gracefully toward your face. Because you are pulling the hair upward, you automatically create shorter layers at the crown and longer ones at the bottom. This cut gives your hair incredible body and natural movement.
9. Diy Asymmetrical Bob
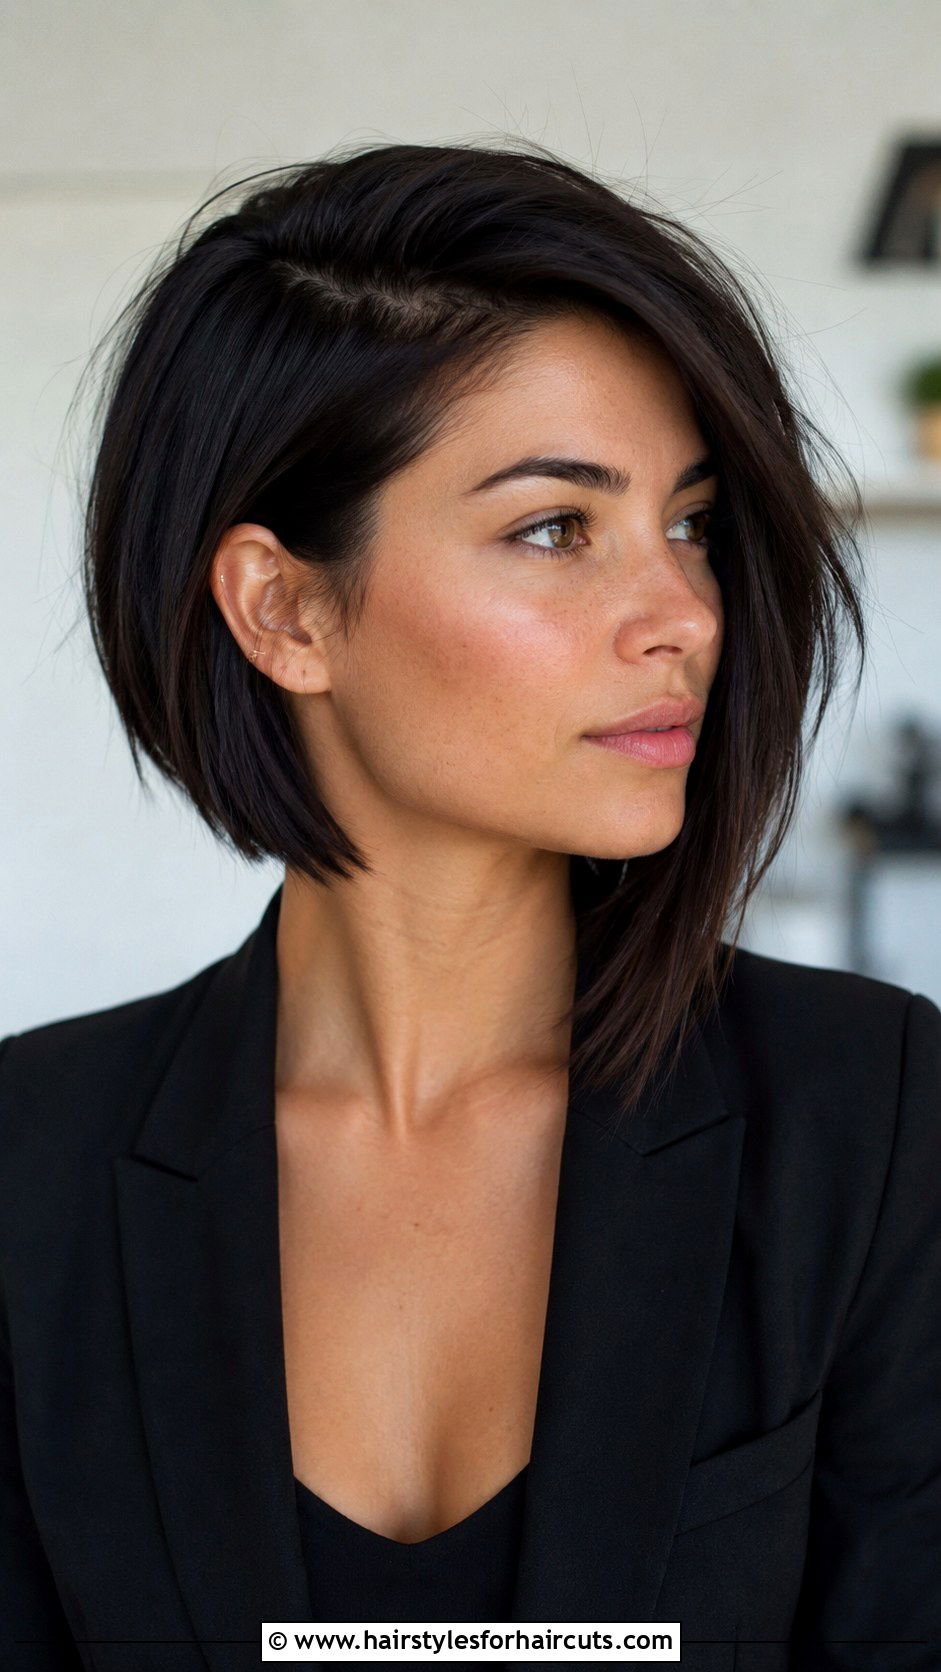
Want to turn heads with a modern, architectural style? A diy asymmetrical bob features one side longer than the other for a striking visual effect. Decide which side you want to be longer. Part your hair to the opposite side. Starting at the nape, cut the back straight across. On the shorter side, cut the hair at an angle from the ear up to the chin. On the longer side, allow the hair to fall naturally and cut it to your desired length, usually around the collarbone. The transition from the back to the longer front should be a smooth, diagonal line. This bold, angled cut is exceptionally flattering and draws attention to your jawline and neck.
10. Diy Short Wedge Haircut

Need volume at the back without heavy bulk? The diy short wedge haircut uses stacked layers to create a curved, lifted shape at the occipital bone. Cut the hair at the nape very short, about an inch long. As you work up the back of your head, gradually increase the length of each section. This stacking technique creates a shelf that makes the hair flip out naturally. The sides should be cut to blend into the layered back, usually around the mid-ear. Leave the top slightly longer to blend smoothly into the stacked back. The wedge is perfect for fine hair because the stacking creates the illusion of incredible thickness. A round brush easily lifts the back during styling.
11. Diy Micro Bangs Bob
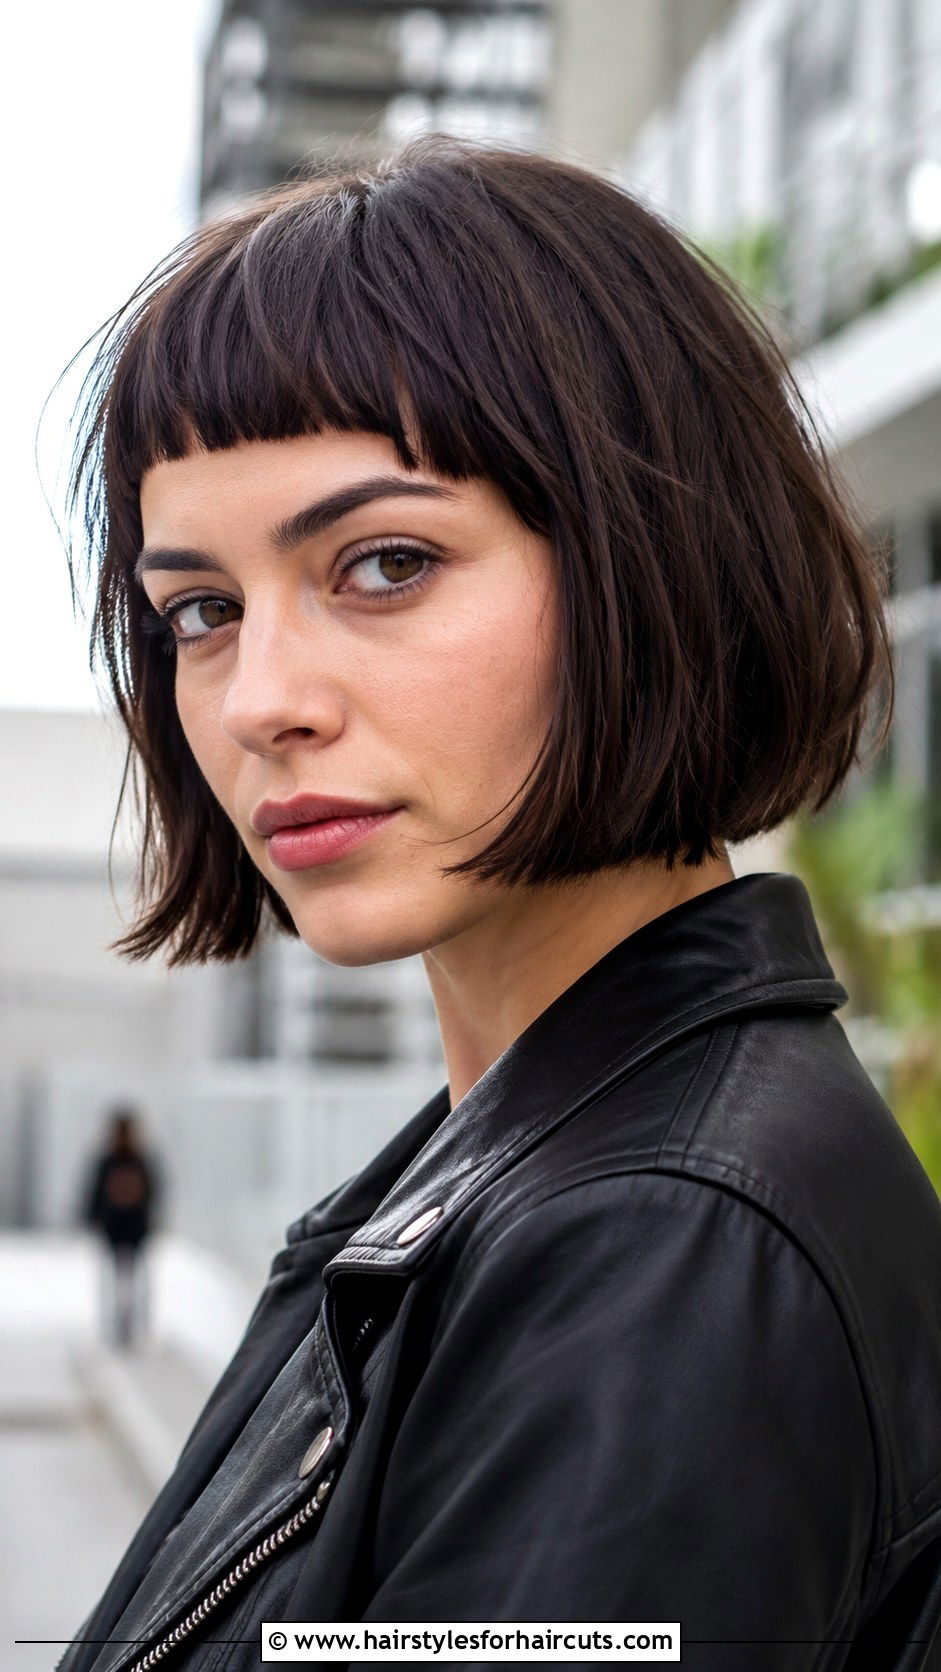
Feeling brave enough to show off your forehead? A diy micro bangs bob pairs a chin-length cut with ultra-short fringe. Start by cutting your bob to your desired length, keeping it blunt or slightly textured. To create the micro bangs, section off a small triangle of hair at the front of your hairline. Comb this section straight down over your forehead. Cut across horizontally, leaving the bangs about half an inch to an inch long. The key is cutting them slightly longer than you think, as they will spring up when dry. Keep the bangs perfectly blunt for a striking, editorial look. This style highlights your eyes and adds an avant-garde touch to a classic bob.
12. Diy Undercut Short Hair
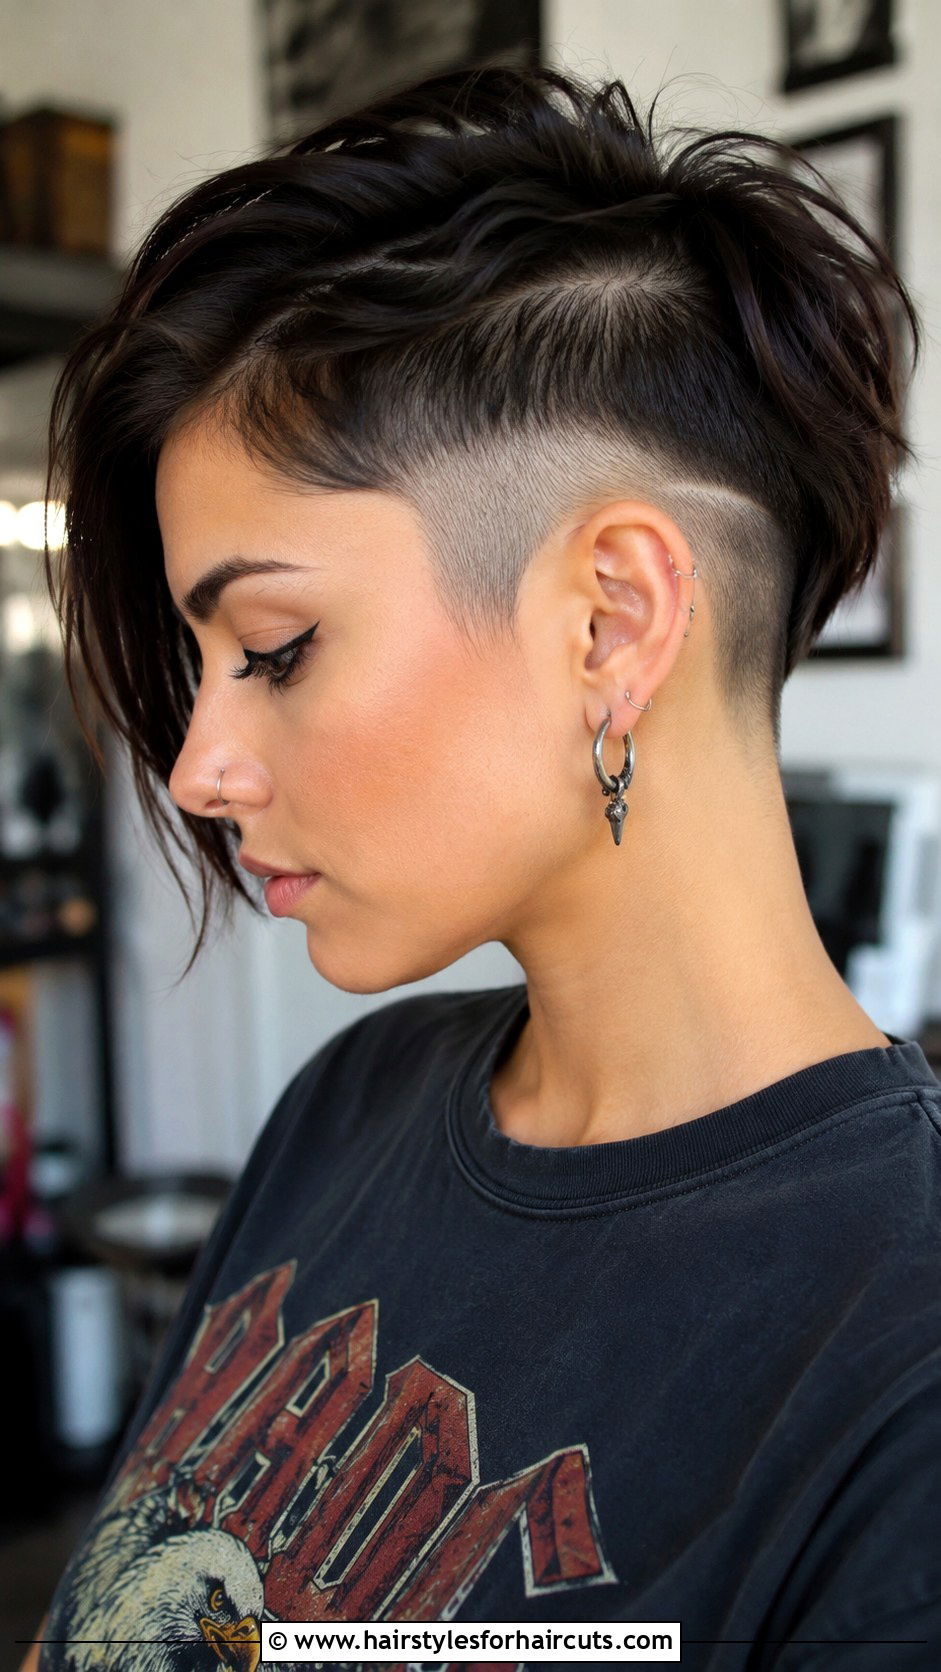
Want a hidden surprise that keeps your neck cool? A diy undercut short hair look involves shaving the lower sections beneath the top layer. Separate your hair by creating a horizontal part from ear to ear. Clip the top section securely out of the way. Using clippers, shave the underneath section as short as you like, perhaps a number two guard. You can also shave a design or pattern into this lower section if you feel creative. When you release the top section, the longer hair should completely cover the shaved part. This is a fantastic way to remove bulk and stay cool. You can also pin the top up to reveal the edgy undercut when you want.
13. Diy Curly Bob
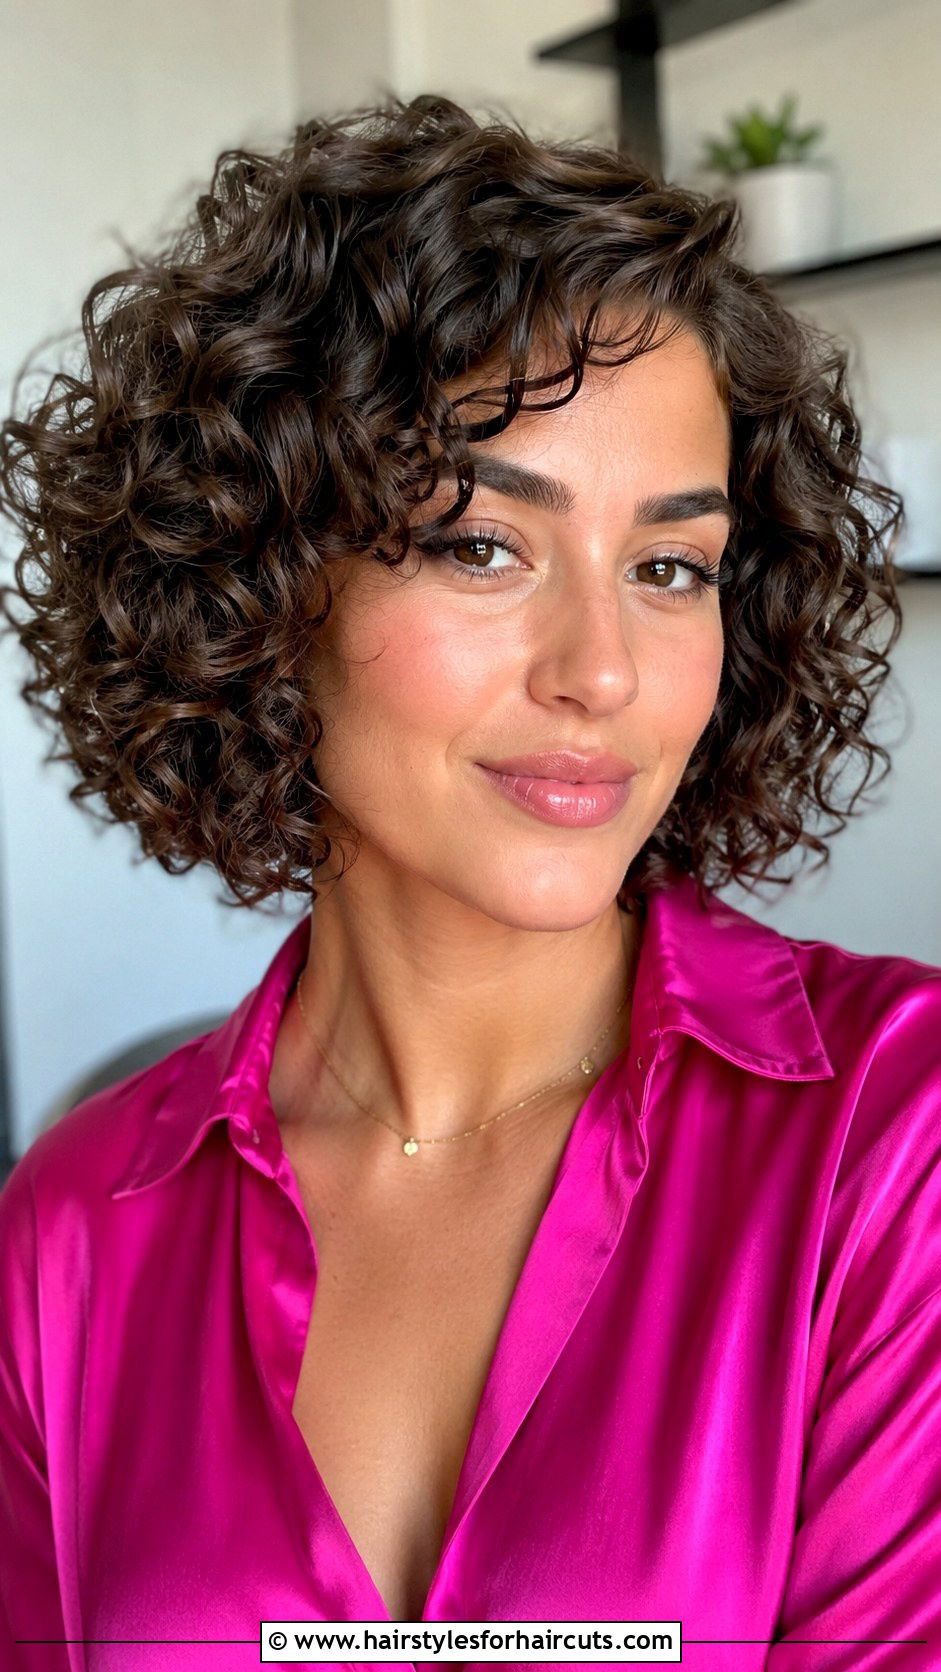
Struggling to find a shape that respects your natural texture? A diy curly bob requires a completely different approach than straight hair. You must cut curls while they are completely dry to avoid shrinkage surprises. Shape the perimeter by trimming individual curls at your desired length, usually right below the chin. Work slowly, snipping one curl at a time. To remove bulk, pull small sections of curls straight up and cut diagonally across the ends. This creates space for the curls to bounce and interlock without becoming a giant triangle. Never use thinning shears on curly hair, as they will just cause frizz. This tailored technique leaves you with a perfectly shaped, bouncy bob.
14. Diy Short Layered Haircut

Wishing for a soft, feminine look with plenty of movement? A diy short layered haircut removes weight and creates a feathery silhouette. Start by pulling the entire top section of your hair into a high ponytail. Cut the ponytail to your desired shortest length. Release the hair, and you have instant face-framing layers. Next, comb the sides and back down and cut to your preferred baseline length, perhaps at the jawline. Blend the longer top layers into the shorter sides by pulling the hair out horizontally and point cutting the ends. This technique ensures the layers sweep softly around your face. Add a light volumizing mousse to the roots to amplify the airy texture.
15. Diy A Line Bob
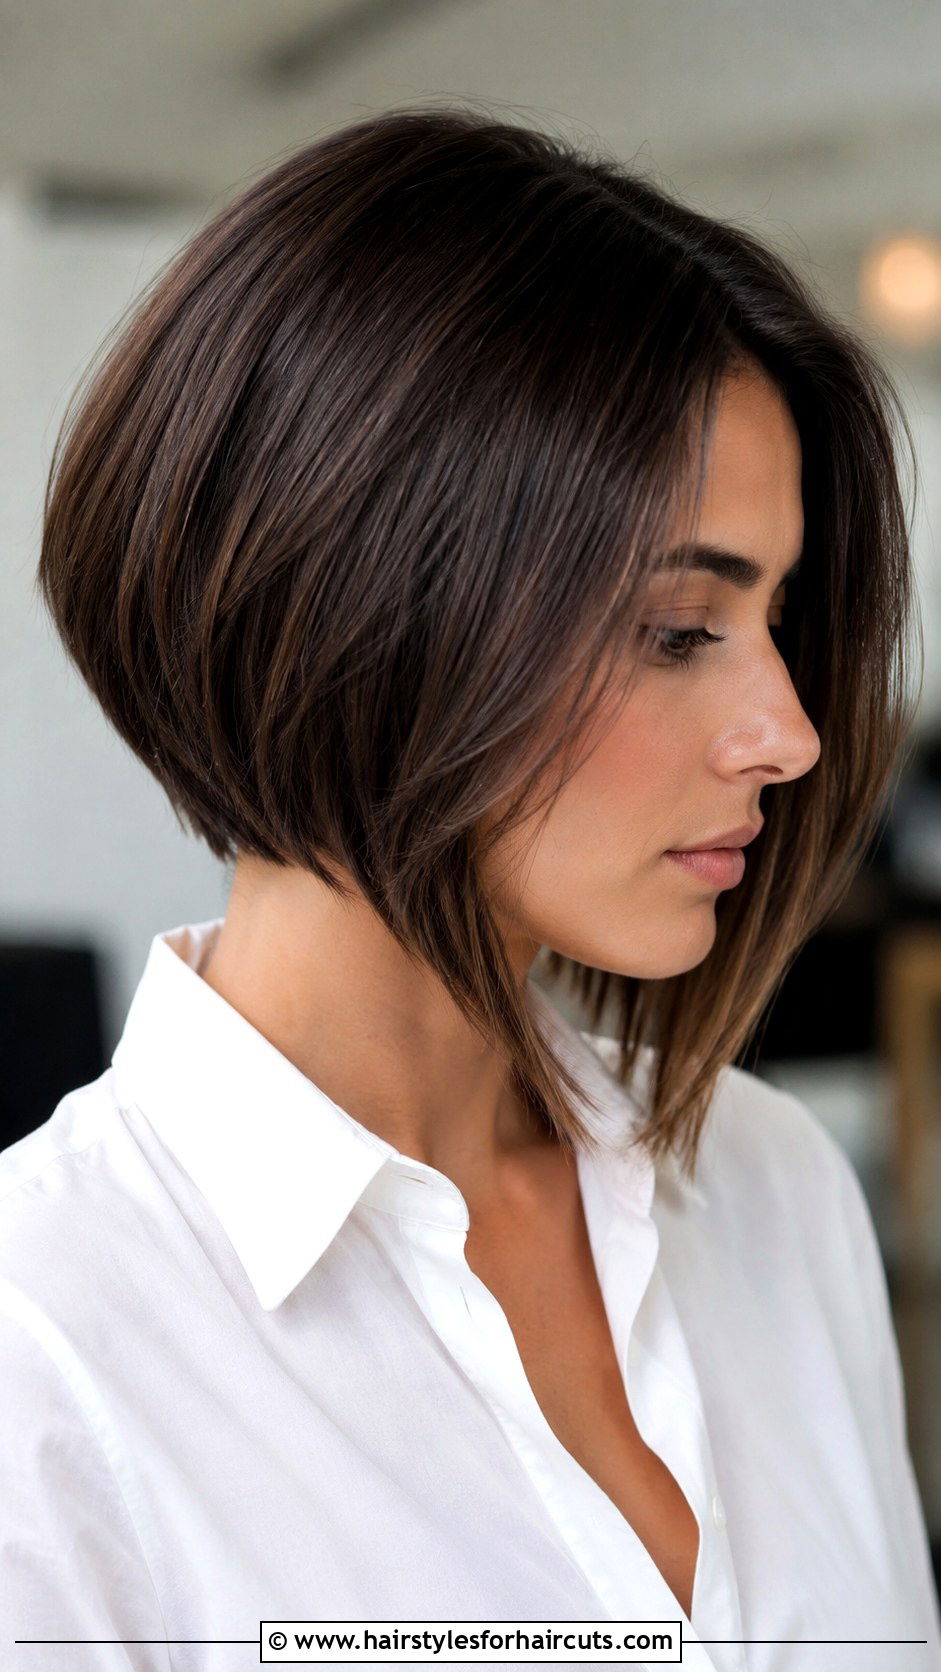
Searching for a classic cut that naturally styles itself? A diy a line bob is shorter at the back and gradually gets longer toward the front. Start at the back center. Cut a small guide section at the nape to your desired shortest length. Working up and out, pull small sections down and cut to match this guide. As you reach the sides, angle your cuts downward so the front pieces fall near the collarbone. The line from the back to the front should be completely straight and seamless. Because the front is longer, it automatically tucks under the chin, creating a beautiful swoop. This sleek shape is incredibly professional and requires very little daily styling effort.
16. Diy Choppy Pixie
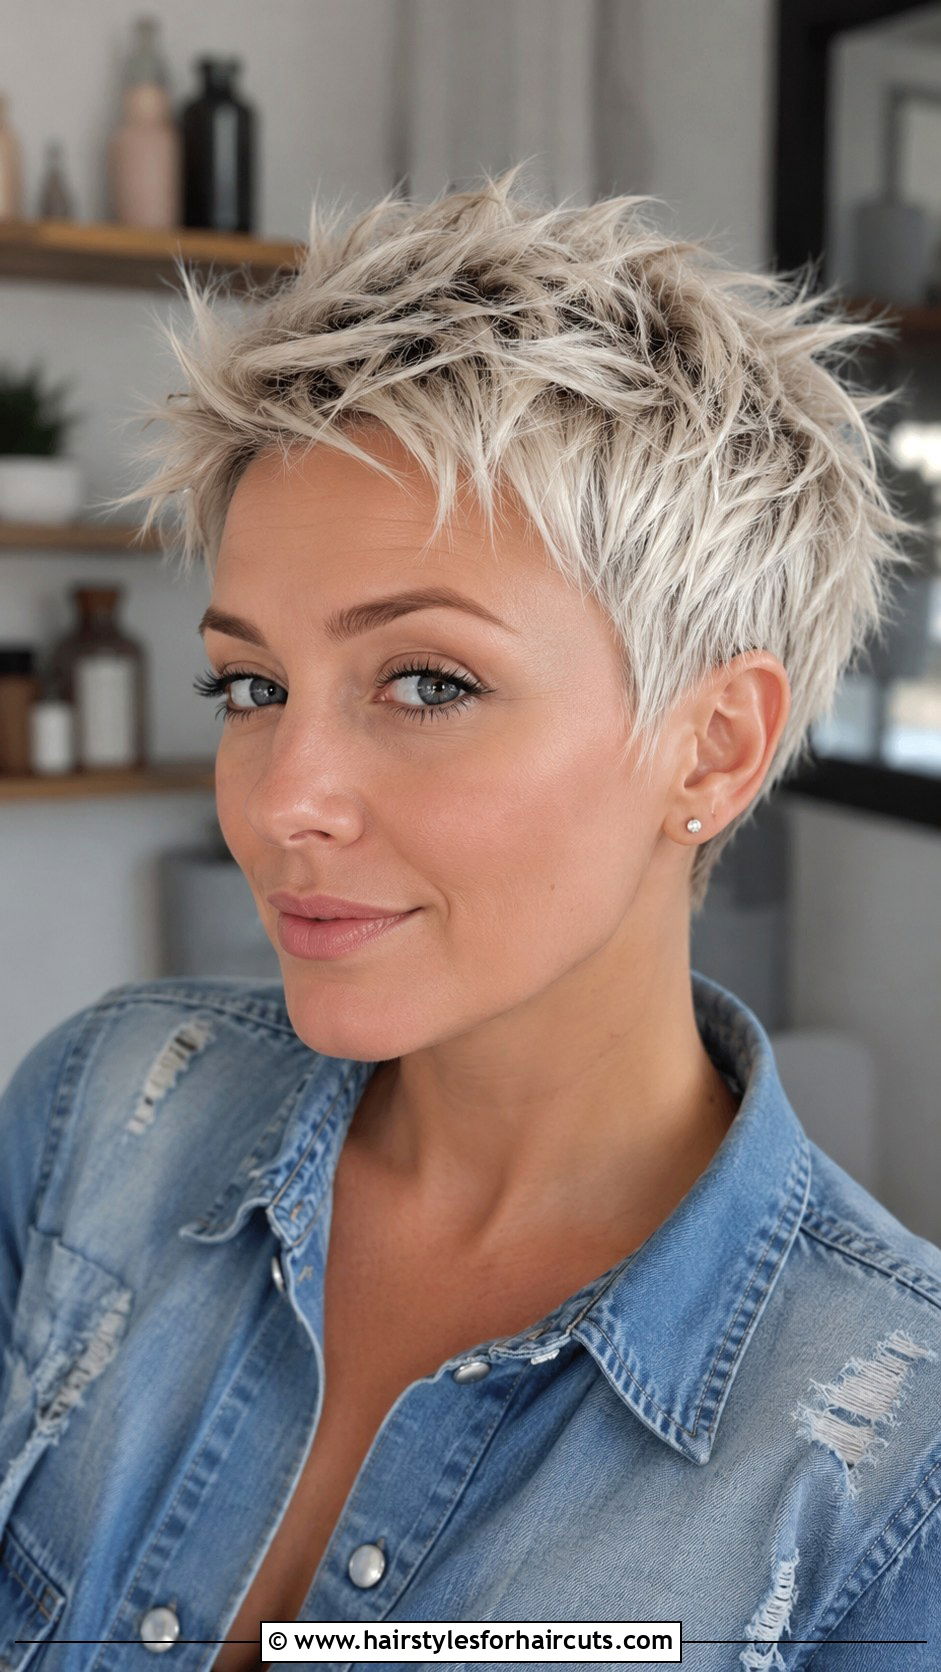
Love a grunge aesthetic that takes zero time in the morning? A diy choppy pixie is all about aggressive texture and uneven lengths. Start by cutting the sides and back relatively short using clippers or scissors, fading it into the longer top. Leave the top section about three inches long. The trick is how you texturize it. Pull small pieces of the top hair straight up and cut deep vertical notches into the ends. This creates a heavily shredded, spiky effect. You can even use a razor tool on the ends for more separation. Ruffle some styling wax into the choppy pieces to make them stand out. This edgy look is deliberately messy and full of attitude.
17. Diy Short Curtain Bangs Haircut

Want a face-framing style that blends seamlessly into short hair? A diy short curtain bangs haircut features a center-parted fringe that tapers outward. Section off a triangle at the front hairline. The triangle should be about two inches wide at the roots. Comb this section forward. Cut the very center of the bangs at the bridge of your nose. Angle your scissors downward, cutting the sides of the bangs at a steep slant so they reach your cheekbones. Pull the bangs apart at the center to see the curtain effect. The rest of your hair should be cut to a short bob or a long pixie. The long sides of the bangs blend into the rest of the haircut.
18. Diy Feathered Short Haircut

Longing for that bouncy, voluminous look from the nineties? A diy feathered short haircut relies on sweeping layers that curve away from the face. Cut your baseline to a short bob length, resting just below the ears. To create the feathers, pull sections of hair out to the sides and cut at a steep angle, pointing your scissors toward your face. The front pieces should be the longest, gradually getting shorter as they move up the crown. Blow-dry the hair using a round brush, rolling the ends upward and away from your face. This encourages the hair to flip out naturally. The result is a soft, airy look that adds incredible width and movement.
19. Diy Short Mohawk Haircut
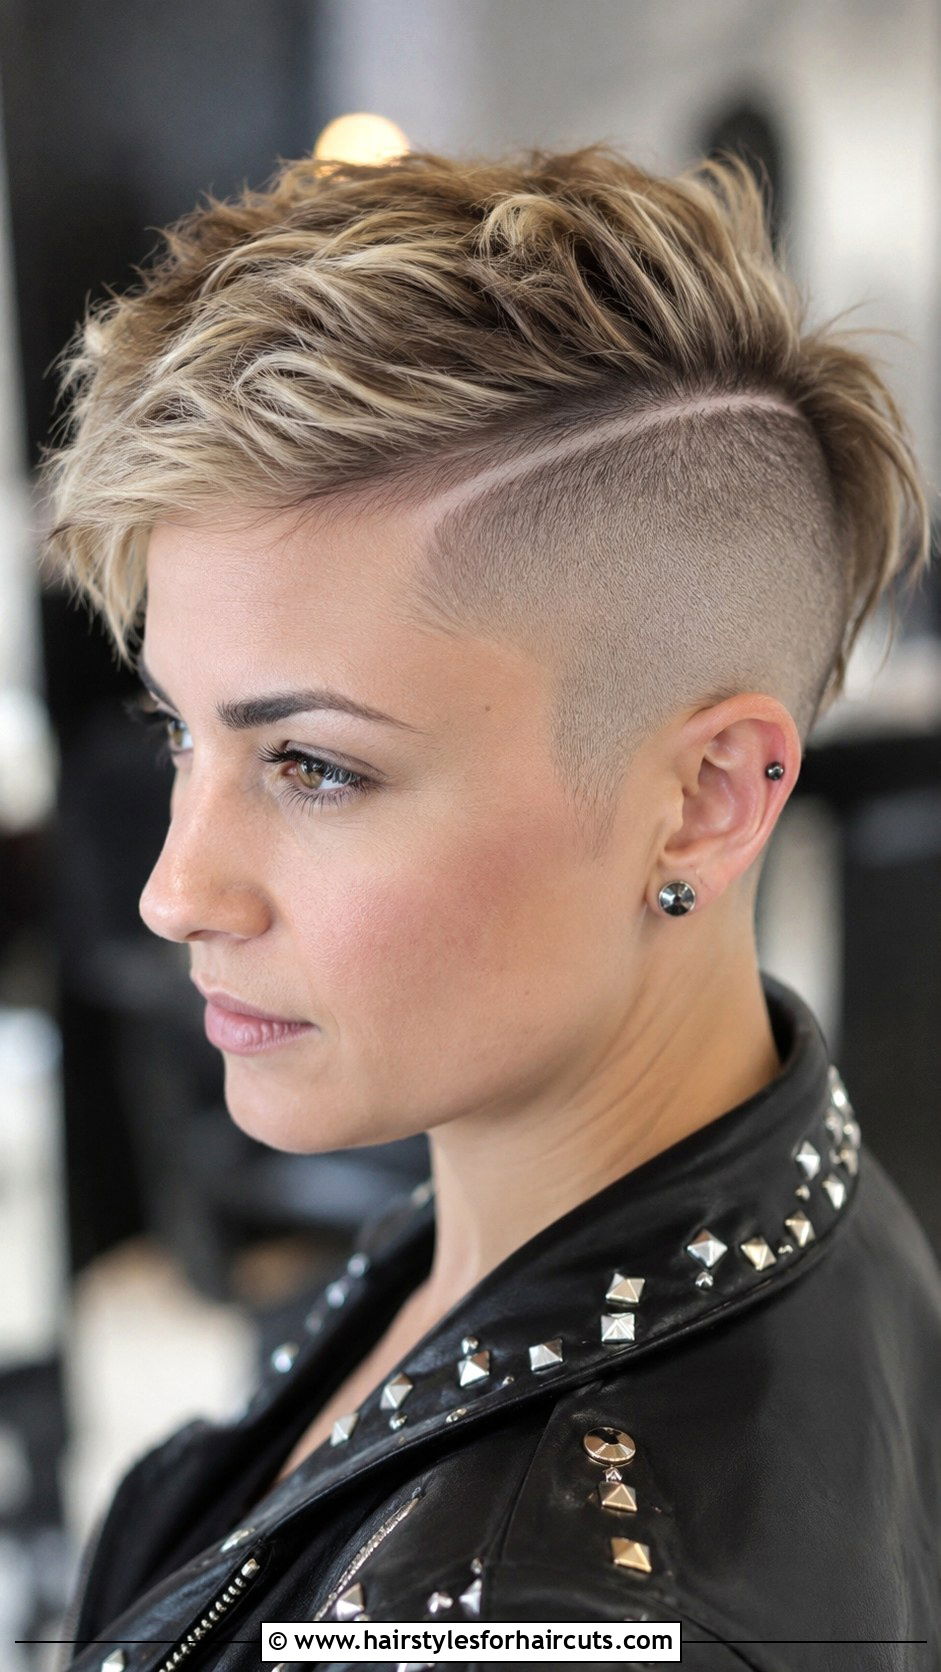
Ready to embrace your rebellious side? A diy short mohawk haircut keeps a strip of longer hair down the center while shaving the sides. Use clippers to buzz the sides of your head down to a short guard length, like a number two. Leave a two-inch wide section of hair uncut from your front hairline to the nape. The contrast between the shaved sides and the longer center creates the mohawk shape. You can taper the sides slightly so they blend into the longer top, or leave a harsh line for a punk vibe. Spike the center up with a strong hold gel for a classic look. It is bold, cool, and surprisingly easy to cut.
20. Diy Inverted Bob
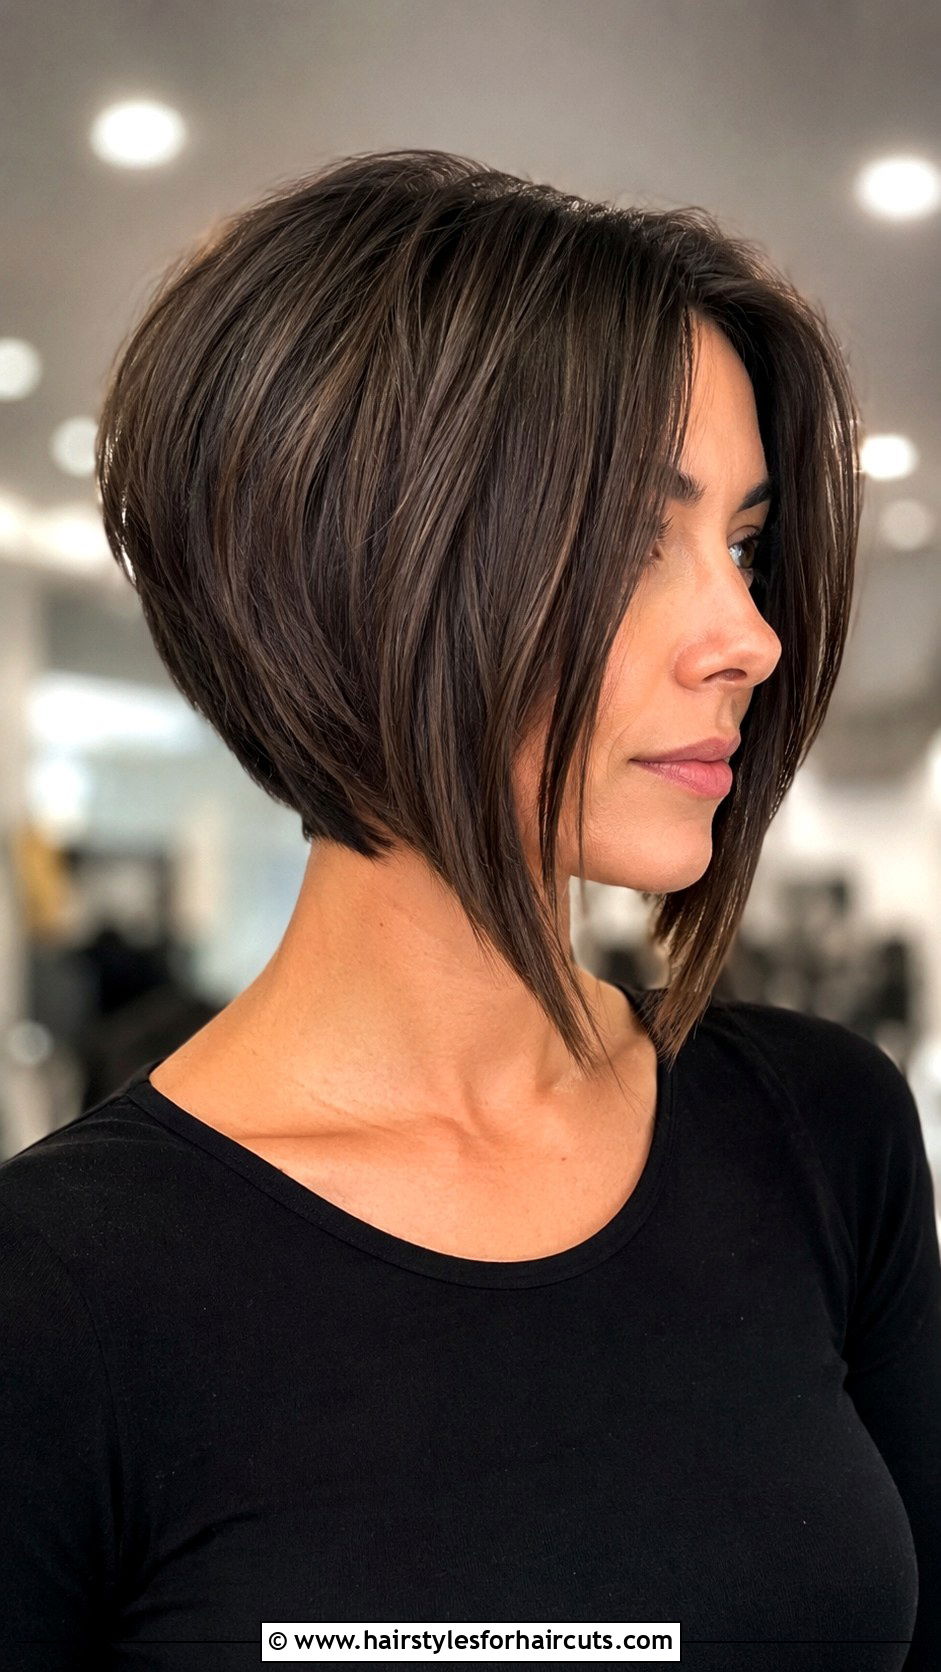
Seeking a cut with undeniable drama and swing? A diy inverted bob is stacked at the back and dramatically long in the front. Start by creating a sharp guide at the front, cutting one side to your desired length near the collarbone. Comb the back hair straight down. As you cut toward the nape, angle your fingers sharply upward, creating a stacked curve at the back. The back should be very short and heavily layered to build volume, while the front remains long and solid. This angled line creates a beautiful swing when you turn your head. The stacked back gives it lift, making this a perfect choice for anyone wanting high impact and movement.
21. Diy Short Wolf Cut

Want the ultimate trendy, shaggy vibe? A diy short wolf cut mixes a mullet and a shag for a wildly textured look. Pull the top section of your hair into a high ponytail and cut it short, around three inches. Take down the sides and pull them into side ponytails, cutting them slightly longer. The rest of the hair at the back should be left the longest. This creates the signature heavy top and long back of the wolf cut. Go through the entire head with point cutting to shatter the edges and remove any blunt lines. Messy is the goal here. Scrunch in some sea salt spray to enhance the chaotic, piecey texture.
22. Diy Flapper Bob
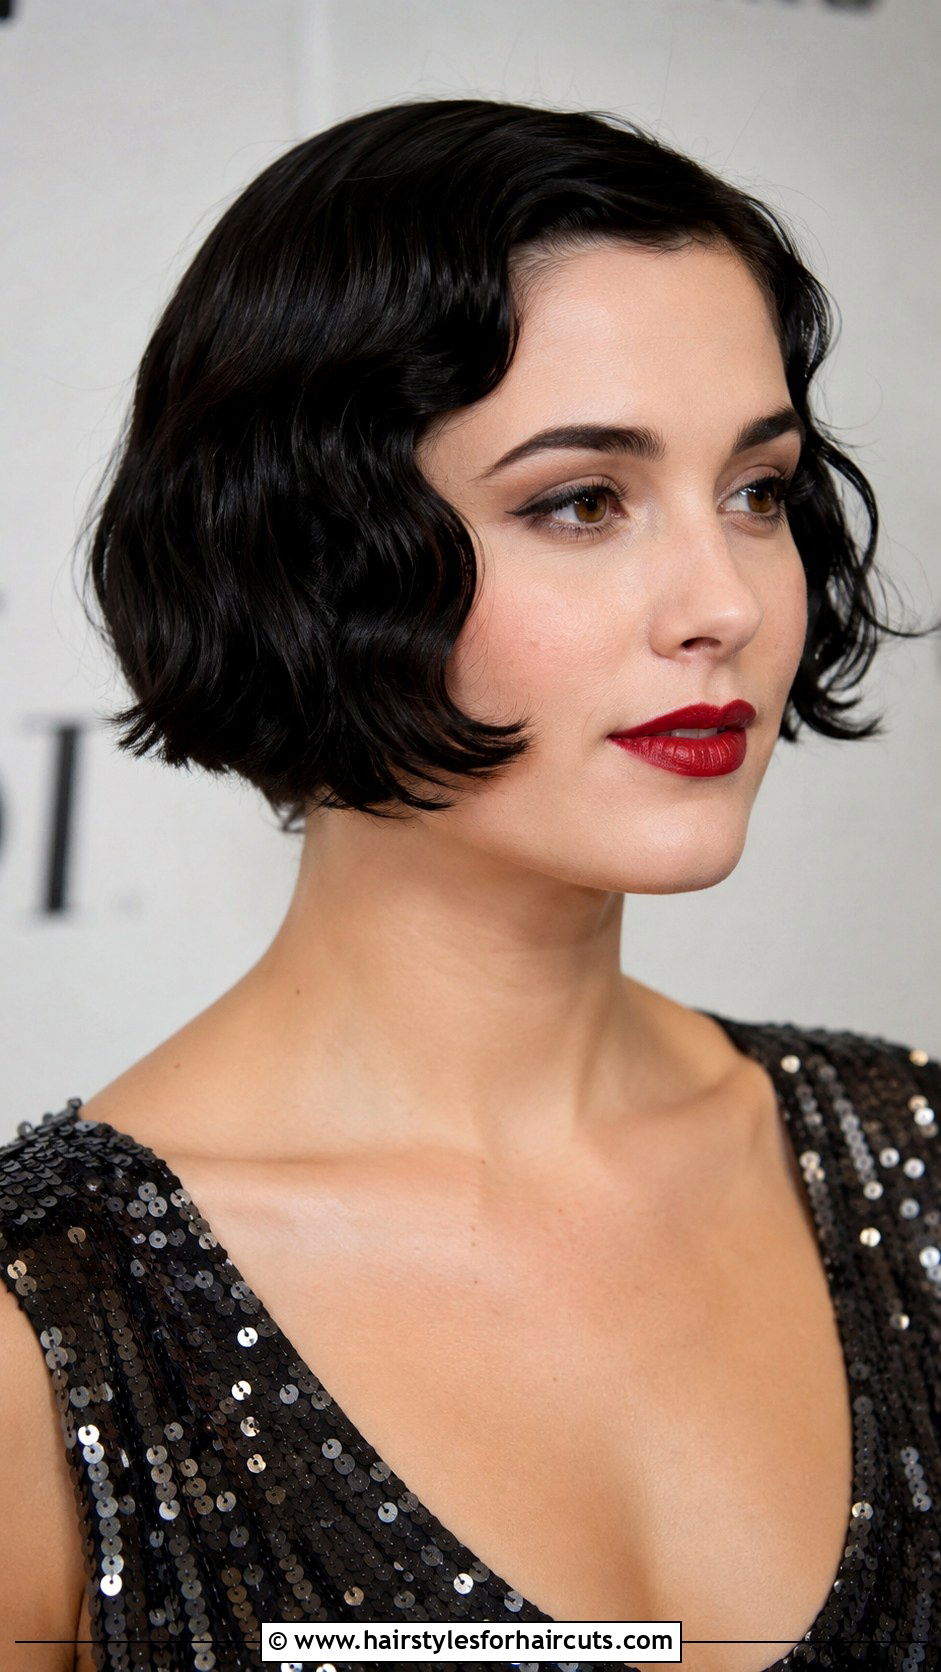
Obsessed with roaring twenties glamour? A diy flapper bob is a sleek, ear-length cut with barely there waves. Cut your hair to a uniform length all the way around, hitting right at the earlobes. The cut must be precise and blunt to achieve that authentic look. Do not add any layers, as this style relies on a solid, heavy line. The magic happens in the styling. Part the hair deep to one side. Use a flat iron to create a very subtle, shallow wave that hugs the head, rather than bouncy curls. Tuck the side without the part behind your ear. This smooth, helmet-like shape is incredibly elegant and totally transforms your everyday appearance.
23. Diy Long Pixie Cut

Need something short but still versatile enough to tuck behind your ear? A diy long pixie cut offers the best of both worlds. Keep the sides and back closely cropped, cutting them to about an inch or two in length. The top section should be left much longer, sweeping down to the cheekbone. Use a comb and scissors to blend the short sides into the long top, creating a seamless taper. The long front pieces can be styled behind the ear or swept across the forehead for a dramatic side part. This cut gives you the ease of a pixie with the styling options of a short bob. It is flattering on almost every face shape.
24. Diy Short Razored Bob

Looking for a soft edge that moves like water? A diy short razored bob uses a razor tool instead of scissors to slice the ends. Cut your bob to the desired baseline length, perhaps at the jawline. Once the shape is established, take small sections and run a styling razor down the last two inches of the hair. This strips away weight and creates a tapered, feathery edge that scissors simply cannot achieve. The razored ends allow the hair to sway and move effortlessly instead of falling in a solid block. This technique is absolutely ideal for thick or coarse hair that needs to be thinned out. It gives the cut a light, airy, and incredibly soft finish.
25. Diy Tapered Short Haircut

Want a clean, polished look that never goes out of style? A diy tapered short haircut gradually decreases in length from the top to the nape. Start by leaving the top section at your preferred length, around two to three inches. Using clippers, begin at the nape with a short guard. As you move up the sides and back, switch to longer guards, blending the short hair into the longer top. Scissor over comb is a great technique to perfect the taper at the edges. The sides should be neat and close to the head. This structured, sculpted shape is incredibly professional and sharp. It requires minimal upkeep and looks fantastic with a side part.
Conclusion:
Mastering your own hair at home is a highly rewarding skill. Trying out these 25 diy short haircuts allows you to experiment with your look without the salon price tag. Remember to always use sharp, professional shears and take your time. It is much better to cut too little and go back for more than to chop off too much at once. Short hair is incredibly forgiving, and many of these heavily textured cuts thrive on imperfection. Whether you choose a sleek blunt bob or a chaotic shag, confidence is your best accessory. Grab your scissors, trust the process, and enjoy your fresh, newly styled short hair. You will be amazed at what you can achieve.

Leave a Reply