
Searching for the perfect way to refresh your look without visiting the salon? You are certainly not alone. Learning how to trim, shape, and style your own hair at home can save you time and money while giving you total creative control. This comprehensive guide provides a 25 haircuts tutorial woman list that covers every length, texture, and vibe you can imagine. Whether you want to master a classic layered bob, try a trendy butterfly cut, or bravely go for a pixie, we have step-by-step instructions for you. Grab your shears, comb, and clips. It is time to transform your tresses right in your own bathroom with confidence and precision.

1. Layered Bob Haircut Tutorial

Have you ever wondered how stylists get that perfect swing in a layered bob? Start by dampening your hair and parting it down the middle. Create a clean horseshoe section at the front and clip the top away. Take a small section at the nape as your guide. Cut it to your desired length. Working your way up the back, pull sections straight down and cut to your guide. Once the back is solid, drop the top sections down. Pull the sides forward and cut at an angle to create soft face-framing layers. Point cut the ends to remove bulk and add movement. This technique gives you a bouncy, salon-quality layered bob at home.
2. Long Layers Haircut Tutorial
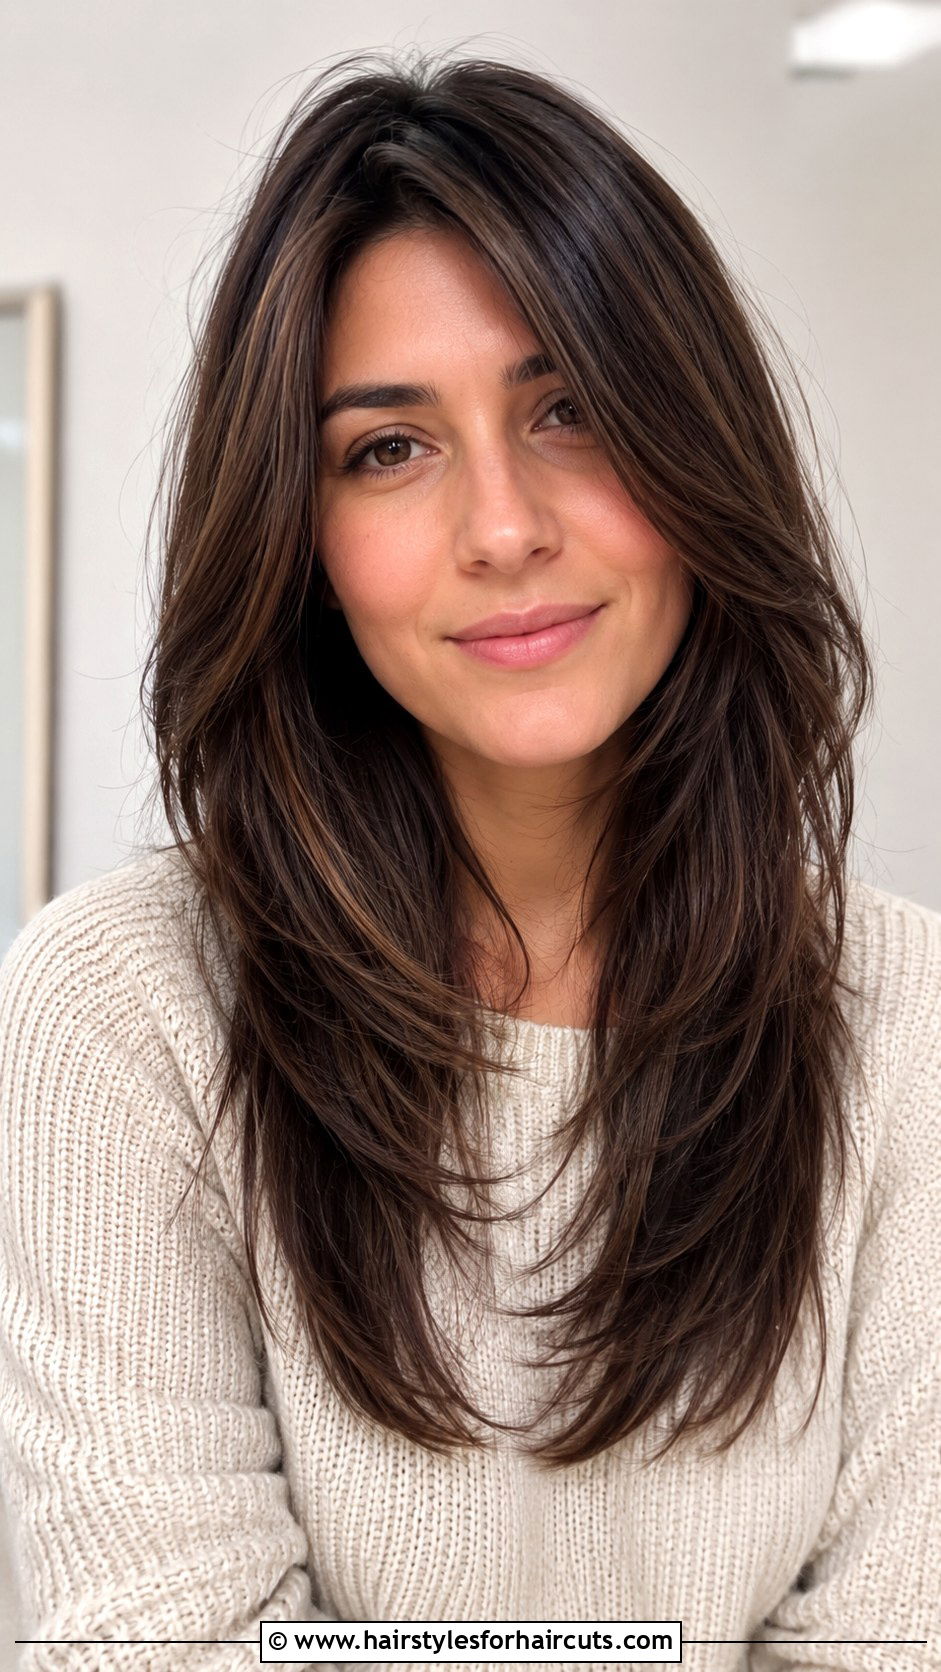
Picture your hair flowing beautifully with effortless volume and natural bounce. Long layers are perfect for removing weight without sacrificing length. Begin with clean, damp hair. Pull the entire hair back into a low ponytail at the nape of your neck. Secure it tightly with an elastic band. Decide how much length you want to remove. Slide the elastic down to that exact point. Make a clean, horizontal cut right below the elastic. Take the ponytail down and marvel at the soft layers. To add more dimension, part your hair and pull small front sections forward. Snip vertically into the ends. This creates a seamless, natural blend.
3. Pixie Cut Tutorial
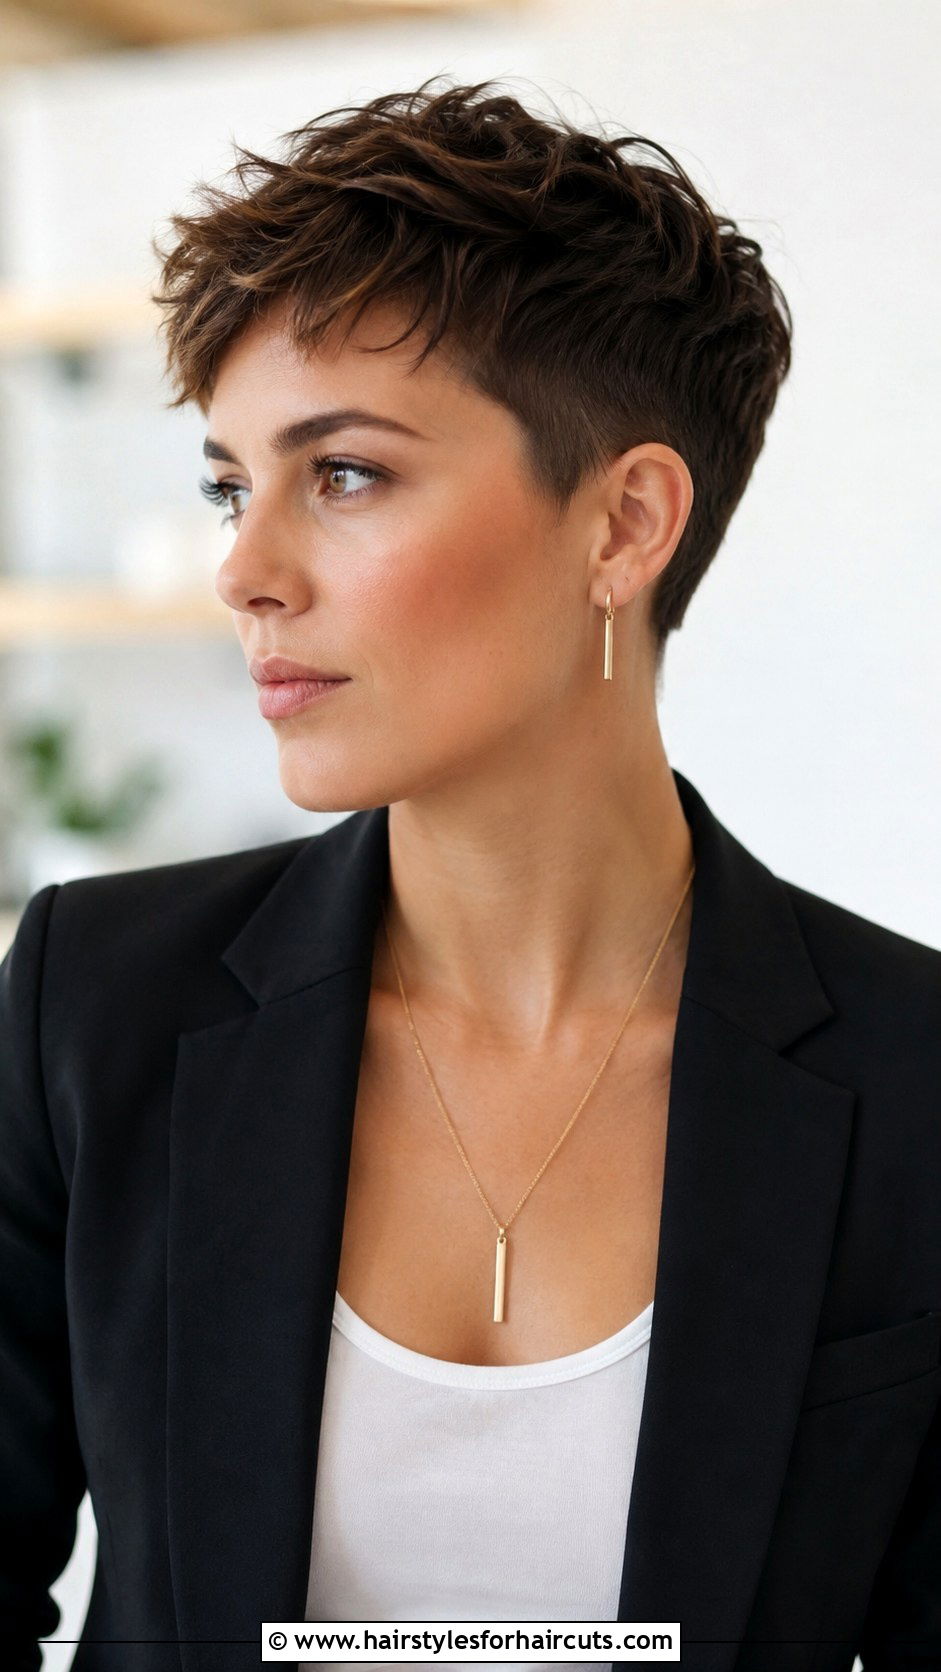
Ready for a bold and liberating change? A pixie cut is daring but highly manageable once you know the trick. Start by separating the top crown section from the lower sides and back. Begin with the nape and trim as short as you prefer using clippers or scissors. Work your way up the sides, leaving the top section longer. The key to a great pixie is the transition. Pull the side hair up and blend it into the longer top. For the top, pull sections straight up and cut to your desired length. Use point cutting on the crown for texture. Leave the front slightly longer to style as bangs.
4. Curtain Bangs With Long Hair Haircut

Craving that 70s soft fringe look but want to keep your length? Curtain bangs frame the face beautifully. Part your hair down the middle. Take a triangular section from the outer corner of one eye to the other. Clip the rest of your hair away. Dampen the front triangle slightly. Pull the triangle straight down over your nose. Decide where you want the shortest piece to hit, usually at the cheekbone. Cut vertically into the hair at an upward angle. Do not cut straight across. The middle pieces will be the shortest, while the outer pieces will gradually get longer. Style them by brushing them to the sides.
5. Blunt Lob Haircut Tutorial

Looking for a sleek and polished finish that looks incredibly chic? A blunt lob is timeless and surprisingly simple to cut yourself. Start with freshly washed, damp, and detangled hair. Part your hair straight down the middle and bring it forward over your shoulders. Comb the left side straight down. Cut straight across at your desired length, usually right around the collarbone. Repeat on the right side. Check the back in a mirror to ensure the line is perfectly even. This zero-layer approach creates maximum thickness at the ends. Blow dry it with a flat brush for a smooth, professional finish that highlights the sharp baseline.
6. Shag Haircut Tutorial

Imagine rocking a messy, retro vibe with tons of texture and zero fuss. The modern shag is all about heavy layers and movement. Start by parting damp hair down the middle. Create a front triangular section for the bangs. Pull the rest of the hair into a high ponytail at the crown. Cut the ponytail to the shortest layer length you desire. Take the hair down. You will see short, choppy layers on top. Pull the side sections forward and cut at a steep angle to create the signature shag frame. Point cut heavily into all the ends to give it that piecey, rock-and-roll finish.
7. Face Framing Layers Haircut

Want to highlight your best features without losing your precious length? Face framing layers do exactly that. Leave your hair down and dry. Visualize where you want the shortest layer to start, usually near your chin. Grab a small section of hair at the front. Pull it forward and cut it to that desired starting length. This is your guide. Take the next small section right behind it. Pull it forward with the guide and cut it slightly longer. Continue this process moving backward. Each section should be slightly longer than the last. This cascading effect beautifully frames your face and adds natural movement throughout the front.
8. Inverted Bob Haircut Tutorial

Dreaming of a cut that is short in the back and long in the front? The inverted bob is a classic, sophisticated look. Dampen your hair and section it cleanly. Start at the nape of your neck. Cut a short, angled baseline, slightly longer as you move toward the sides. Working up the back, pull sections down at a slight angle to maintain that stacked length. Move to the front. Pull the side sections down and cut them to the longest point. The back should stack nicely, creating volume. Blend the back and sides carefully. Blow dry with a round brush to curve the ends under perfectly.
9. Butterfly Cut Tutorial

Have you seen this viral sensation taking over social media? The butterfly cut creates the illusion of shorter face-framing layers with long, flowing ends. Start by parting damp hair down the middle. Pull the front sections forward and clip them. Gather the back half into a low ponytail and cut it to your desired shortest layer length. Unclip the front sections. Pull them forward and cut them slightly longer than the back. The trick is creating a dramatic difference between the short top layers and the long bottom layers. This builds massive volume. Use a large-barrel curling iron to flip the layers away from your face.
10. Asymmetrical Bob Haircut Tutorial

Ready to try something edgy and modern? An asymmetrical bob is longer on one side, creating a striking geometric look. Start with damp, detangled hair. Part it down the middle. Decide which side will be longer. Pin up the top sections. Begin at the nape and cut the back to a uniform length. Move to the shorter side. Pull the hair down and cut it to align with the back. Now, drop the longer side down. Pull it straight down and cut it so it hangs noticeably longer than the other side. The stark contrast makes this cut stand out. Flat iron it for a sleek finish.
11. French Bob Haircut Tutorial
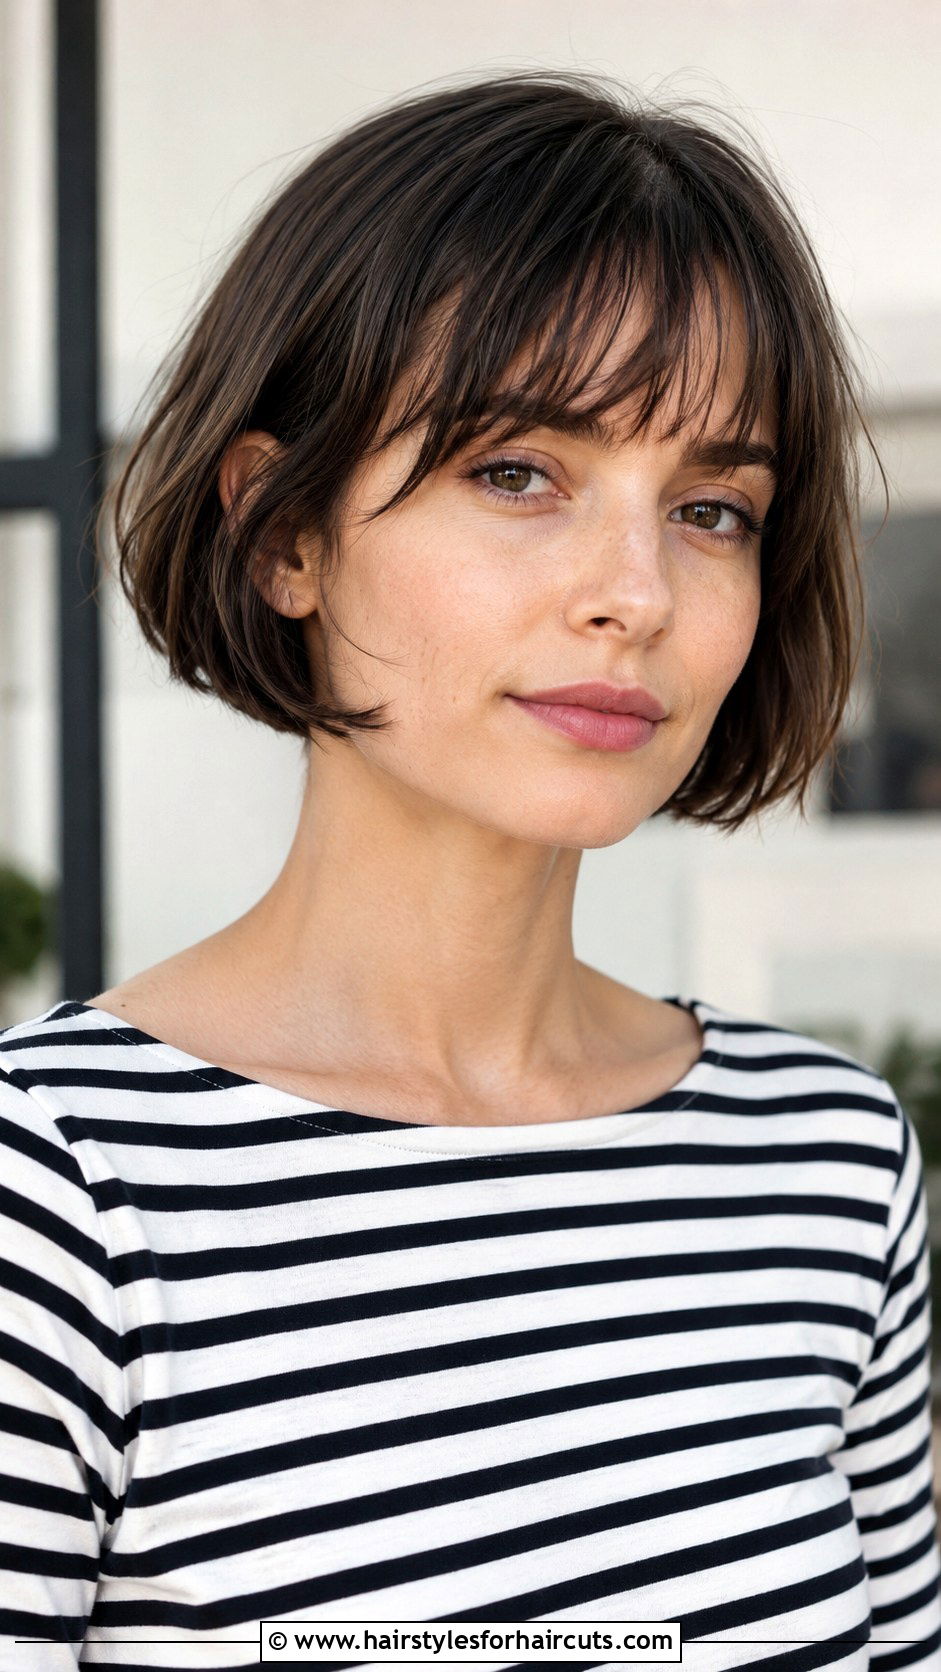
Want a chic, effortless style that screams Parisian cool? The French bob sits right at the chin and features soft, wispy bangs. Start with damp hair. Part it down the middle and pull it forward. Cut the baseline to chin length all the way around. To cut the bangs, take a triangular section at the front. Pull it down and cut it just below the eyebrows using vertical snips. The bangs should be soft and messy. Go back through the entire haircut and point cut the ends aggressively. This removes weight and creates that perfectly undone, lived-in texture. Scrunch with mousse and let it air dry.
12. Wolf Cut Tutorial

Ready to unleash your wild side? The wolf cut is a fierce mix of a shag and a mullet. Section your damp hair into a top and bottom half. Gather the top half into a high ponytail and cut it to your desired short layer length. This creates the heavy, choppy top. Take the bottom half and cut it to your preferred length, keeping it longer in the back. Unclip everything. Pull the side sections forward and cut them at an angle to frame the face. Use thinning shears or point cutting to aggressively texture the ends. Style it messy with a texturizing spray for maximum volume.
13. Textured Bob Haircut Tutorial
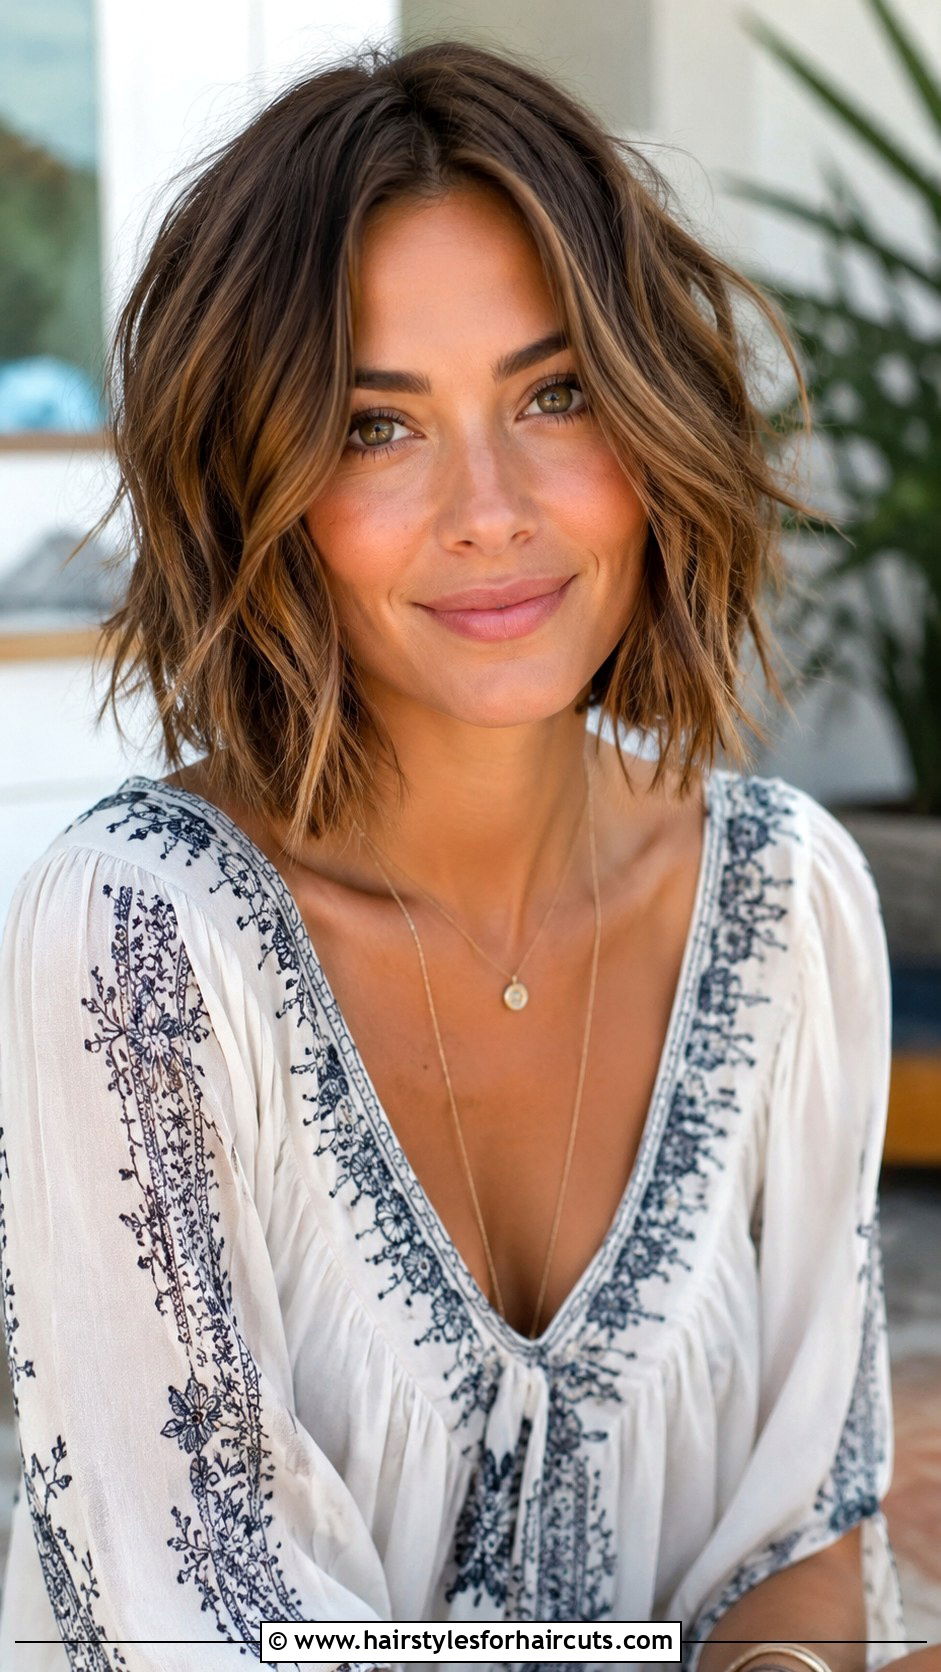
Looking for a relaxed, beachy vibe instead of a sharp, blunt edge? A textured bob is breezy and full of life. Start by cutting a standard bob on damp hair, whether chin-length or shoulder-length. The magic happens in the detailing. Once the baseline is set, take small sections of hair and twist them tightly. Snip into the ends of the twists at various angles. This technique removes weight and creates soft, jagged ends without harsh lines. Do this all over your head. The result is a bouncy, piecey bob that requires minimal styling. Just add some sea salt spray and scrunch for effortless waves.
14. V Cut Long Hair Tutorial

Want to keep all your length but add a gorgeous shape? The V cut creates a stunning, cascading point at the back. Brush your damp hair straight back. Gather it into a low ponytail at the nape of your neck. Ensure the hair is smooth and free of bumps. Slide the elastic band down to the very ends. Cut straight across at the tip of the ponytail. Take the elastic out and let your hair fall loose. You will see a soft, subtle V shape at the back. To make it more pronounced, pull the hair into a center part and trim the longest point again.
15. Feathered Layers Haircut

Remember the bouncy, voluminous hair from the 70s? Feathered layers are making a massive comeback. This cut relies on pulling hair outward to create curved, sweeping layers. Start with damp hair. Part it down the middle and pull a front section up. Hold the scissors vertically and cut upward into the hair. Move around the head, always pulling the hair up and away from the face before snipping. This builds incredible volume and creates the signature feathered flip. Keep the bottom layers long and gradually increase the layer length as you move up. Blow dry with a round brush, brushing the hair away from your face.
16. Short Curly Haircut Tutorial

Tired of the triangle shape ruining your beautiful curls? Cutting curly hair requires a different approach. Always cut curly hair when it is completely dry. This way, you see exactly how the curls fall. Start by trimming the back to your desired length, cutting curl by curl at an angle. Move to the sides and front. Pull individual curls down and snip the very ends. To remove bulk, carefully slide your scissors up the shaft of a few curls. This is called slide cutting. Leave the top longer to allow for shrinkage. Shake it out and let your natural curls bounce freely.
17. A Line Bob Haircut Tutorial

Want a clean, geometric shape that naturally flatters your neck? The A-line bob is slightly longer in the front and bluntly cut in the back. Dampen your hair. Start at the back by cutting a clean baseline at the nape. As you move toward the sides, gradually angle the line down so the front pieces are longer. Ensure the baseline is perfectly straight and solid. Do not add any layers. This is a single-length cut that relies on the precise angle for its shape. Blow dry the hair flat using a paddle brush. Run a flat iron over the ends to emphasize that sharp, perfect line.
18. Choppy Layers Haircut

Craving a grunge-inspired look with tons of attitude? Choppy layers are all about bold, disconnected lengths. Start with dry hair for better control. Pull a top section up and cut it to a shorter length. Drop the side sections and cut them much longer. The contrast is the goal. Instead of blending the layers smoothly, use your scissors to cut deep, intentional notches into the ends. Take random sections and snip into them at different depths. This creates a heavily textured, almost messy look. It adds massive volume and edgy movement. Apply a matte paste to define the choppy pieces and show off the layers.
19. Undercut Women Haircut Tutorial

Ready to shed some serious weight and make a rebellious statement? An undercut removes the hair at the nape and sides while leaving the top long. Part your hair horizontally from ear to ear. Clip the top section up and out of the way. Use hair clippers with your preferred guard size. Start at the nape and buzz the hair upward. Blend the sides into the top section carefully. You can fade it or leave a hard line. The long top hair will fall over the shaved section, hiding it or showing it off depending on how you style. This is perfect for thick hair.
20. Long Blunt Cut Tutorial

Searching for the ultimate healthy, thick-looking hair? A long blunt cut removes all damaged ends and creates a solid, heavy baseline. Brush your dry hair thoroughly. Part it down the middle and bring it forward over your shoulders. Comb the left side perfectly straight. Cut straight across at your desired length, usually near the collarbone or mid-back. Repeat on the right side. Check the back to ensure the line is perfectly level. There are absolutely no layers in this cut. The result is maximum density and striking shine. Use a flat iron to smooth the cut and make the baseline look incredibly sharp and polished.
21. Mohawk Haircut For Women

Want to push the boundaries with a punk-inspired classic? A modern mohawk leaves a strip of long hair down the center while shaving the sides. Start by sectioning off the hair you want to keep. Create a section from your forehead to the nape, about two inches wide on each side of the center part. Clip this top section securely. Use hair clippers without a guard to buzz the sides completely down to the skin. You can fade it slightly if a total shave is too intense. Unclip the center strip. The long middle section can be styled spiky or slicked back for an edgy look.
22. U Cut Hair Tutorial

Looking for a soft, curved bottom that looks incredibly graceful? The U cut features a rounded shape at the back, unlike the sharp V cut. Dampen your hair and brush it straight back. Gather it into a low ponytail at the center of the nape. Secure it tightly. Slide the elastic down towards the ends. Instead of cutting straight across, cut the hair in a slight curve, following the natural roundness of your head. Remove the elastic and let the hair fall. You will see a perfect, soft U shape at the back. This cut retains thickness at the sides while creating a beautiful curve.
23. Short Layered Haircut Tutorial

Want major volume and bounce without the long maintenance? Short layered haircuts are lively and fun. Start with damp hair. Pull the entire hair up into a high ponytail at the very top of your crown. Secure it tightly. Hold the ponytail straight up. Cut straight across to your desired short length. Let the hair down. You will instantly see short, voluminous layers. To refine, pull small sections straight up and point cut the ends to soften the layers. This technique builds incredible height at the crown. Apply some volumizing mousse and blow dry with a round brush for a bouncy, energetic finish every day.
24. Rounded Bob Haircut Tutorial

Want a vintage silhouette that hugs your jawline perfectly? A rounded bob curves inward, creating a soft moon shape. Start with damp hair. Cut a baseline all the way around, just below the jaw. To build the round shape, you must layer the hair. Pull sections up at a 90-degree angle from the head. Cut the hair as you hold it elevated. This removes weight from the bottom and adds volume to the top. As the hair falls, it will naturally curve under. Check the front pieces to ensure they blend smoothly into the back. Blow dry with a large round brush, rolling the ends inward.
25. Buzz Cut Women Tutorial

Ready to liberate yourself from all styling routines completely? The buzz cut is ultimate freedom. It is bold, beautiful, and incredibly low maintenance. Start with dry hair. Use a mirror to see the back of your head. Choose your clipper guard size. A number two or three leaves a bit of fuzz, while a zero is completely bald. Start at the sides and buzz upward against the hair growth. Move to the back, using smooth, overlapping passes. Finish with the top, buzzing from the front to the crown. Once the bulk is gone, go over the entire head again to ensure an even, flawless length everywhere.
Conclusion:
Mastering your own hair at home is entirely possible with the right guidance. Trying out a 25 haircuts tutorial woman guide empowers you to take control of your personal style. You have learned the basics of layering, creating precise blunts lines, and even tackling bold transformations like pixies and buzz cuts. Remember to always use sharp, professional shears and take your time. Small snips are always better than cutting too much at once. Whether you want a subtle face frame or a dramatic shag, practice makes perfect. So grab your tools, trust the process, and enjoy the satisfaction of giving yourself a fresh, beautiful haircut right at home.

Leave a Reply